Project summary
In this project, the goal was to exercise divergent and convergent thinking to design a new nutcracker which is creative and feasible. The result of the design were to be shown with a physical model, and a functioning model.
Using this brief, I designed a nutcracker that splits walnuts in half instead of crushing them and creating a mess.
Project Duration: October- November 2020
Key Skills used: Research, Concept sketching, Presentations, Wood working
Key Apps used: Photoshop, Illustrator, Indesign, Solidworks, Keyshot
the problem
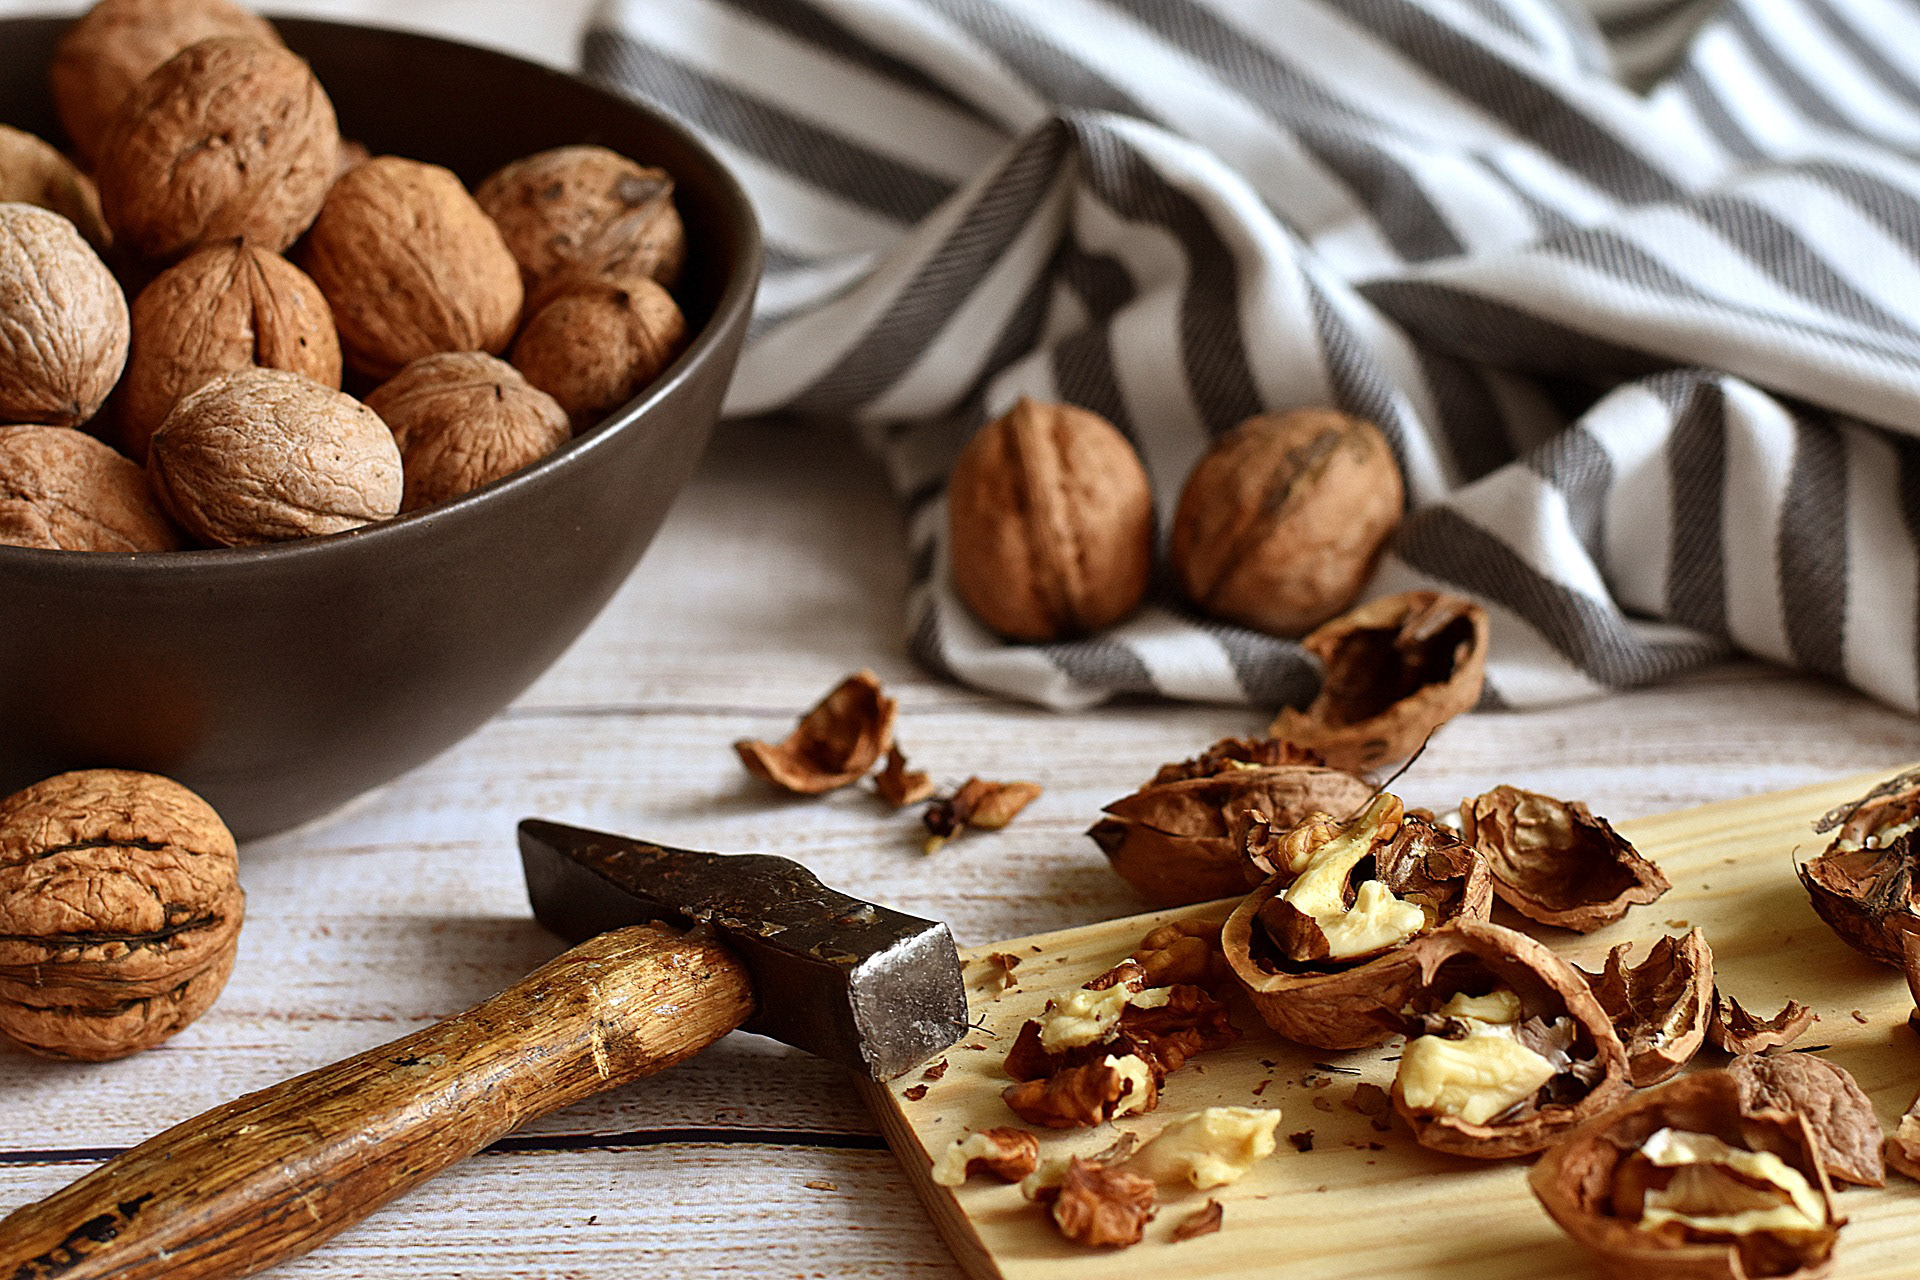
Based on the brief, the problem I decided to tackle was the issue of common nutcrackers crushing nuts and leaving a large mess behind.
idea generation
First, initial sketches were drawn to note and visualize my ideas. These ideas were narrowed down and three ideas were picked to develop through sketching and light testing.
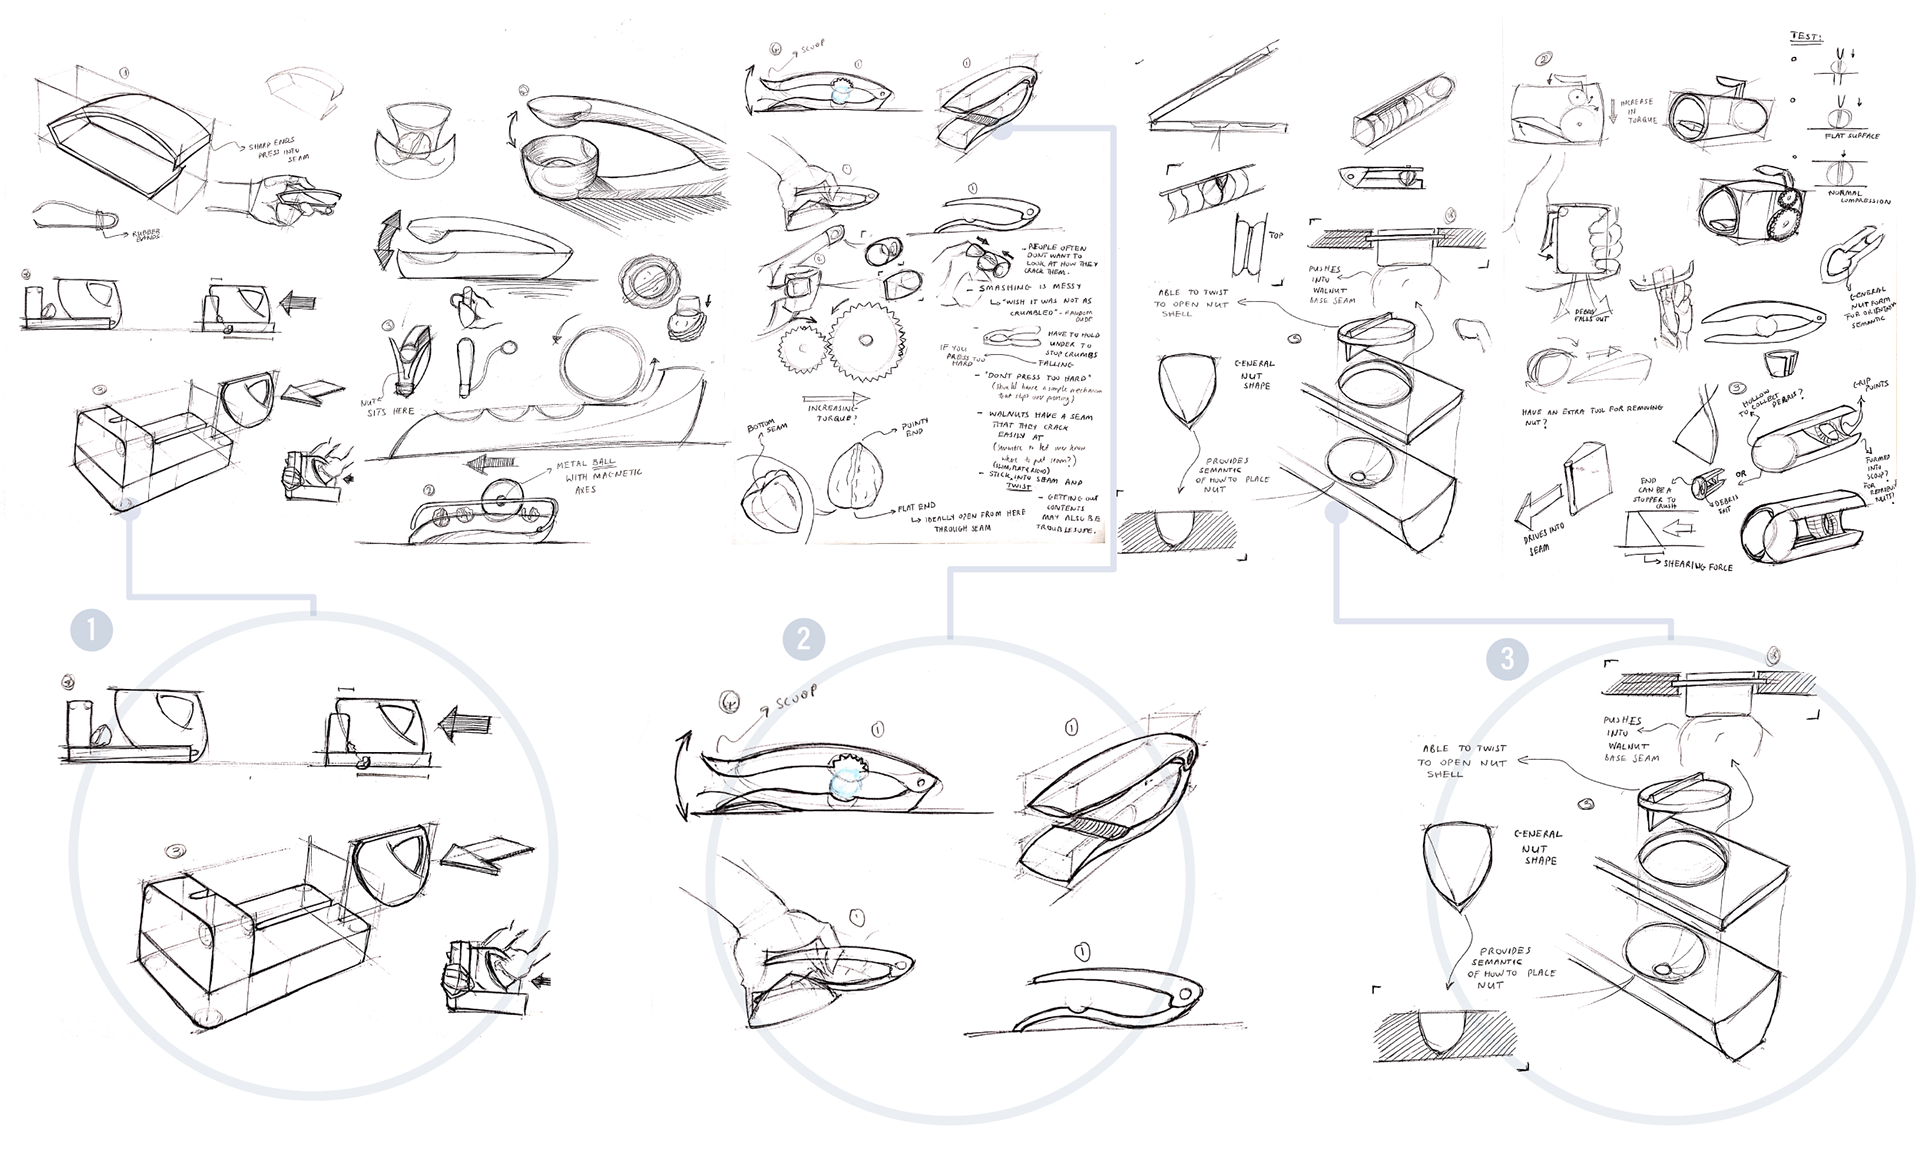
The initial ideas were narrowed down to ideas 1,2 and 3
idea selection
The three concepts chosen were drawn out in more detail for presentation, then idea 1 was chosen to take forward to be developed.
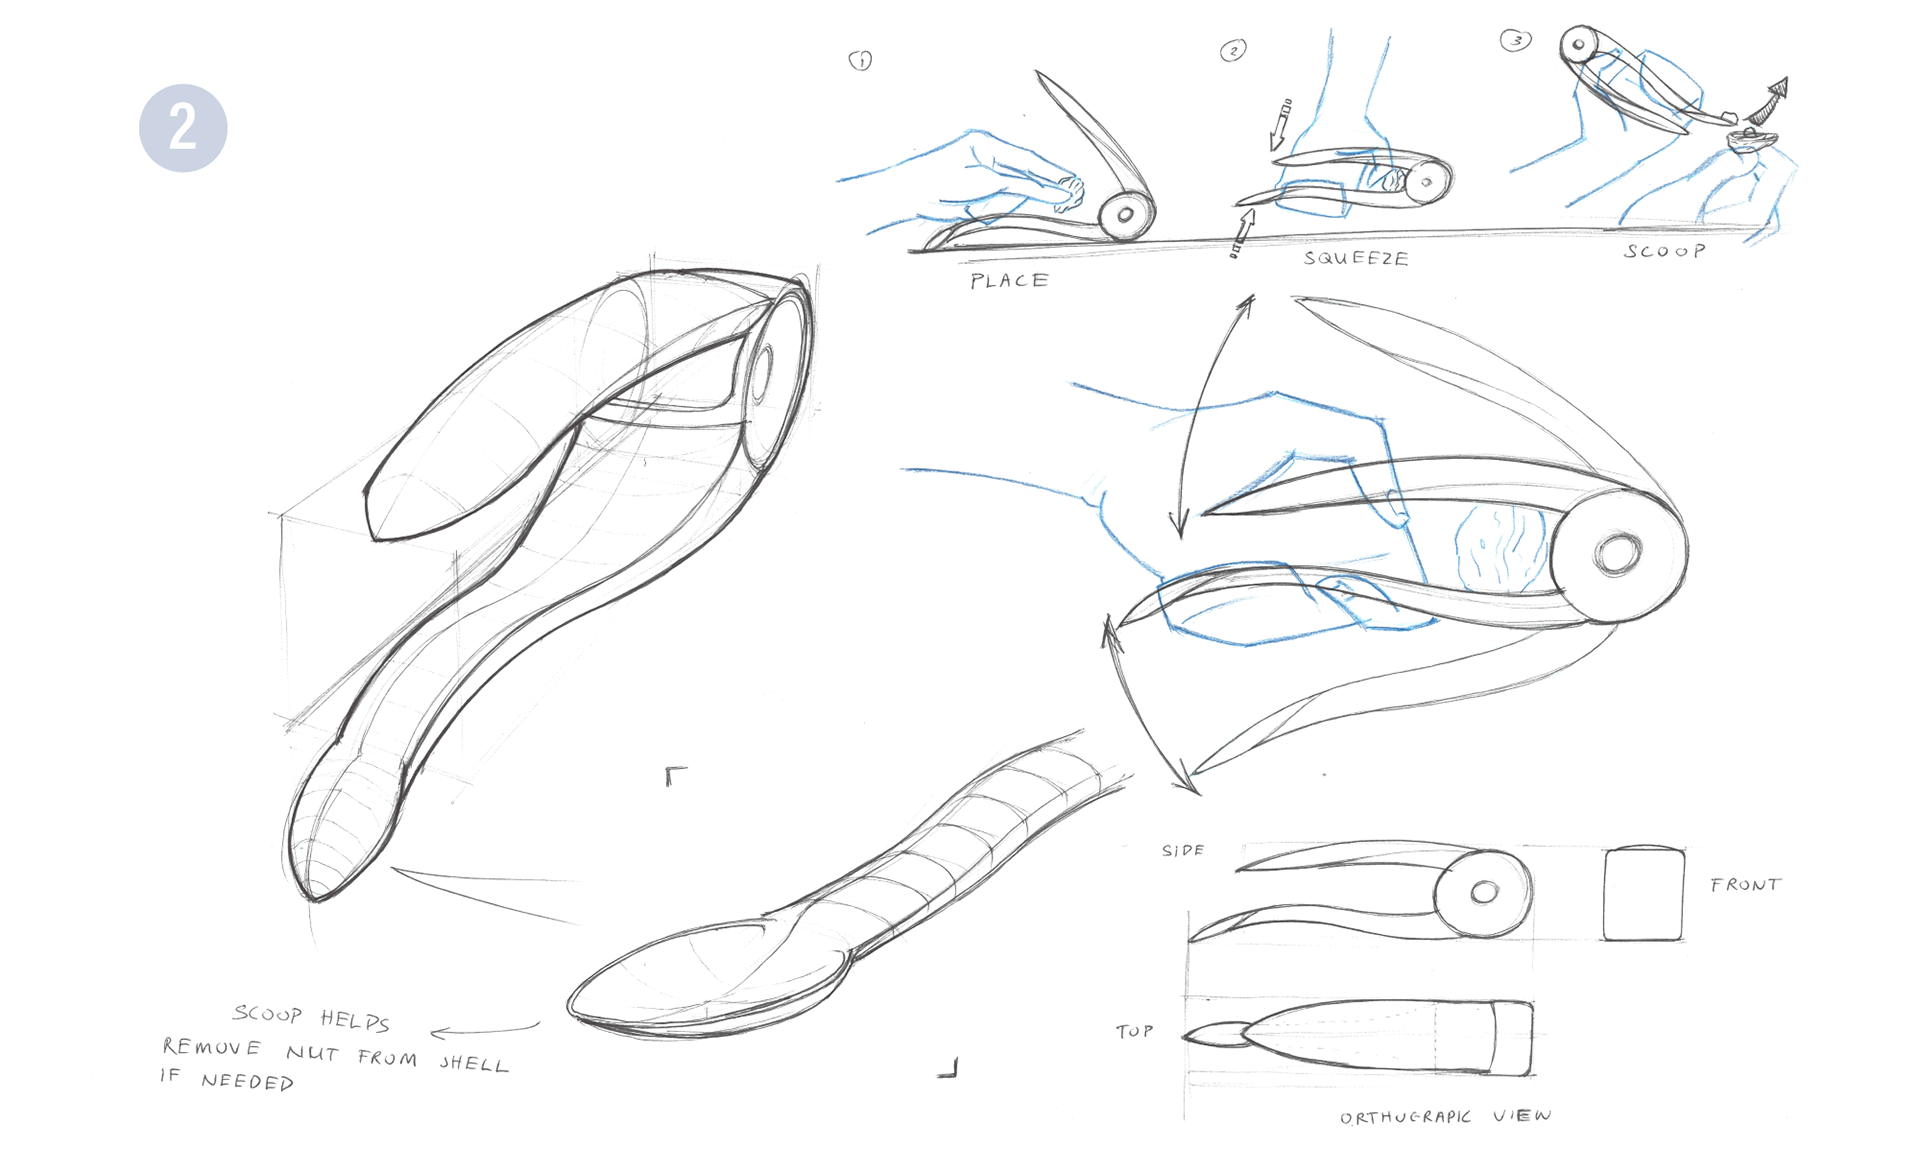
Involves normal crushing methods, but adds a scoop to remove contents more easily
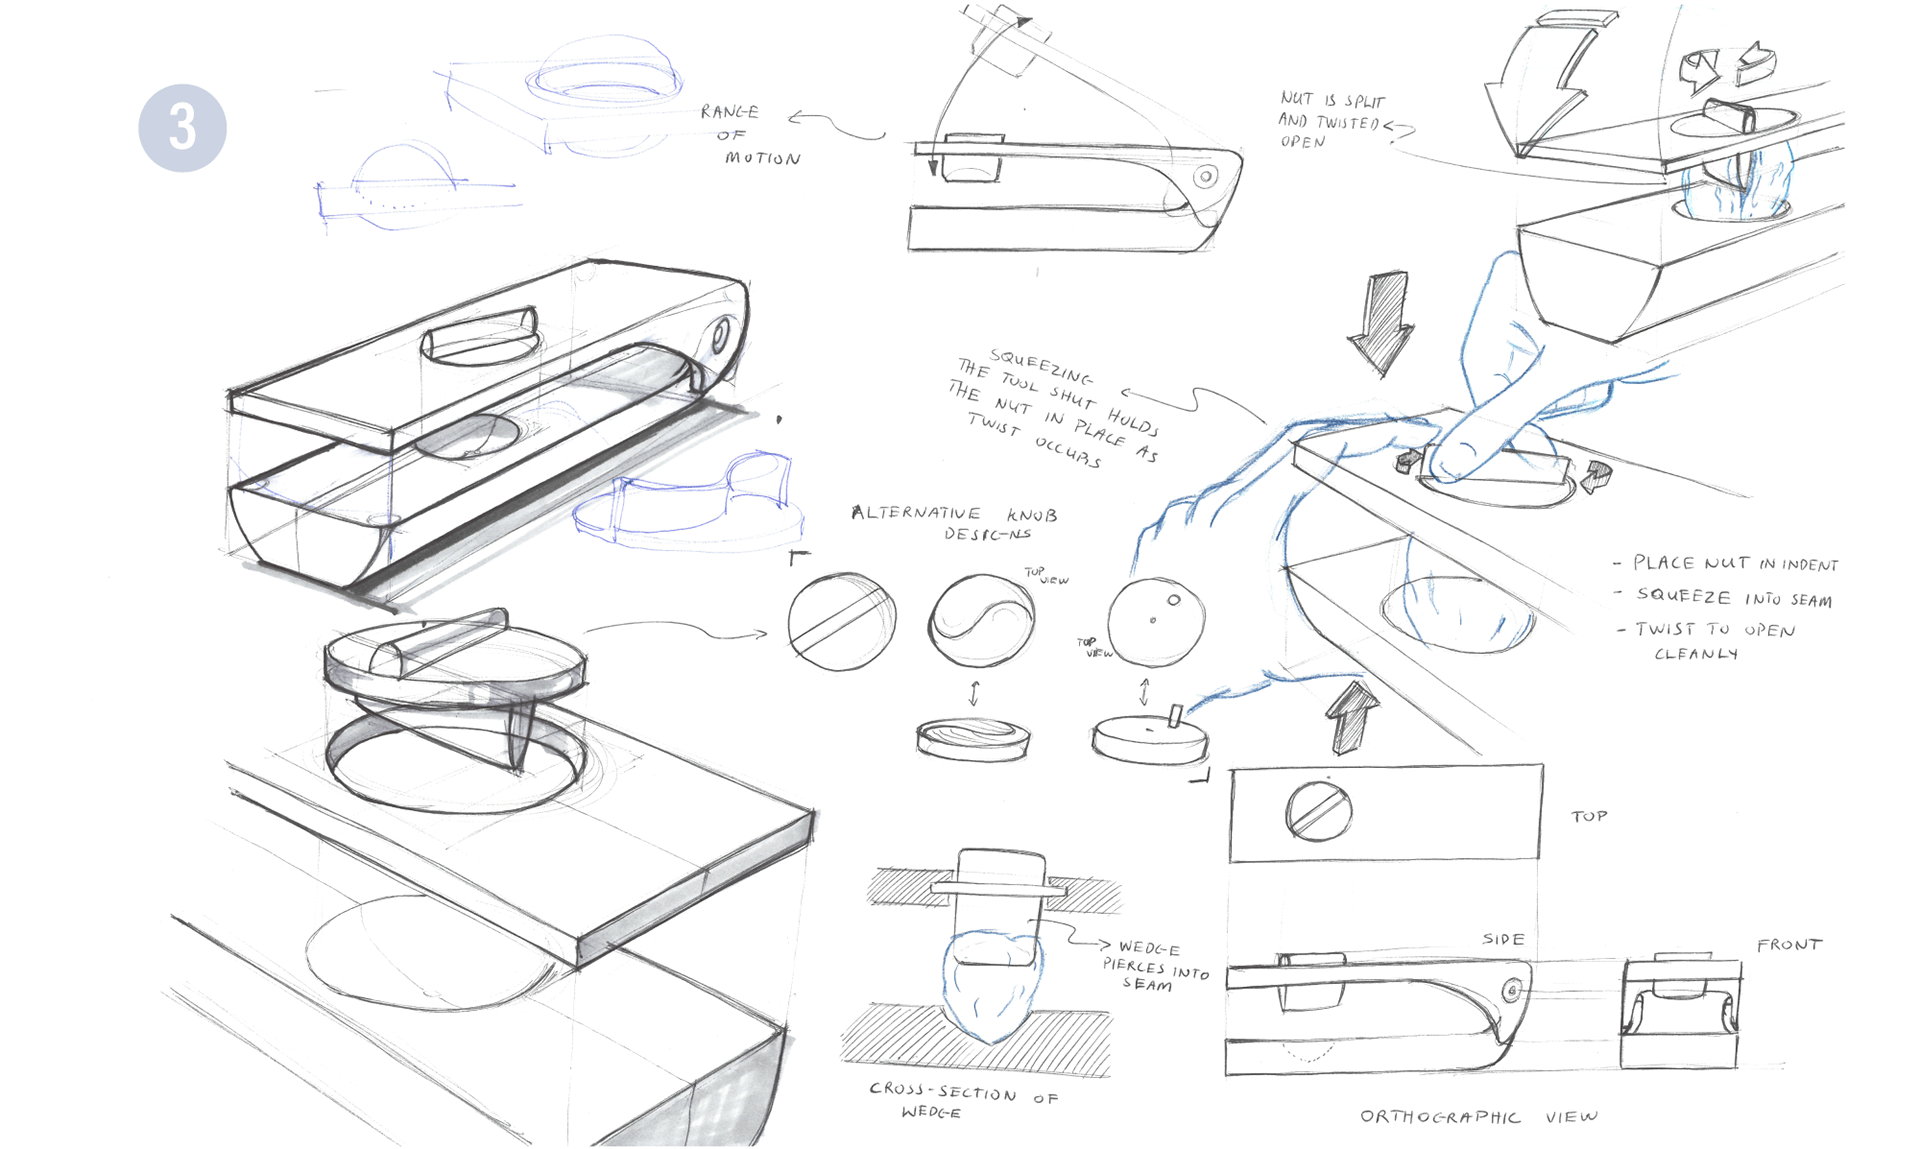
Uses a twisting knob to pry open the nut, minimizing the mess
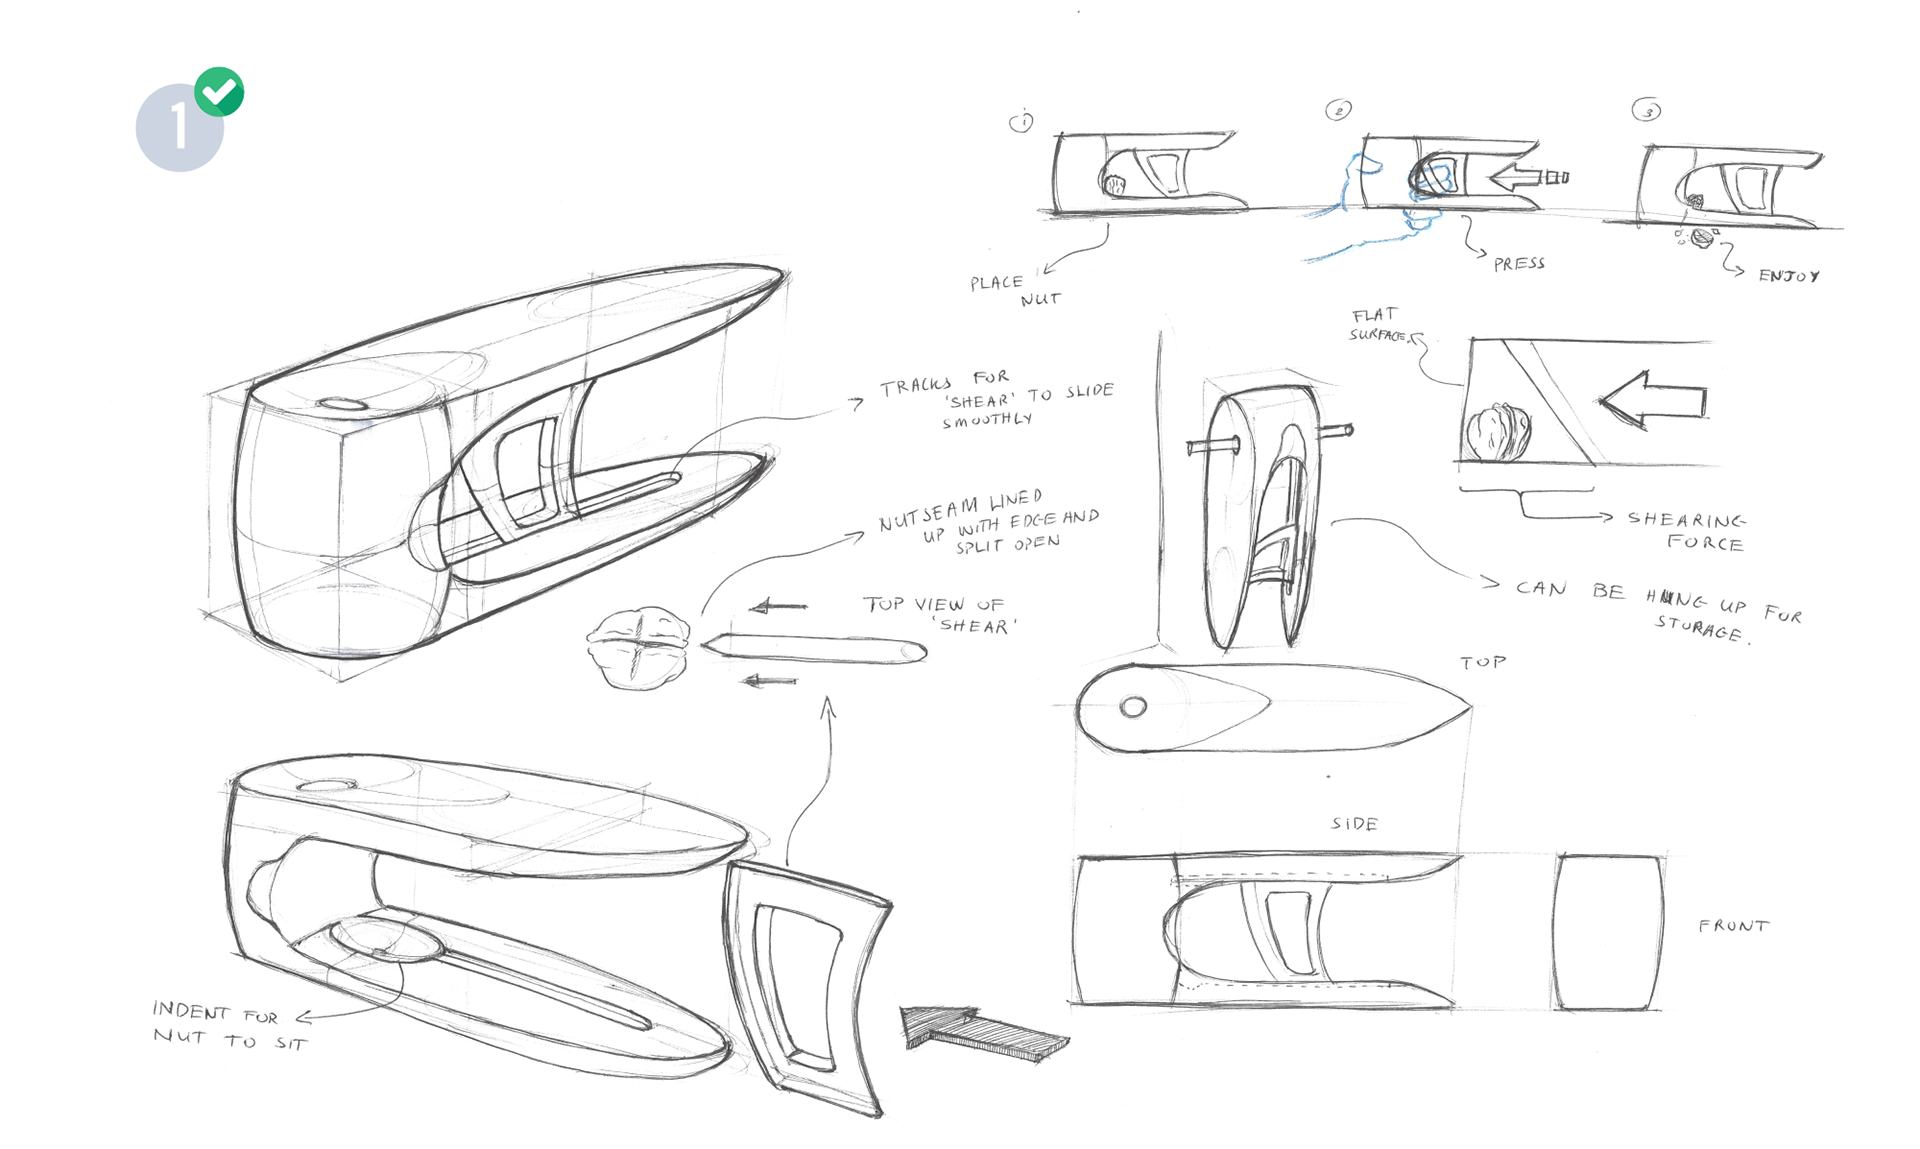
Idea #1 uses the concept of splitting the nut down the seam, to reduce the mess created.
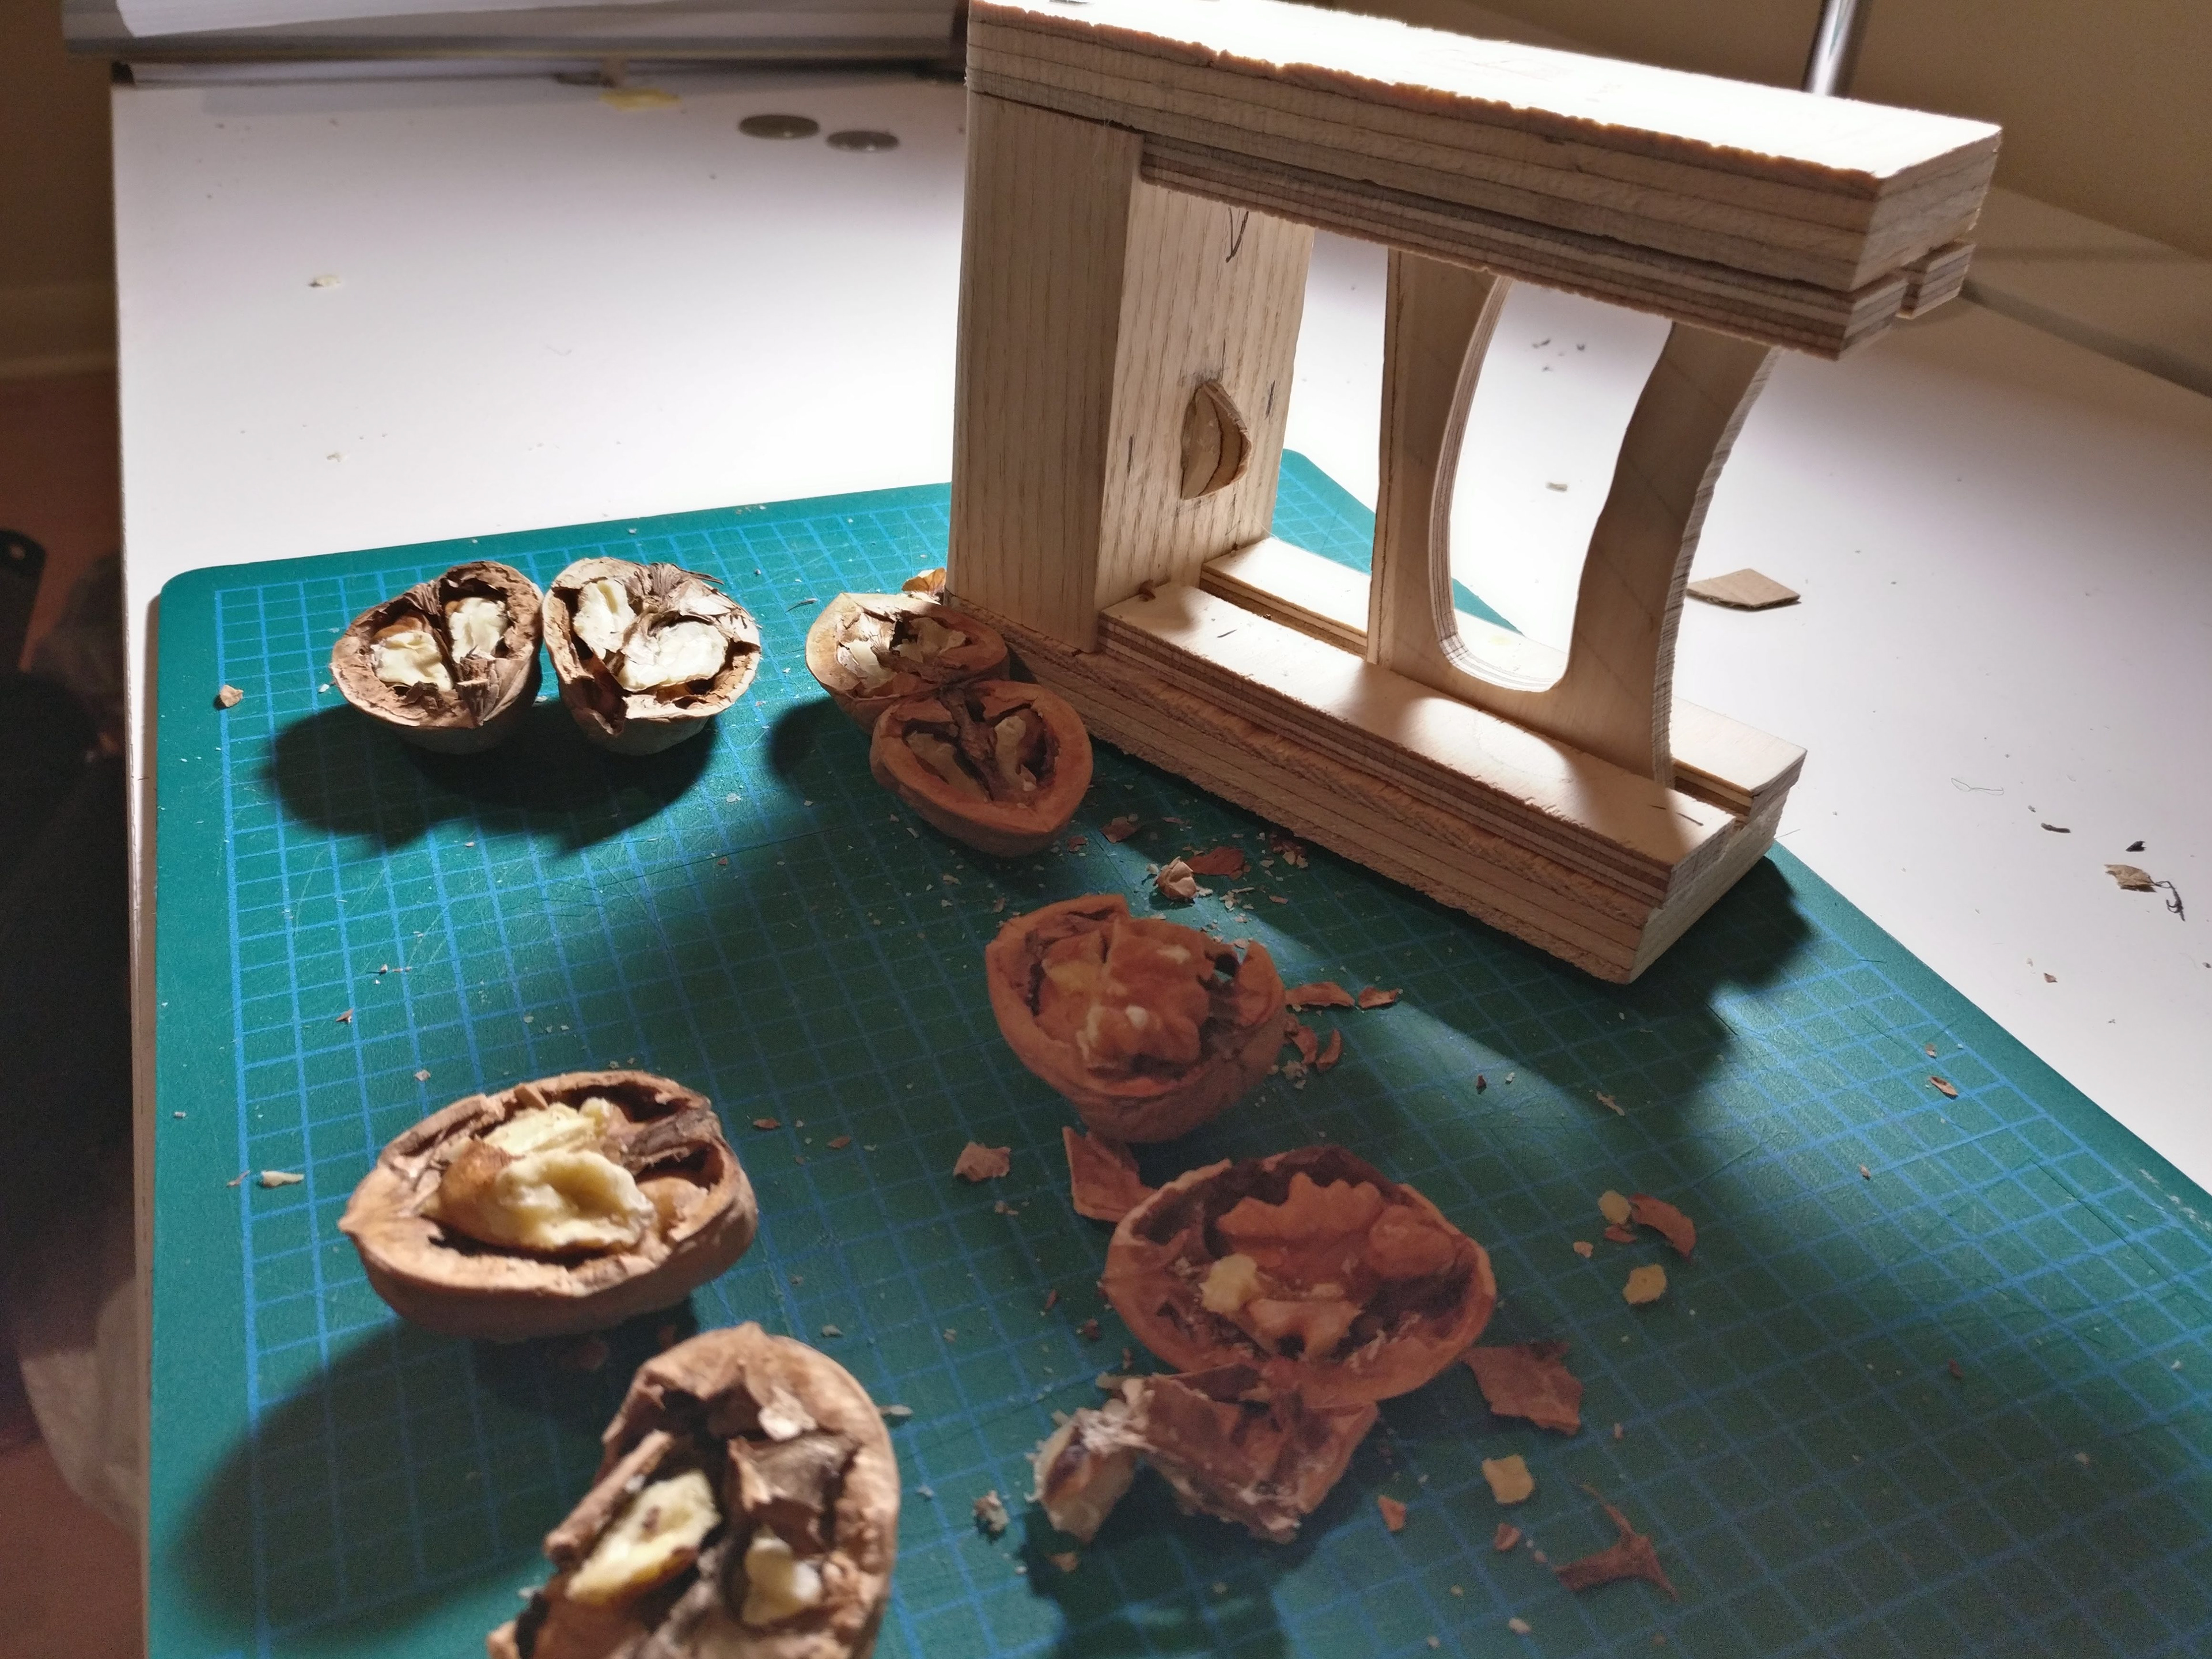
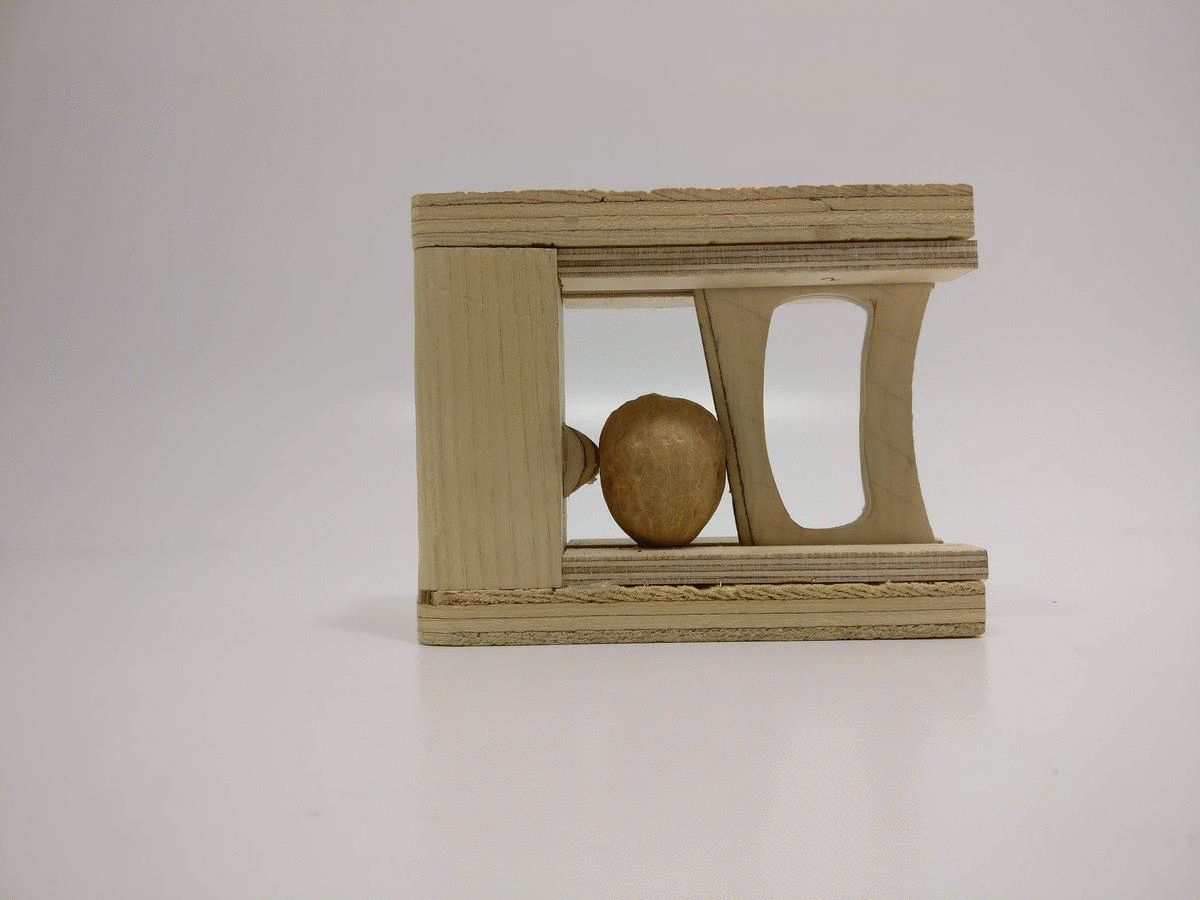
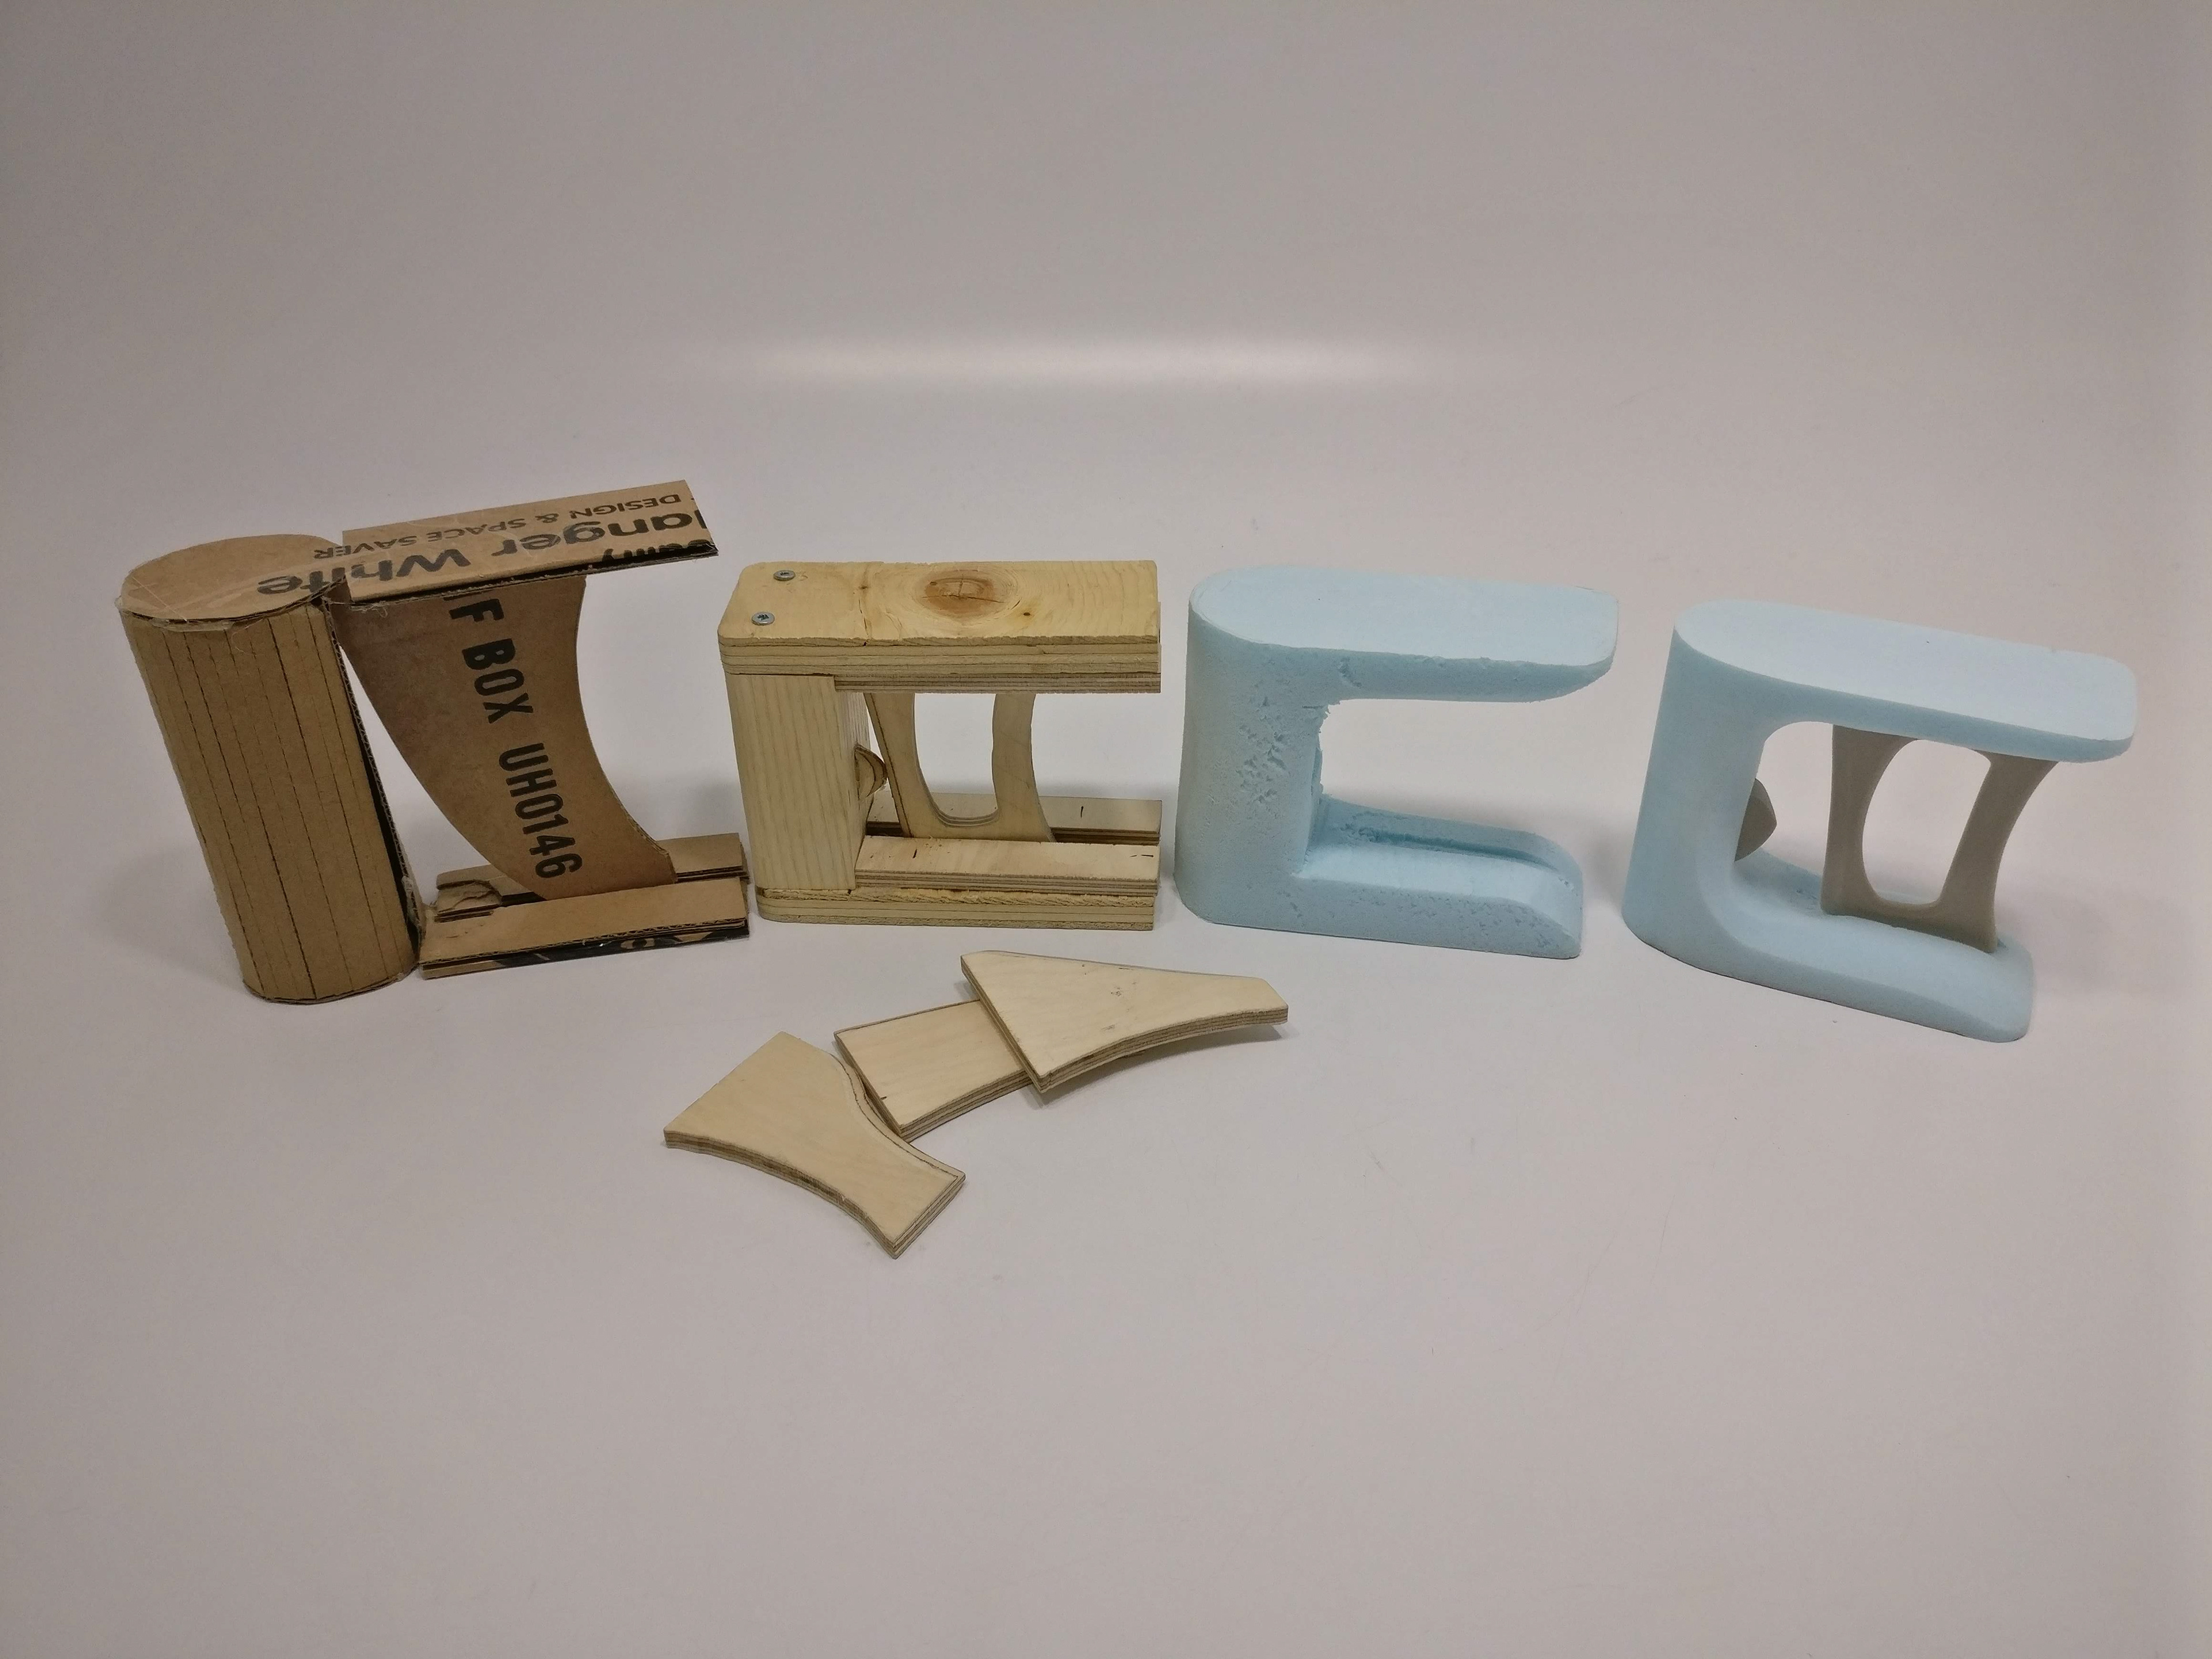
Works-like Model testing
After picking a final concept, it was tested through wooden models till I reached a version that worked within the given time period.
These iterations also affected the final design concept slightly.
Summary of this stage:
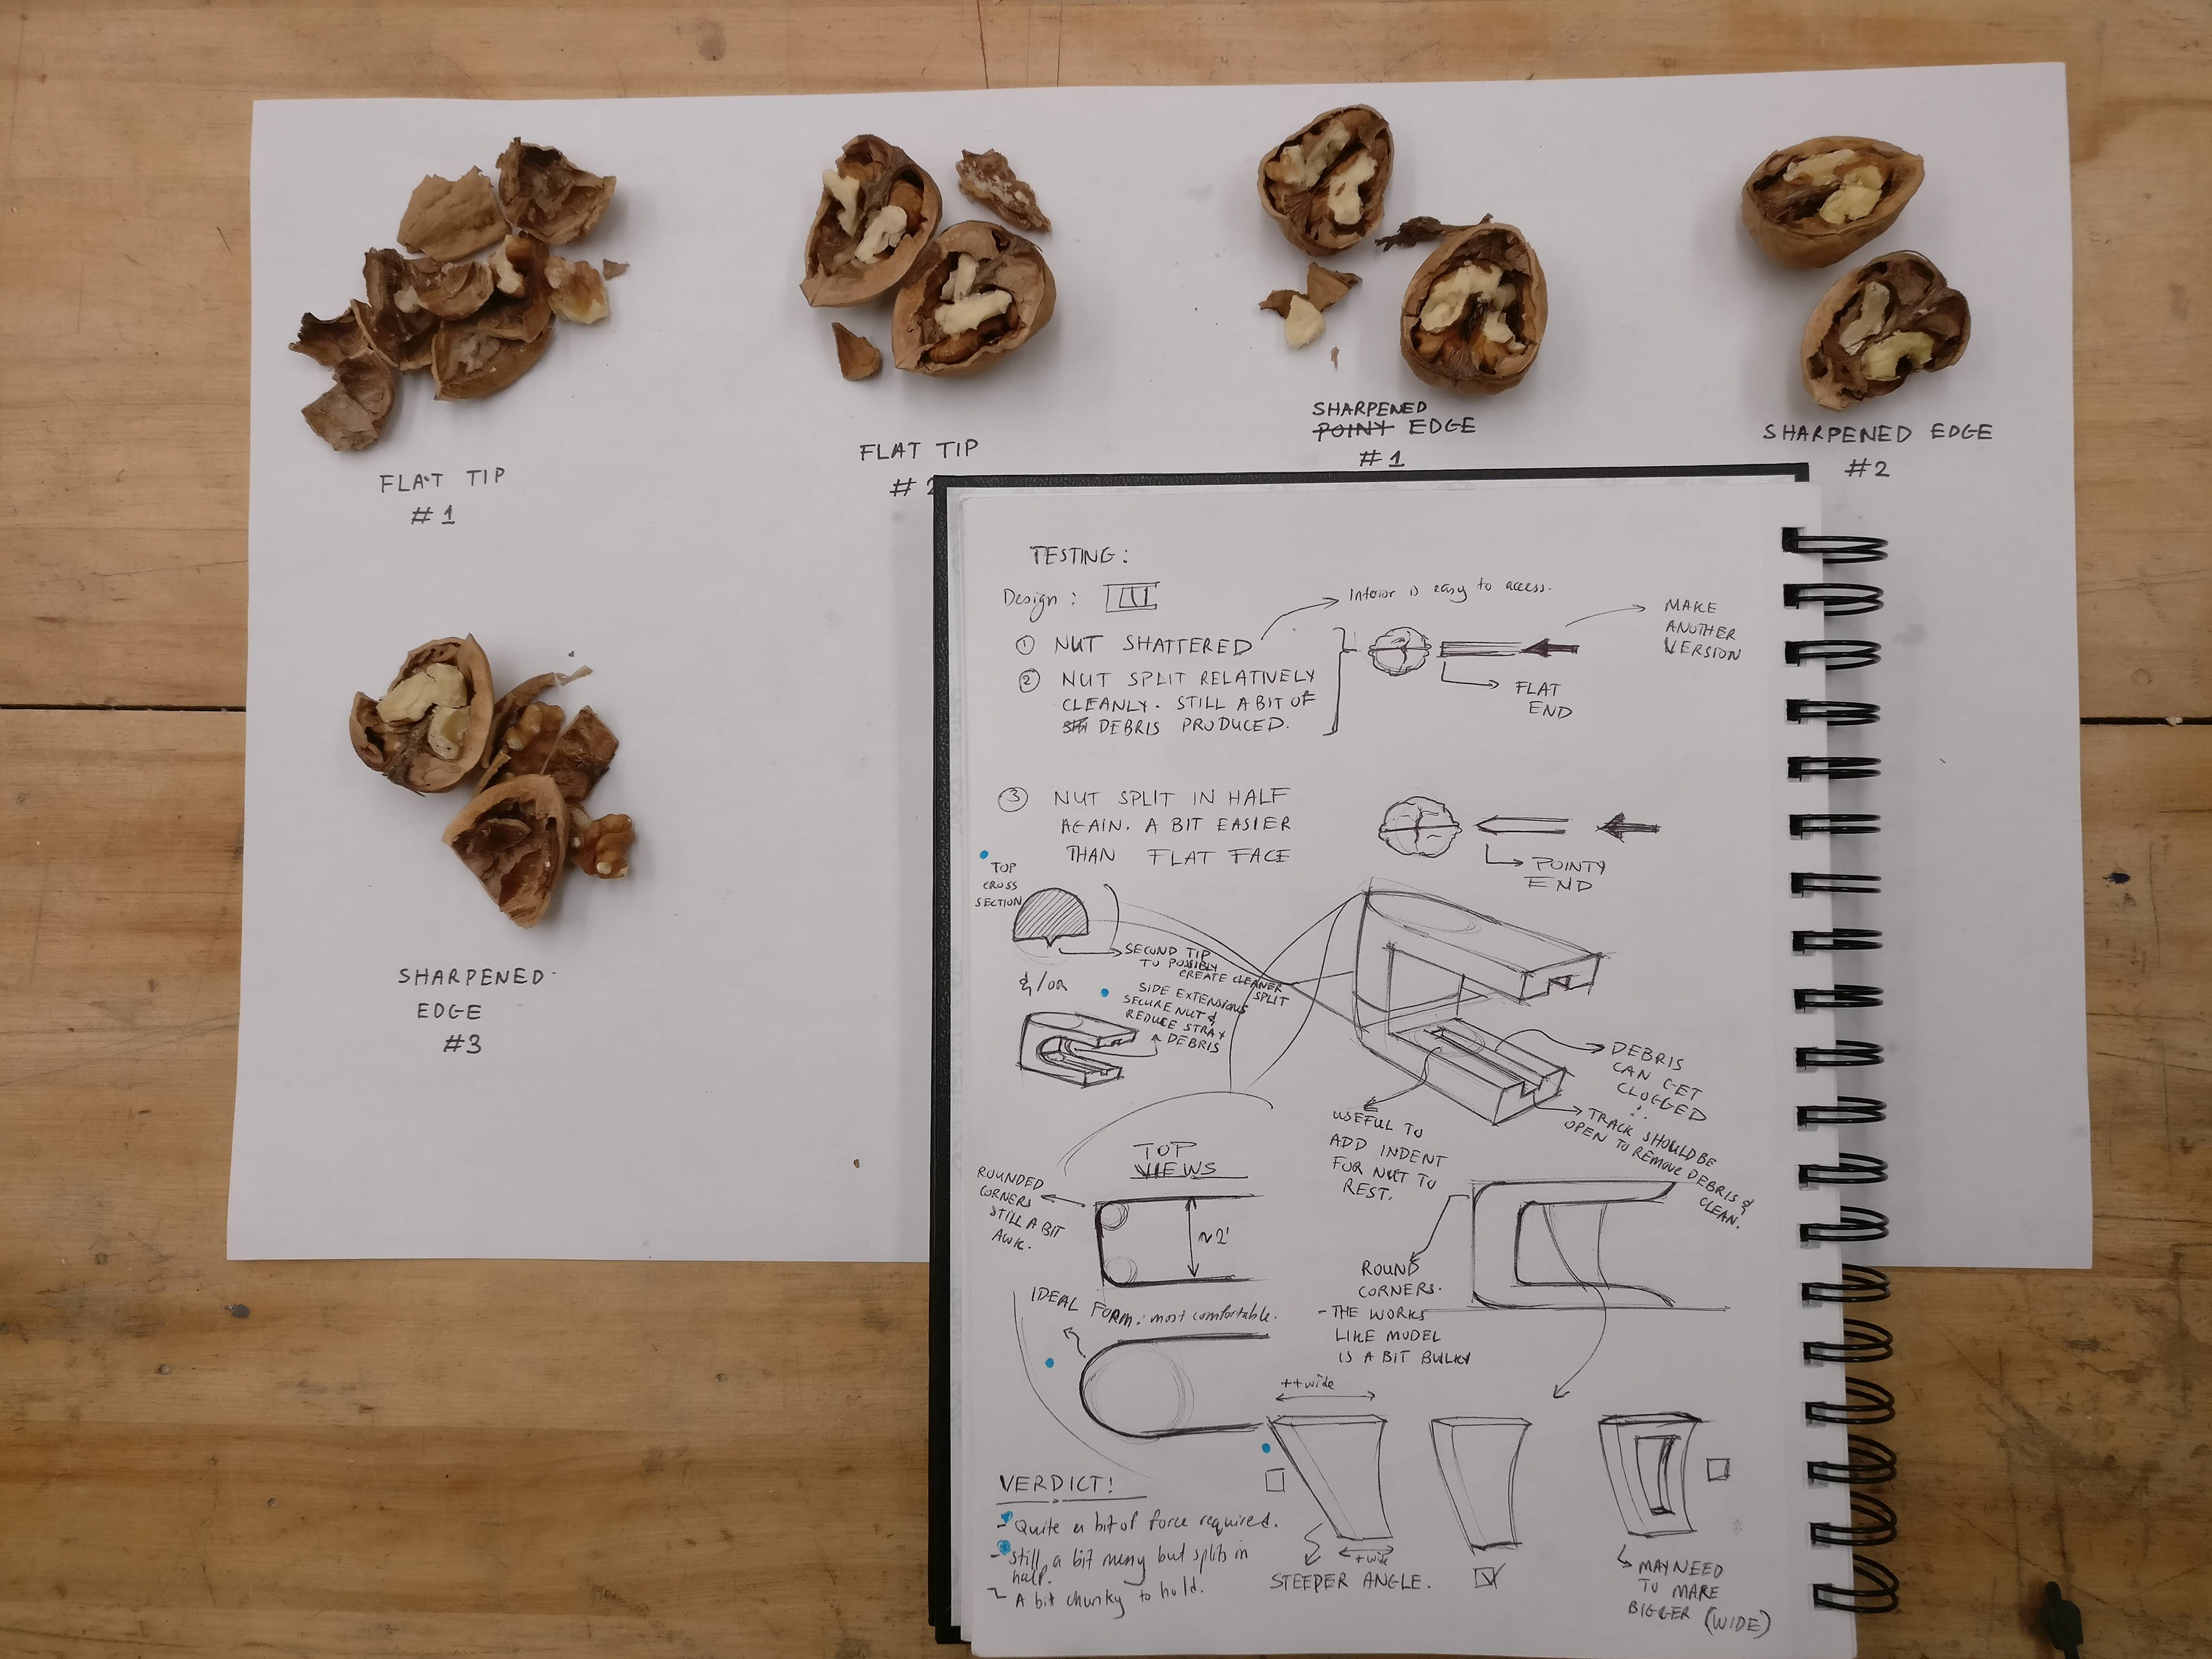
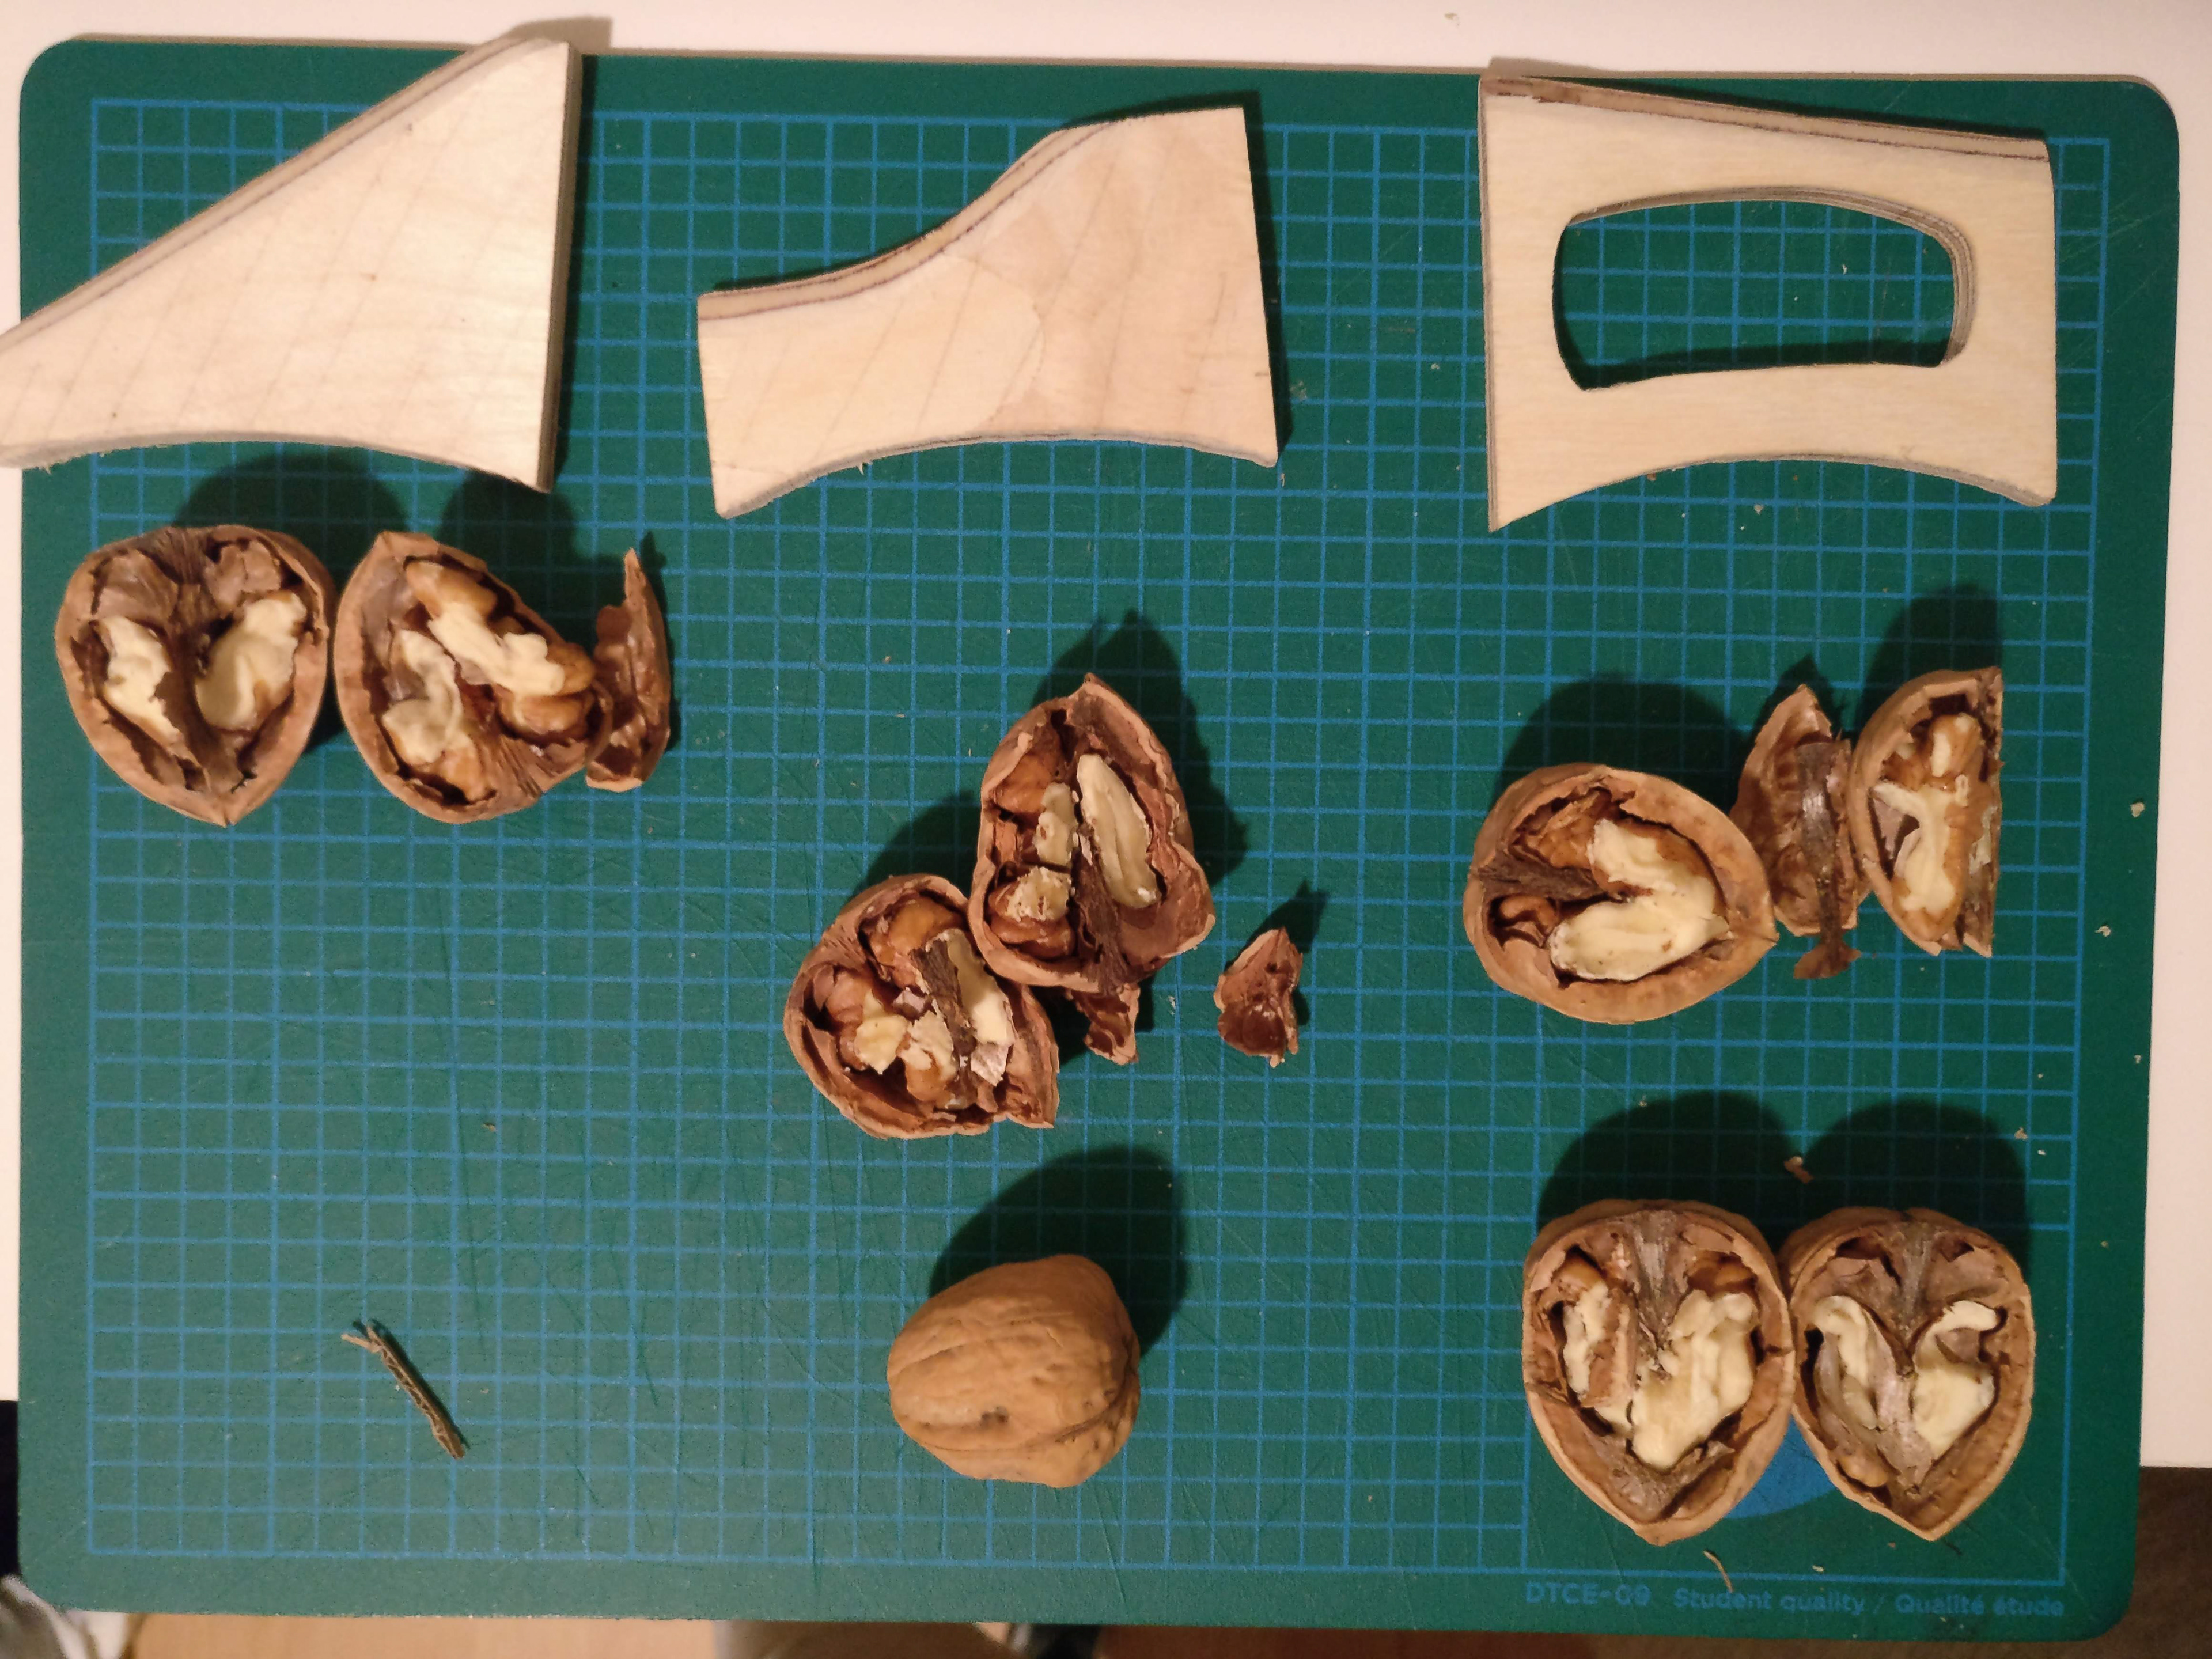
-Tested different blade shapes and found the most comfortable blade shape that fits the most hand sizes.
-Tested a few blade shapes and found the most effective for splitting walnuts. A slight angle worked best.
-A high pressure point from both sides worked best when the force is applied to the seam of the walnut.
-The shape of the works like model was blocky and not very ergonomic.
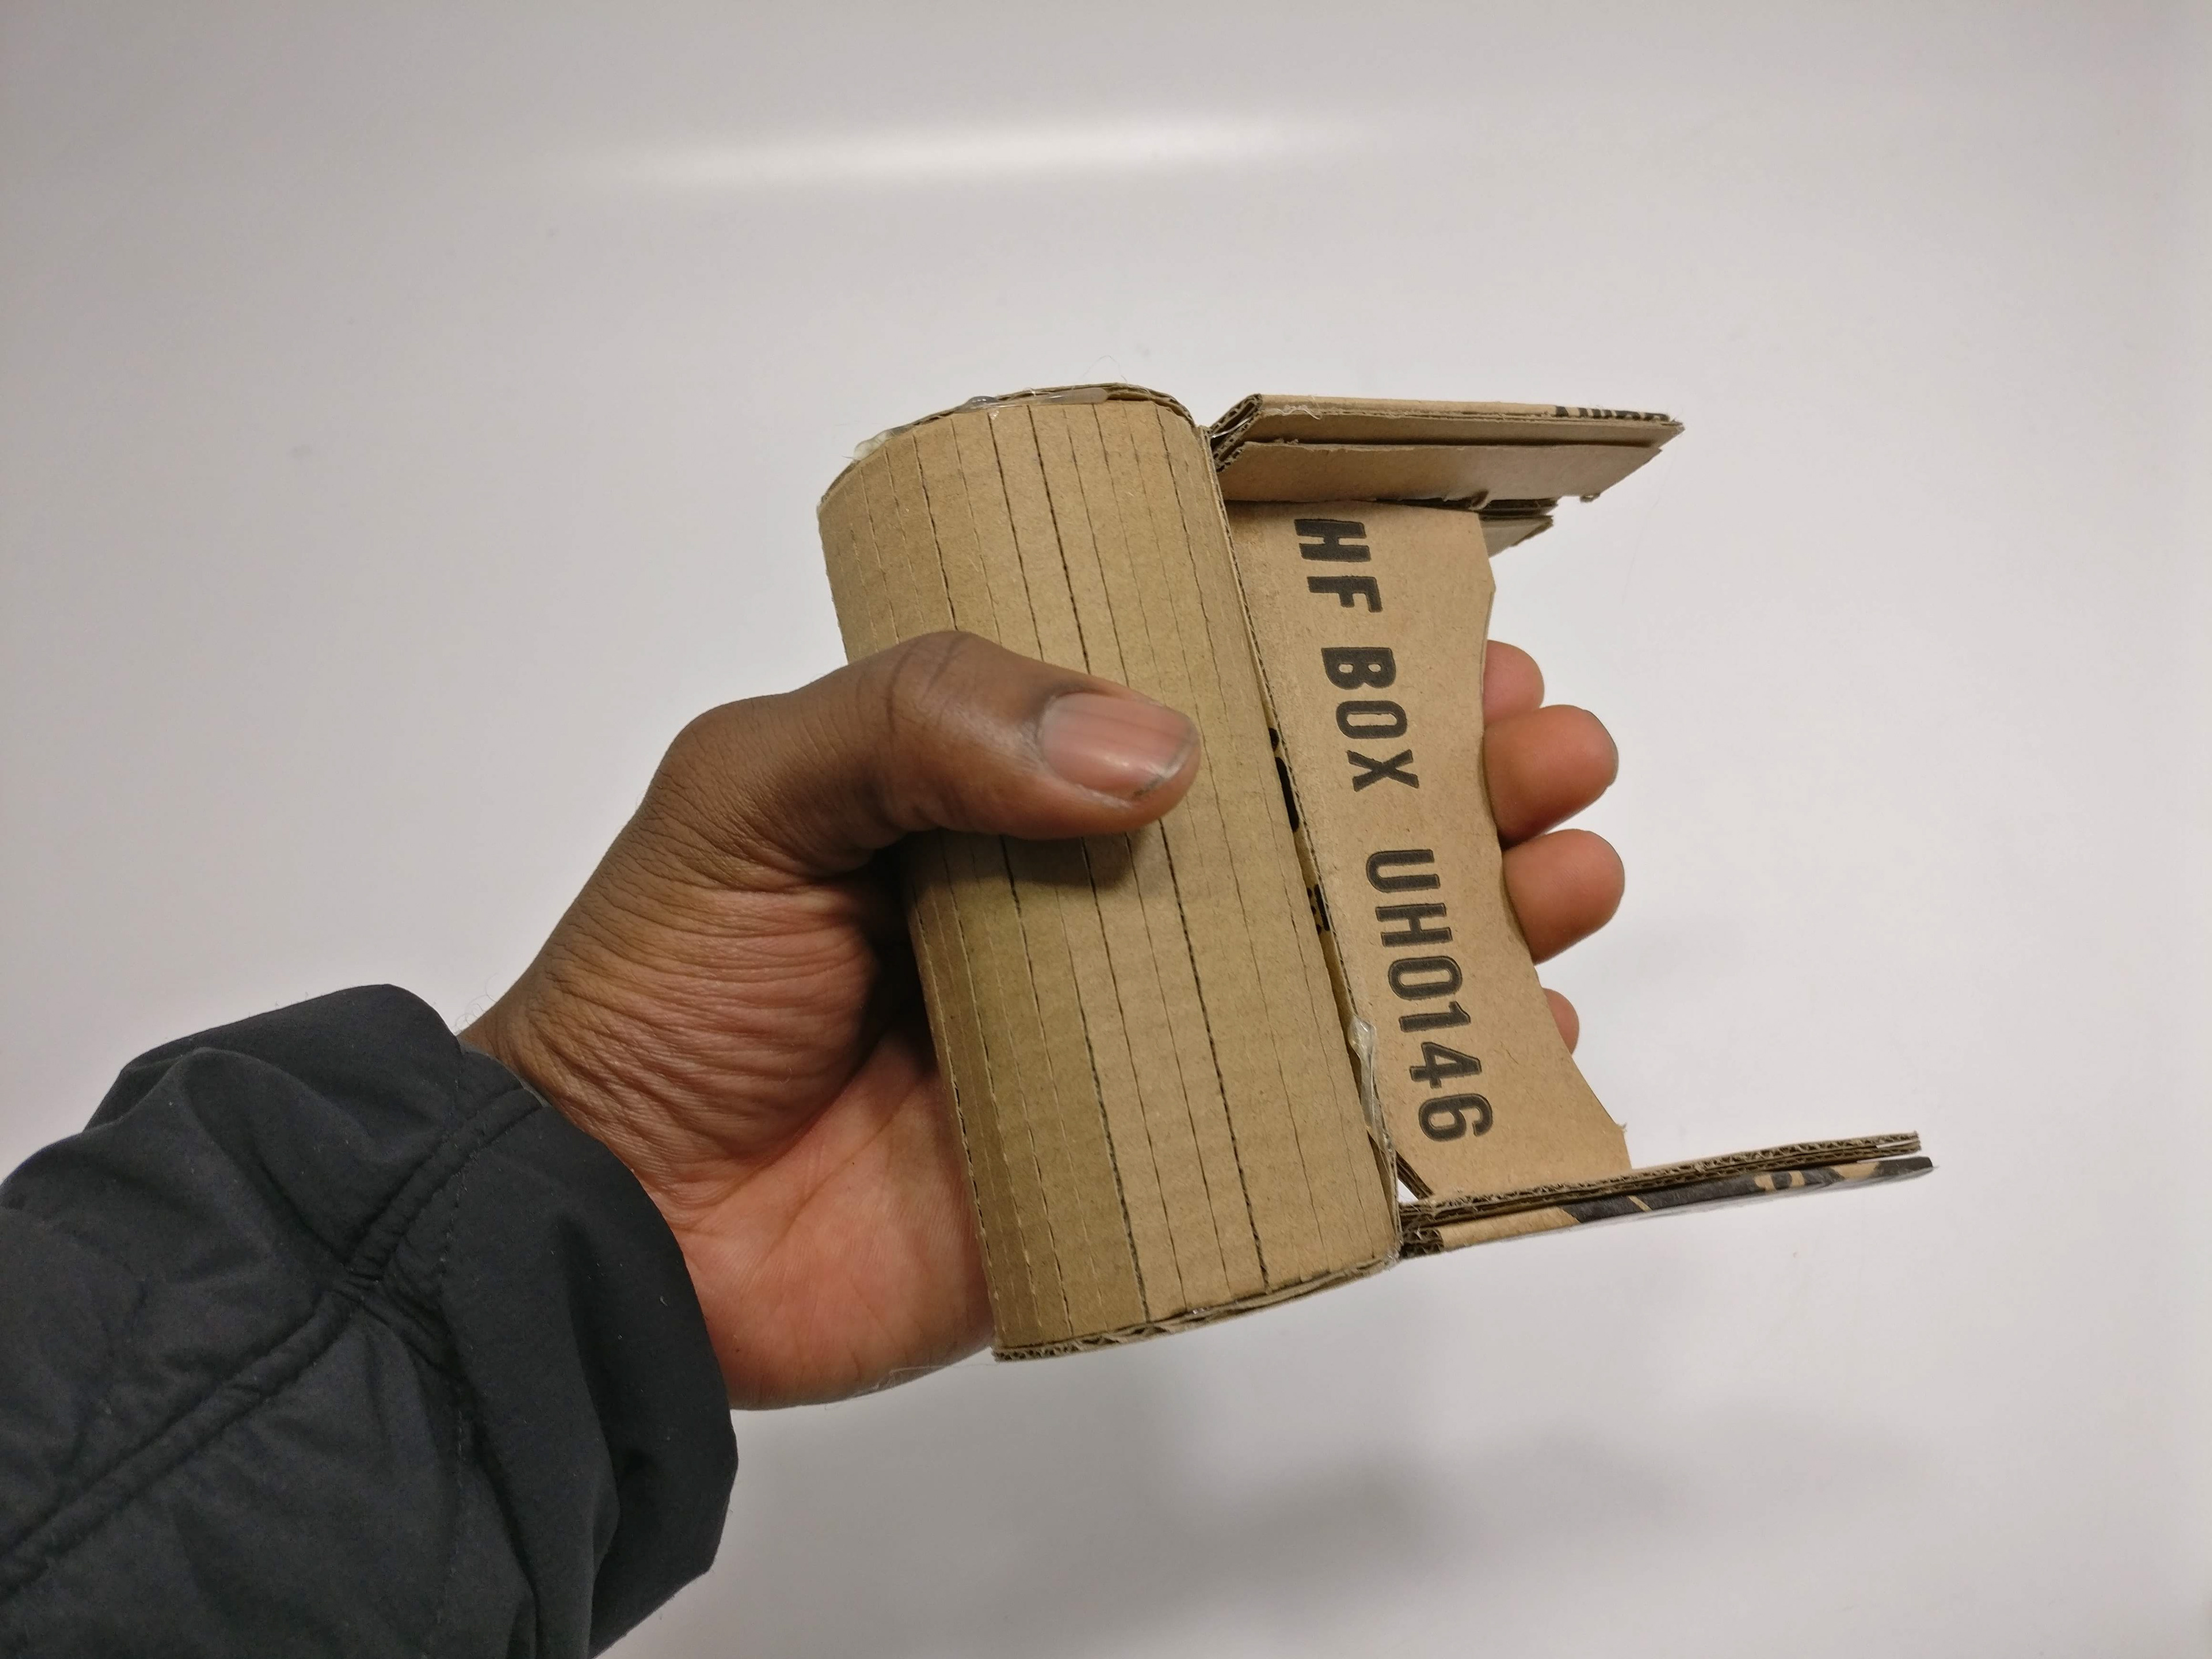
Basic mock-up investigating size

Flat blade crushed nuts...
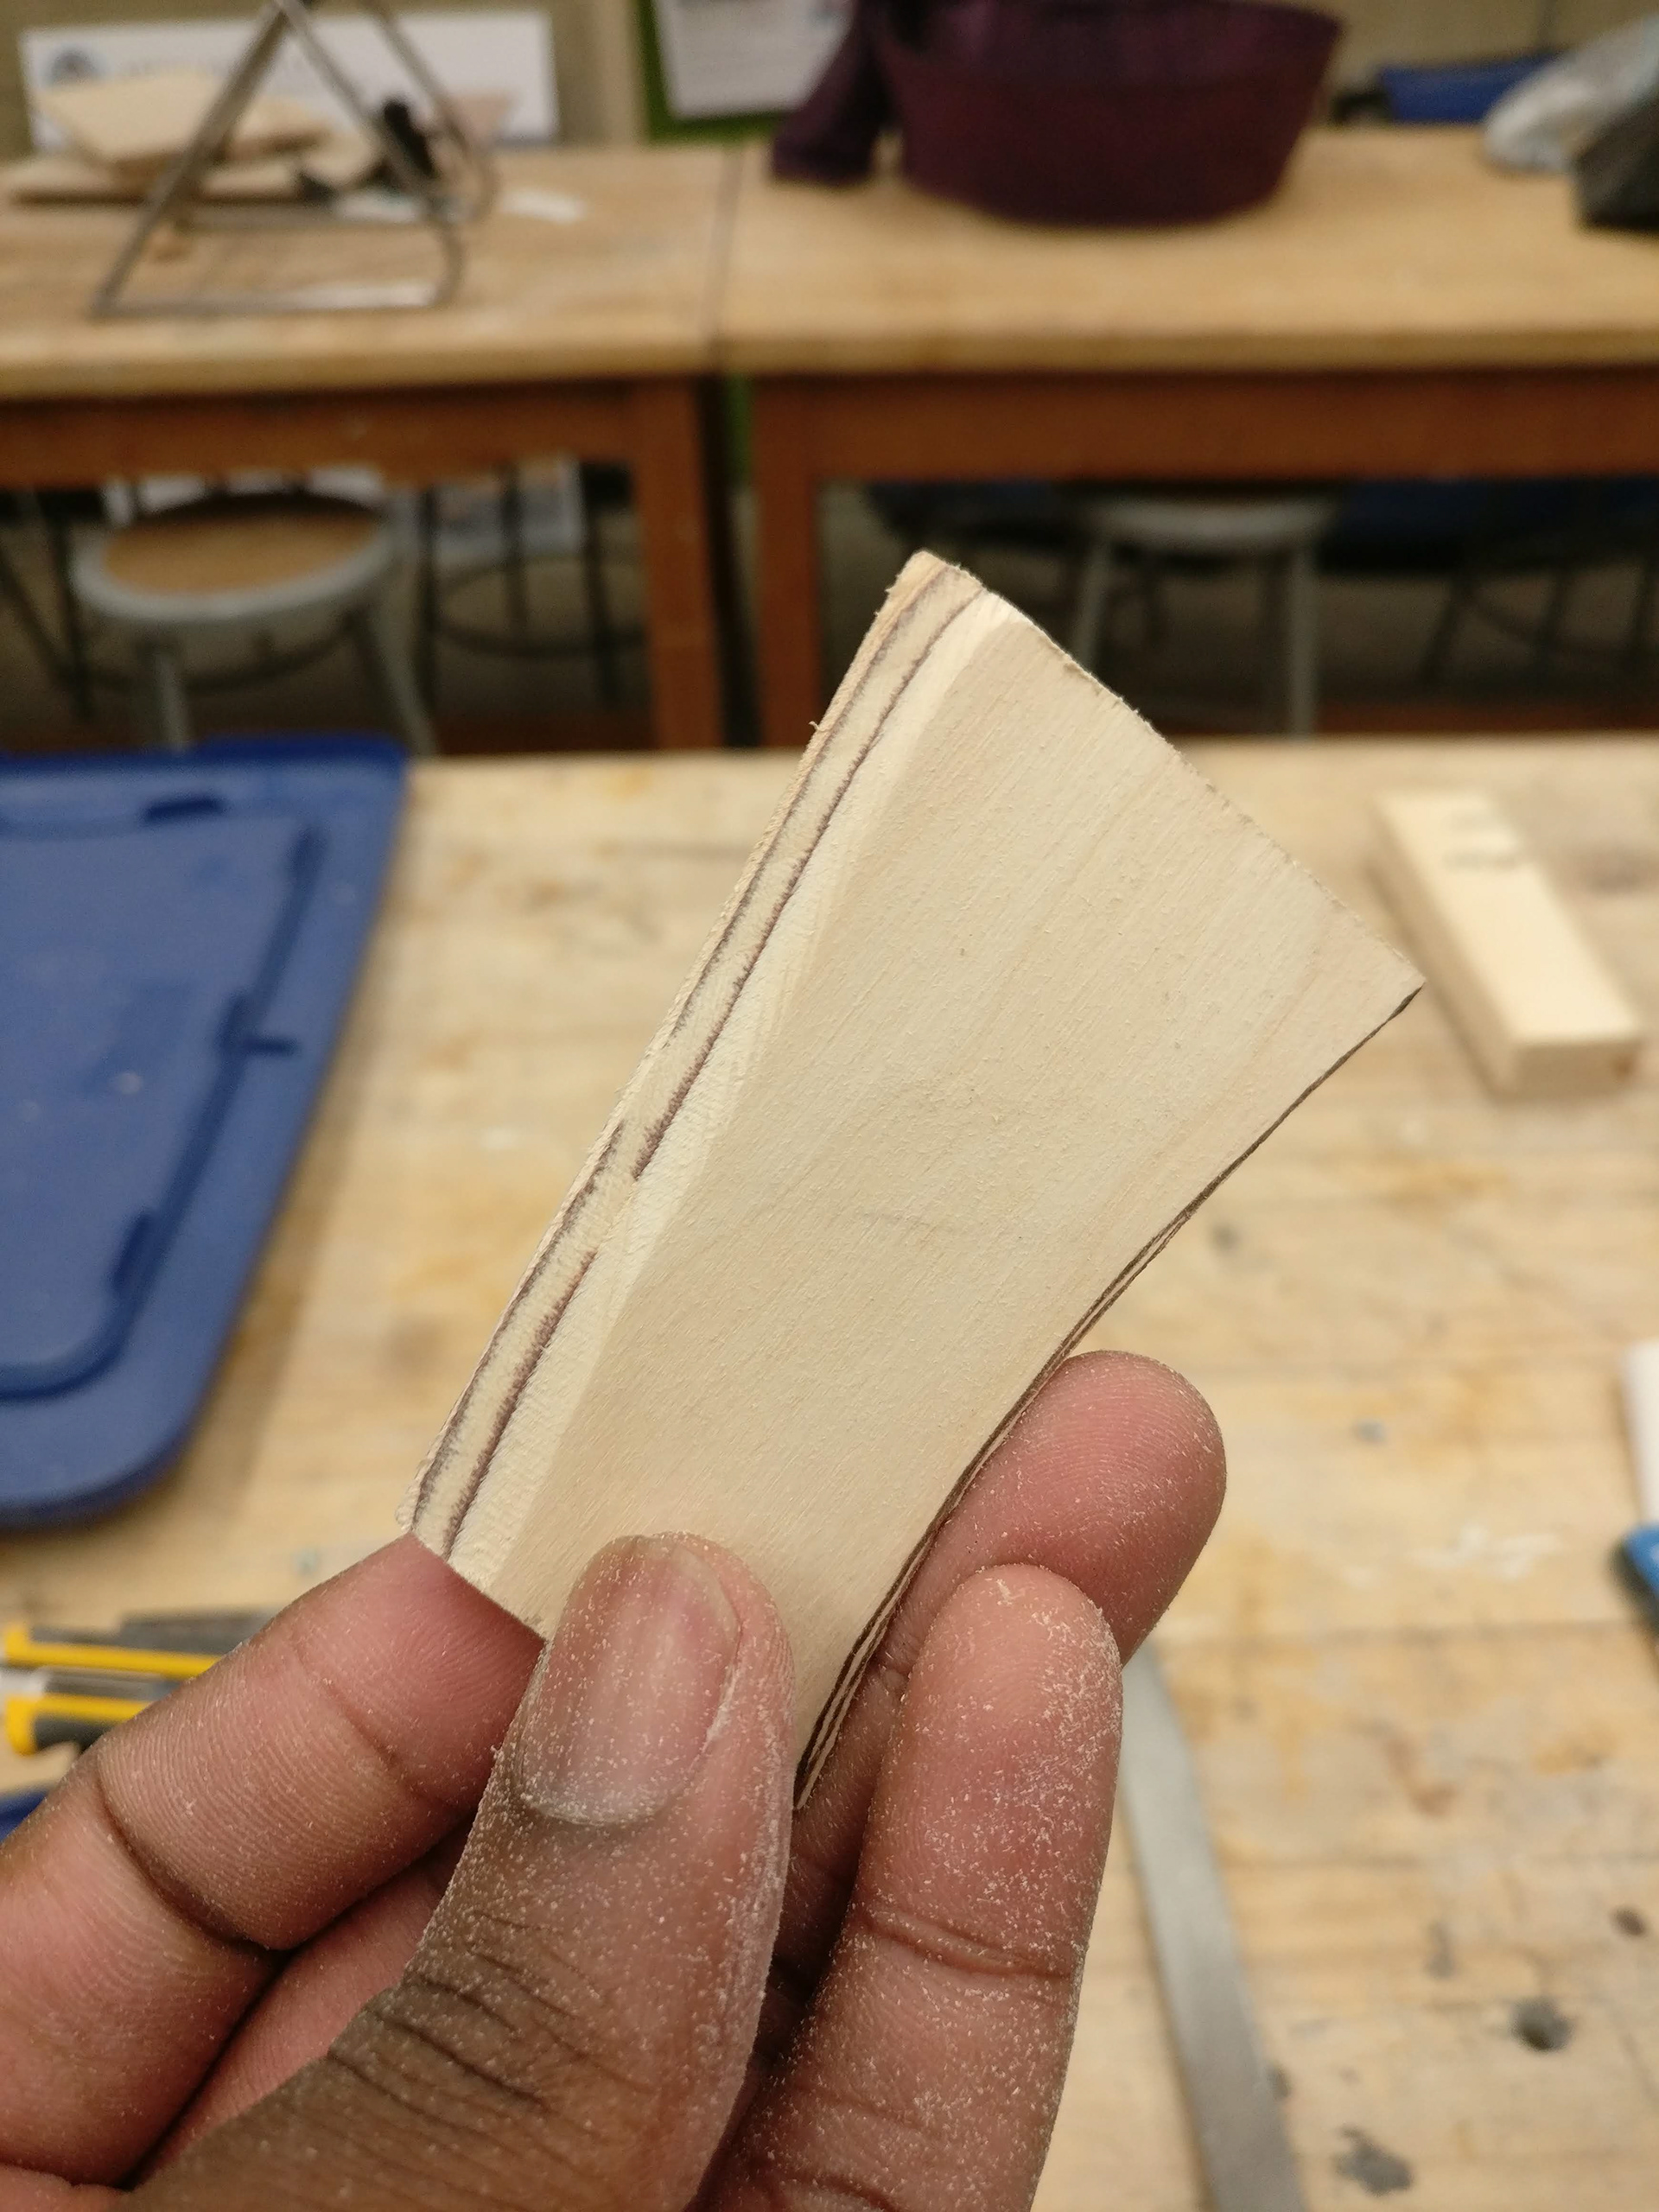
So I sharpened it to make splitting easier
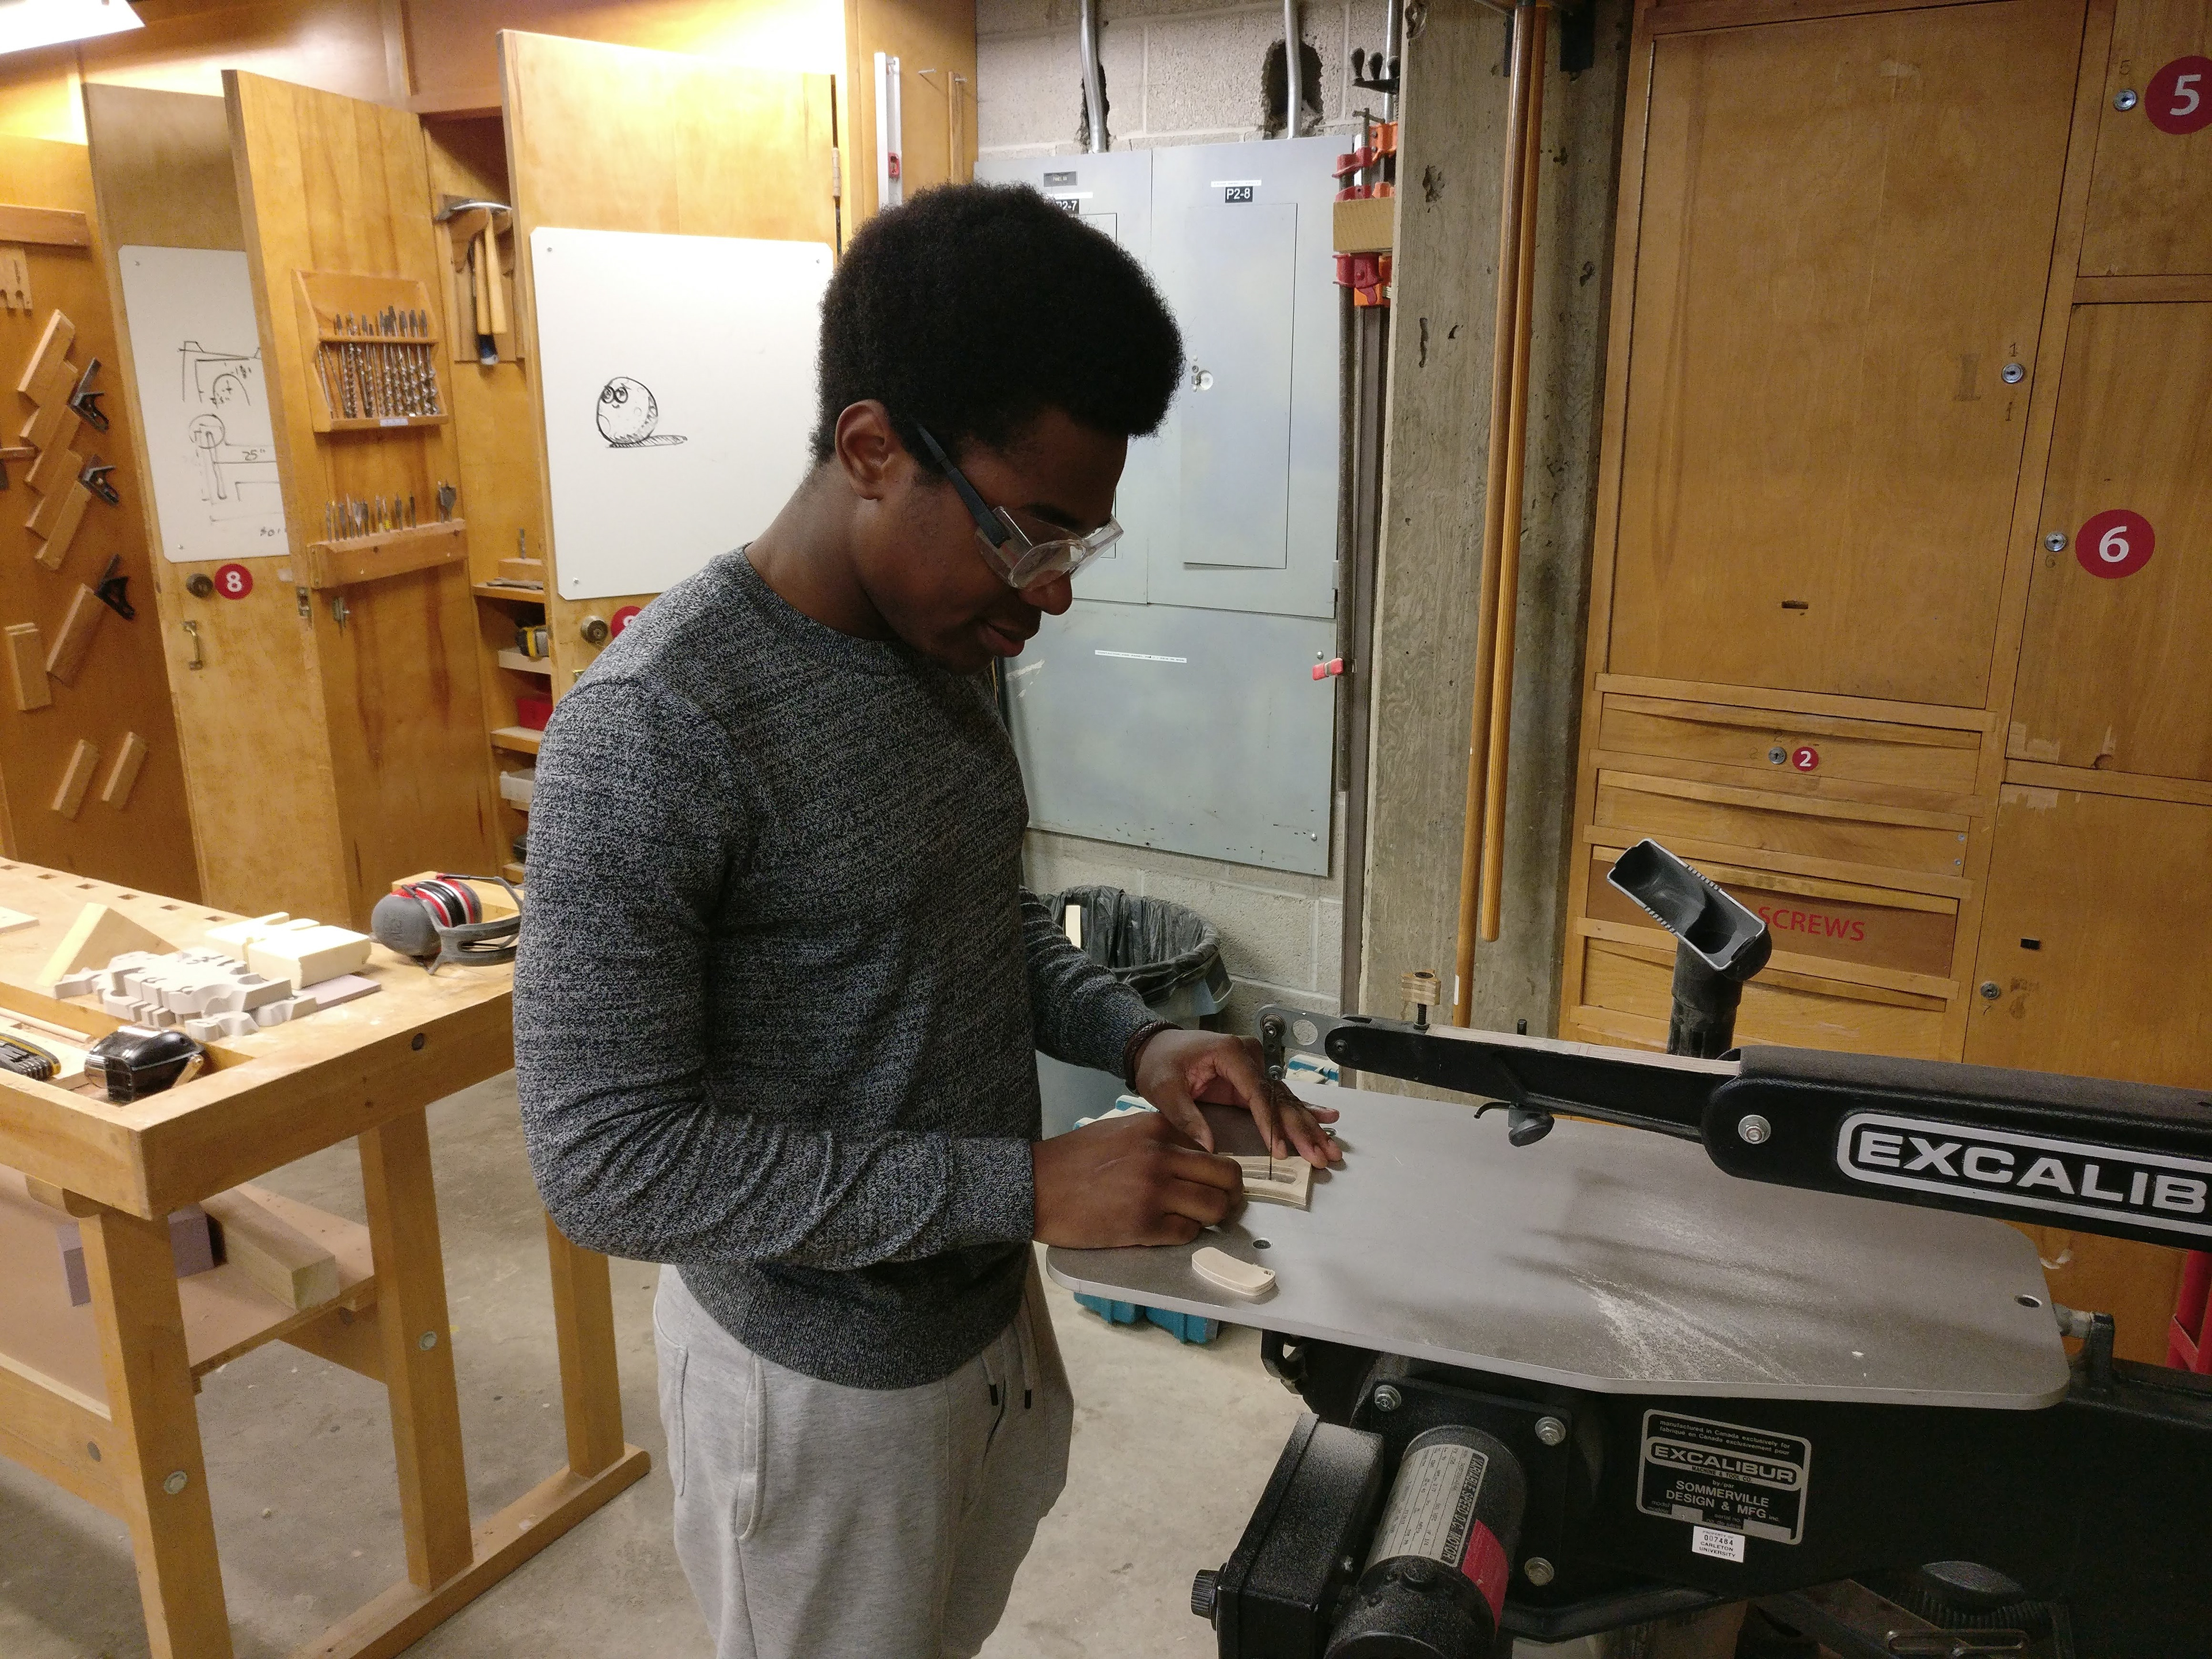
Making a blade that is more comfortable to hold
Testing different blade shapes
Found that adding a point on the back makes it much easier

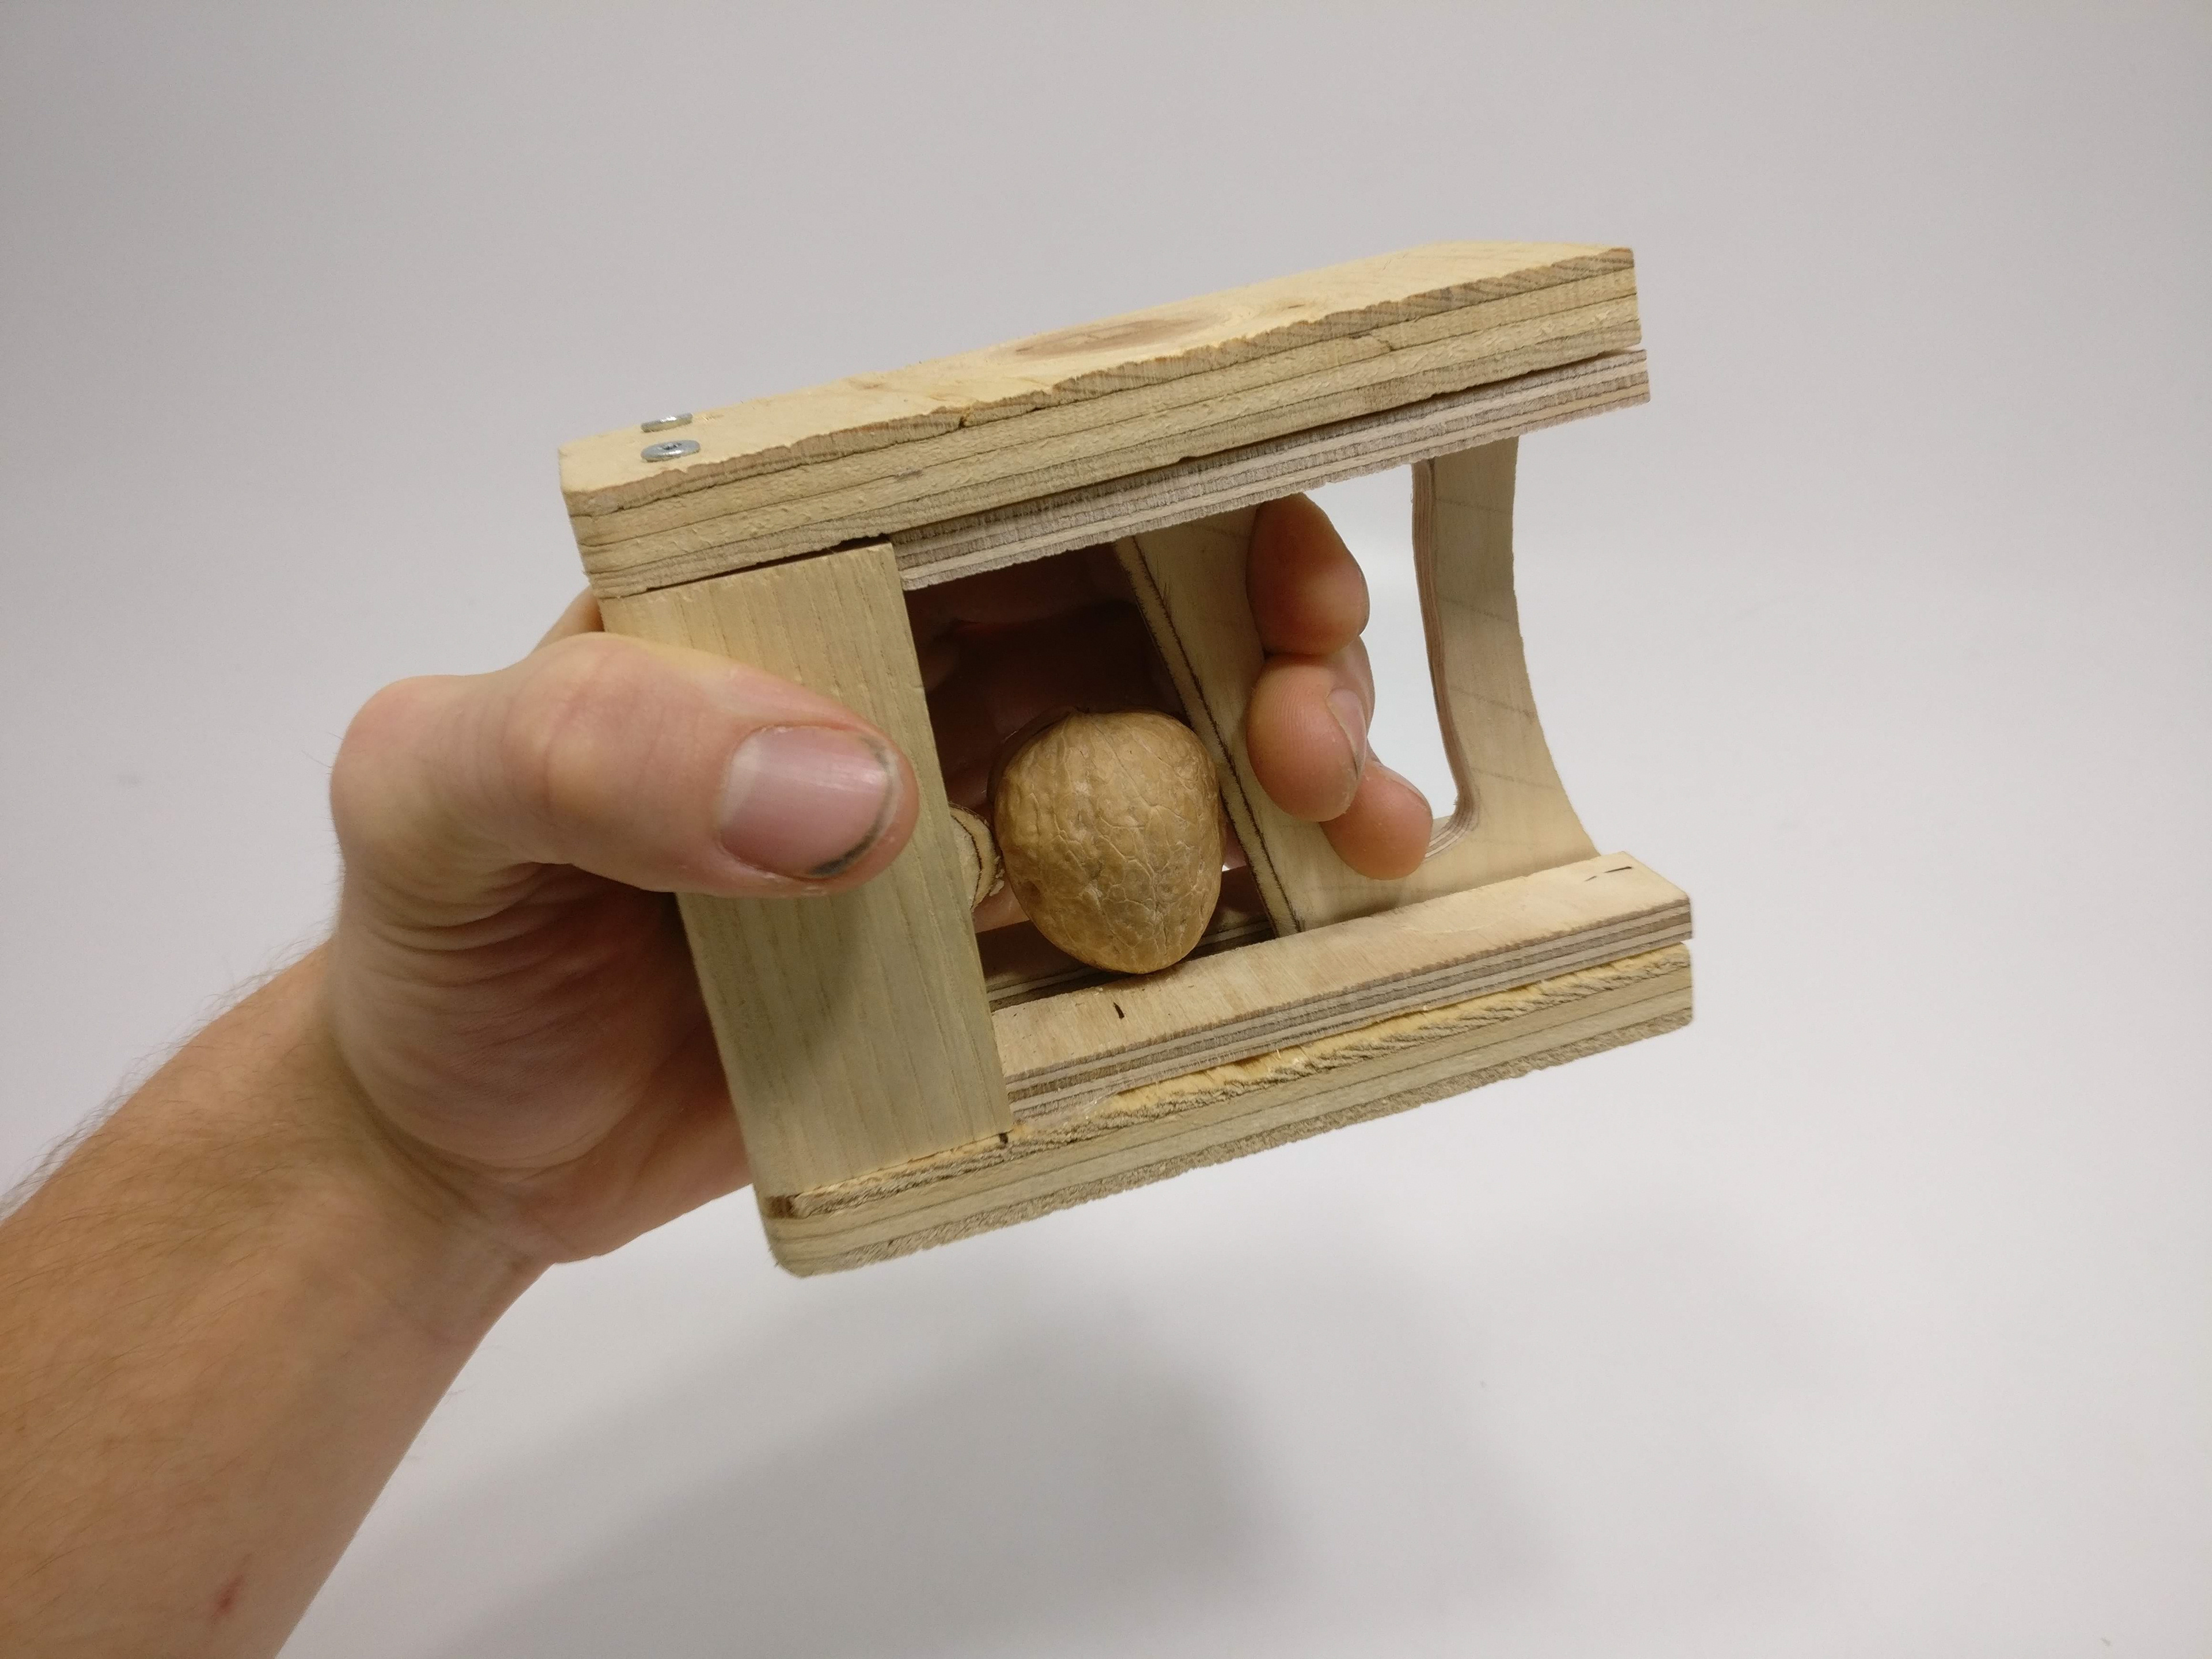
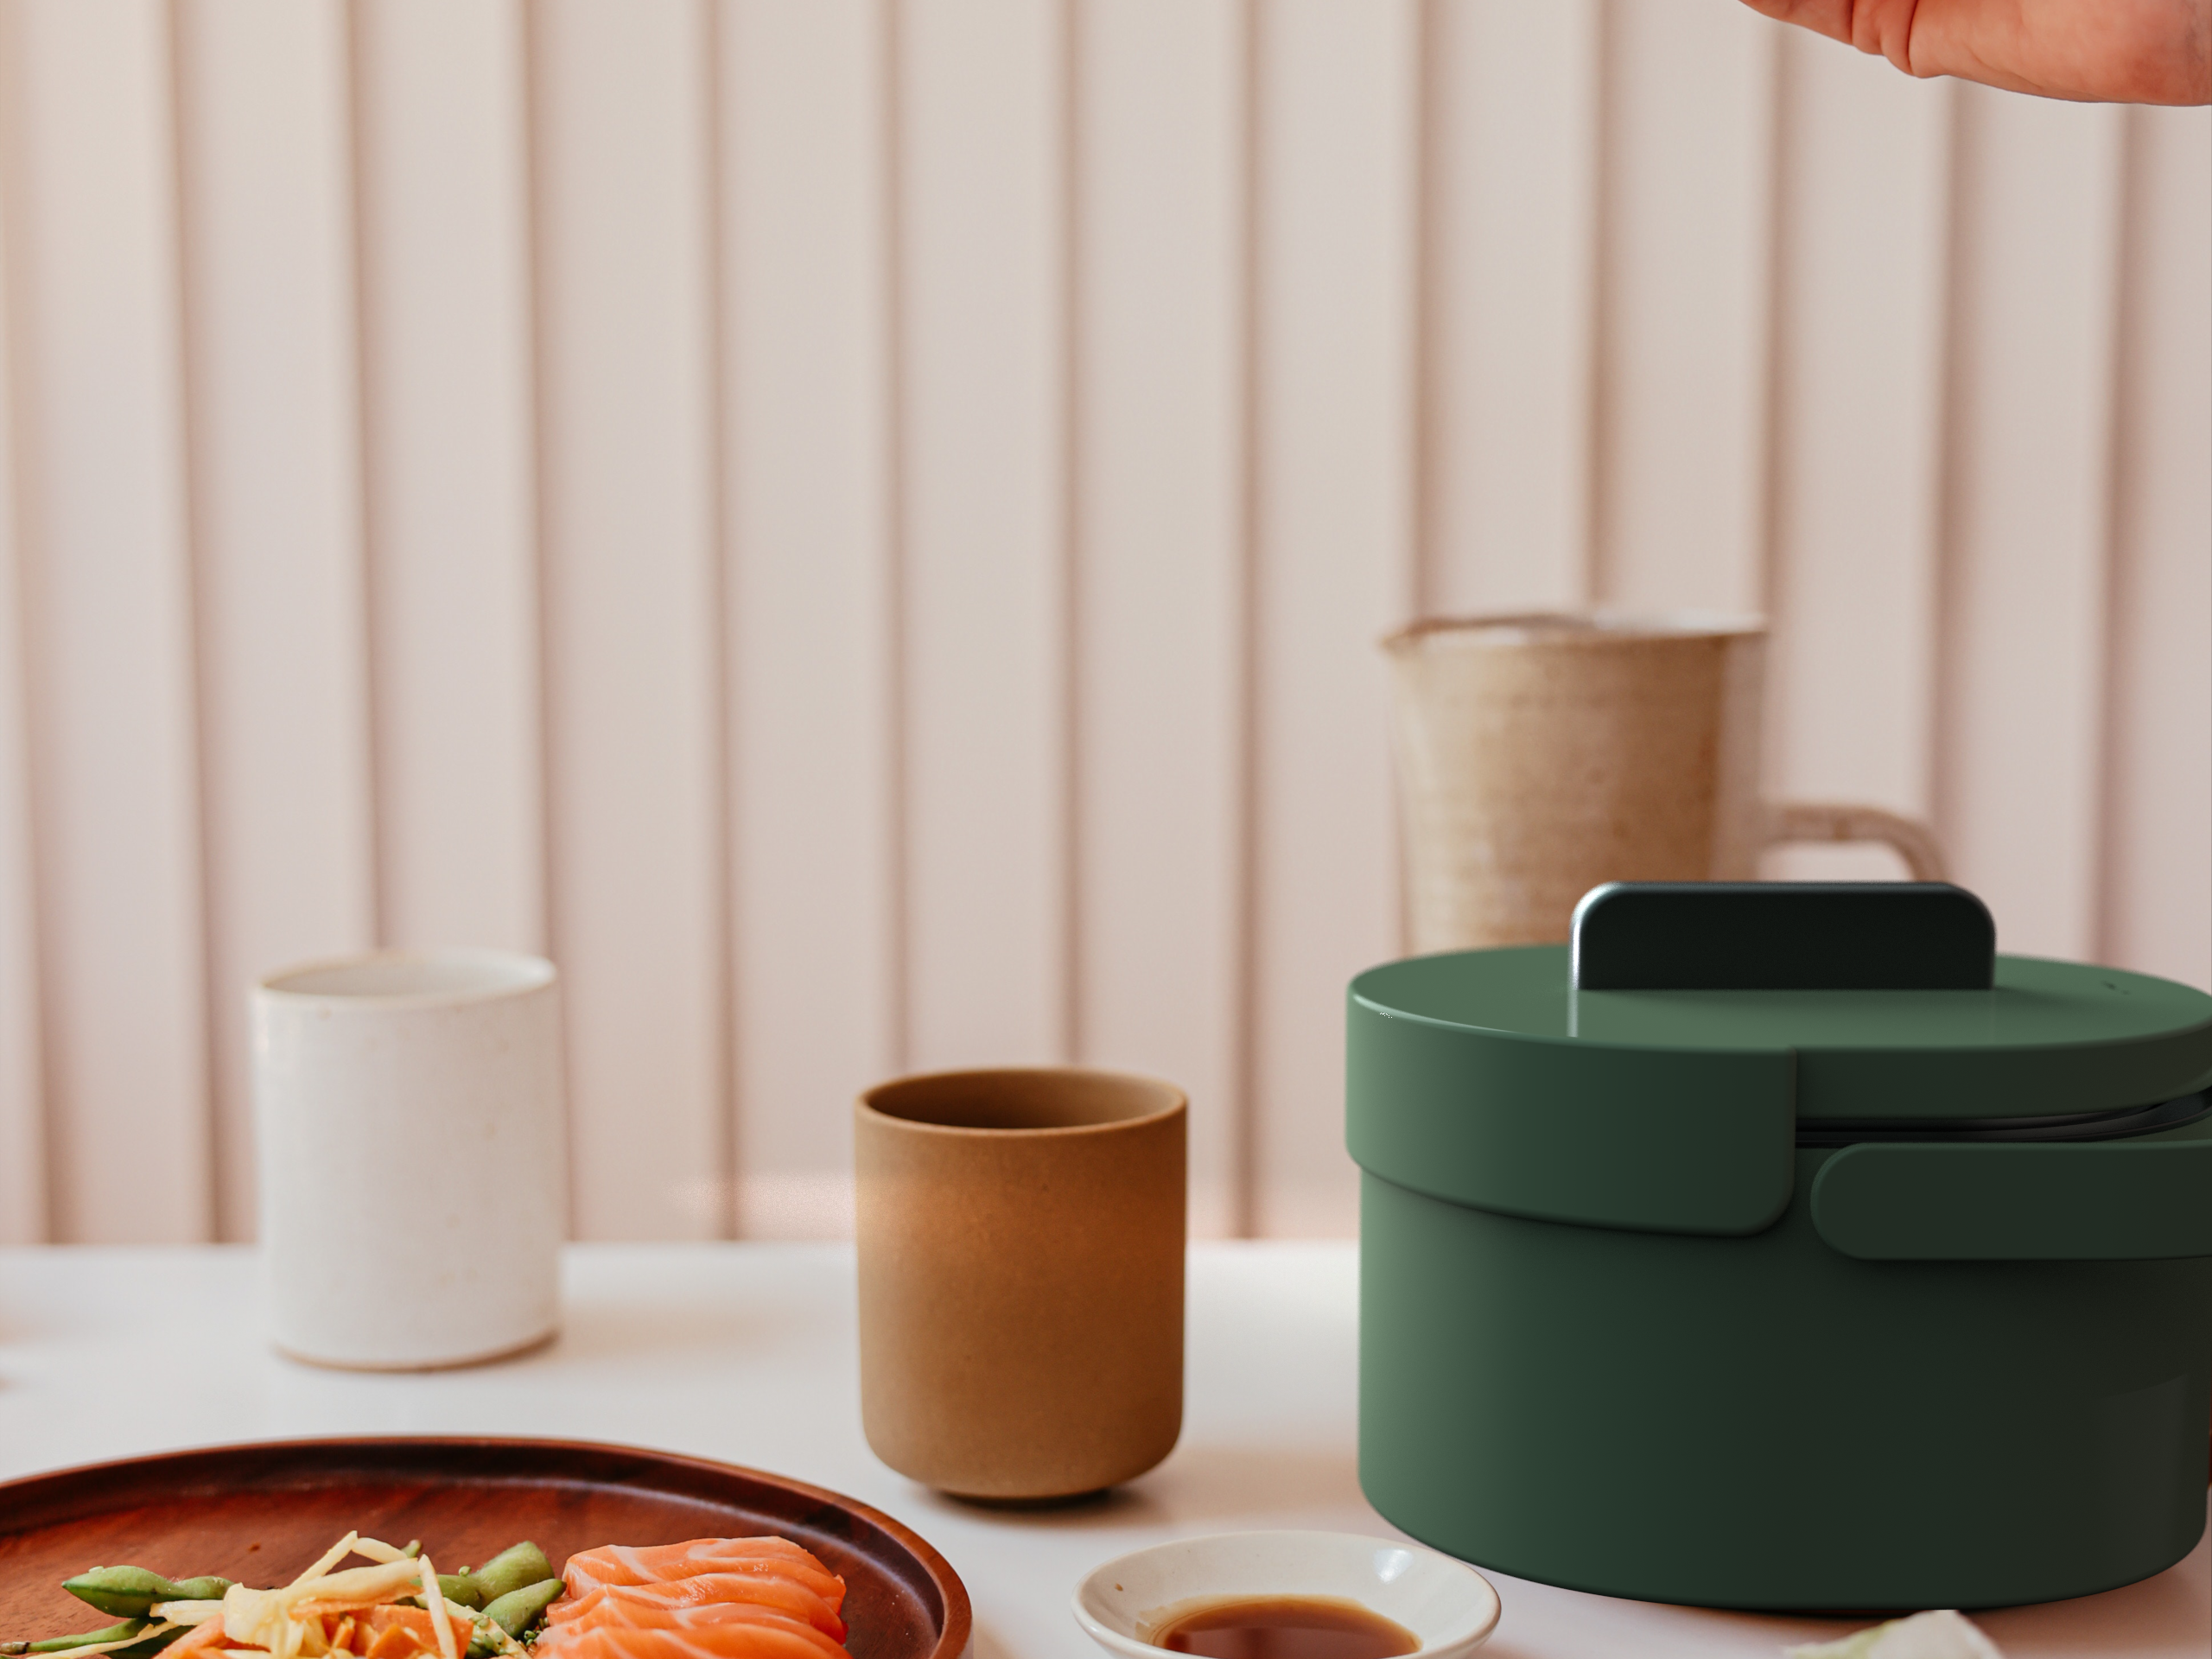
Functioning model in a hand
The different blade types investigated for the final design
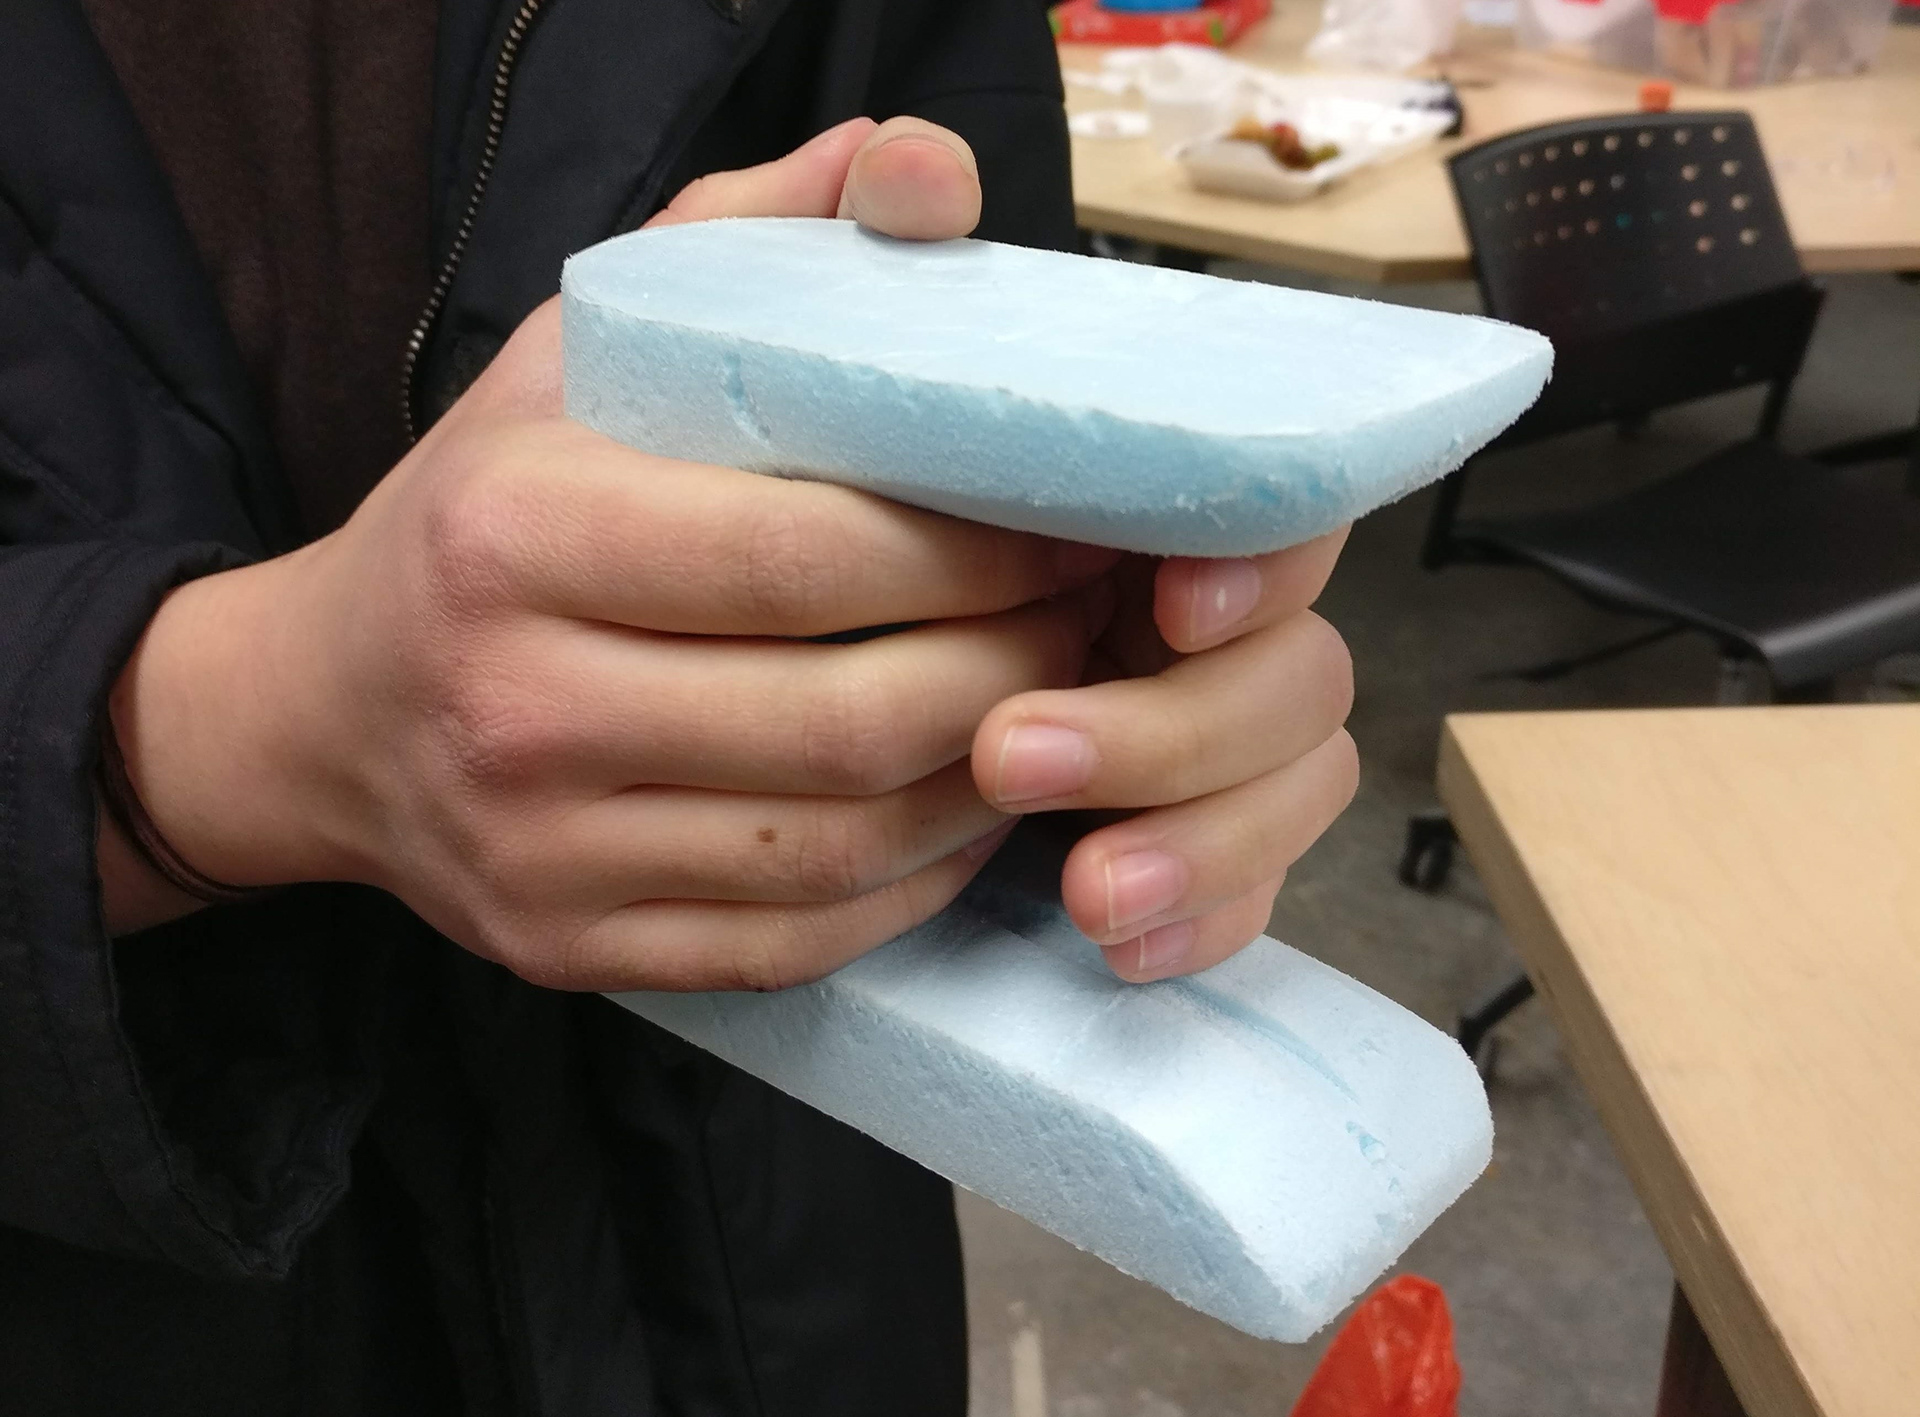
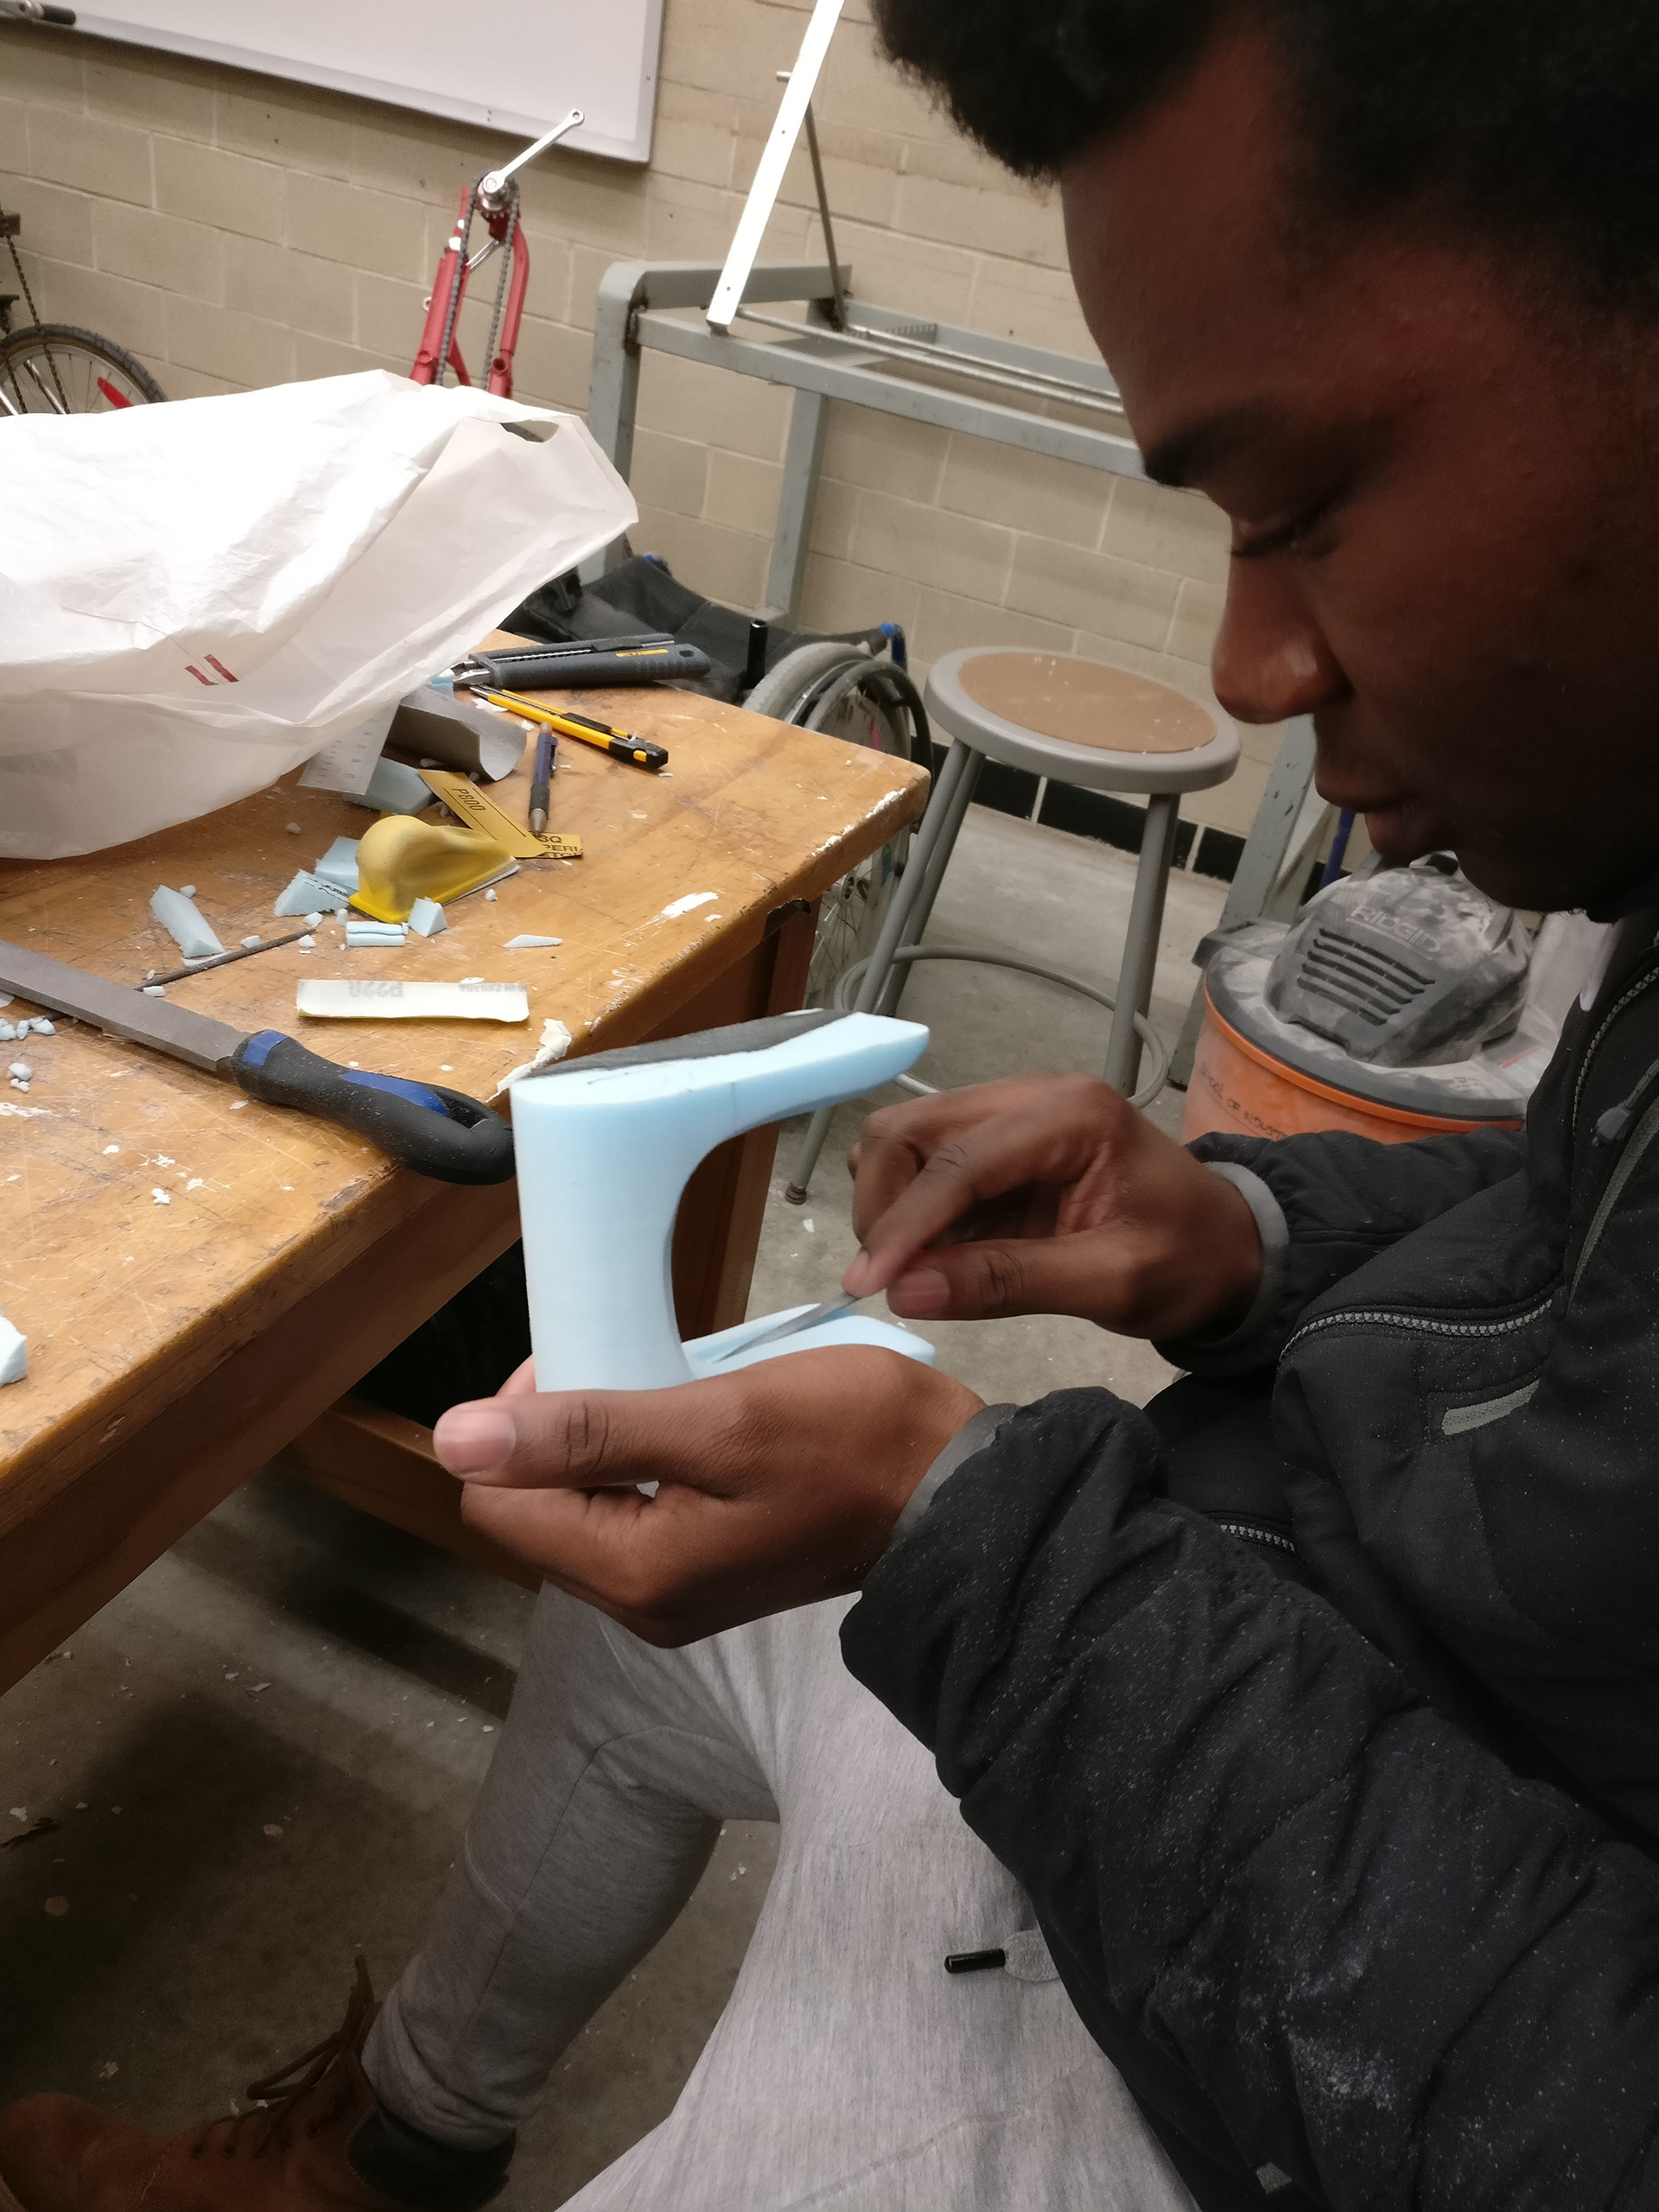
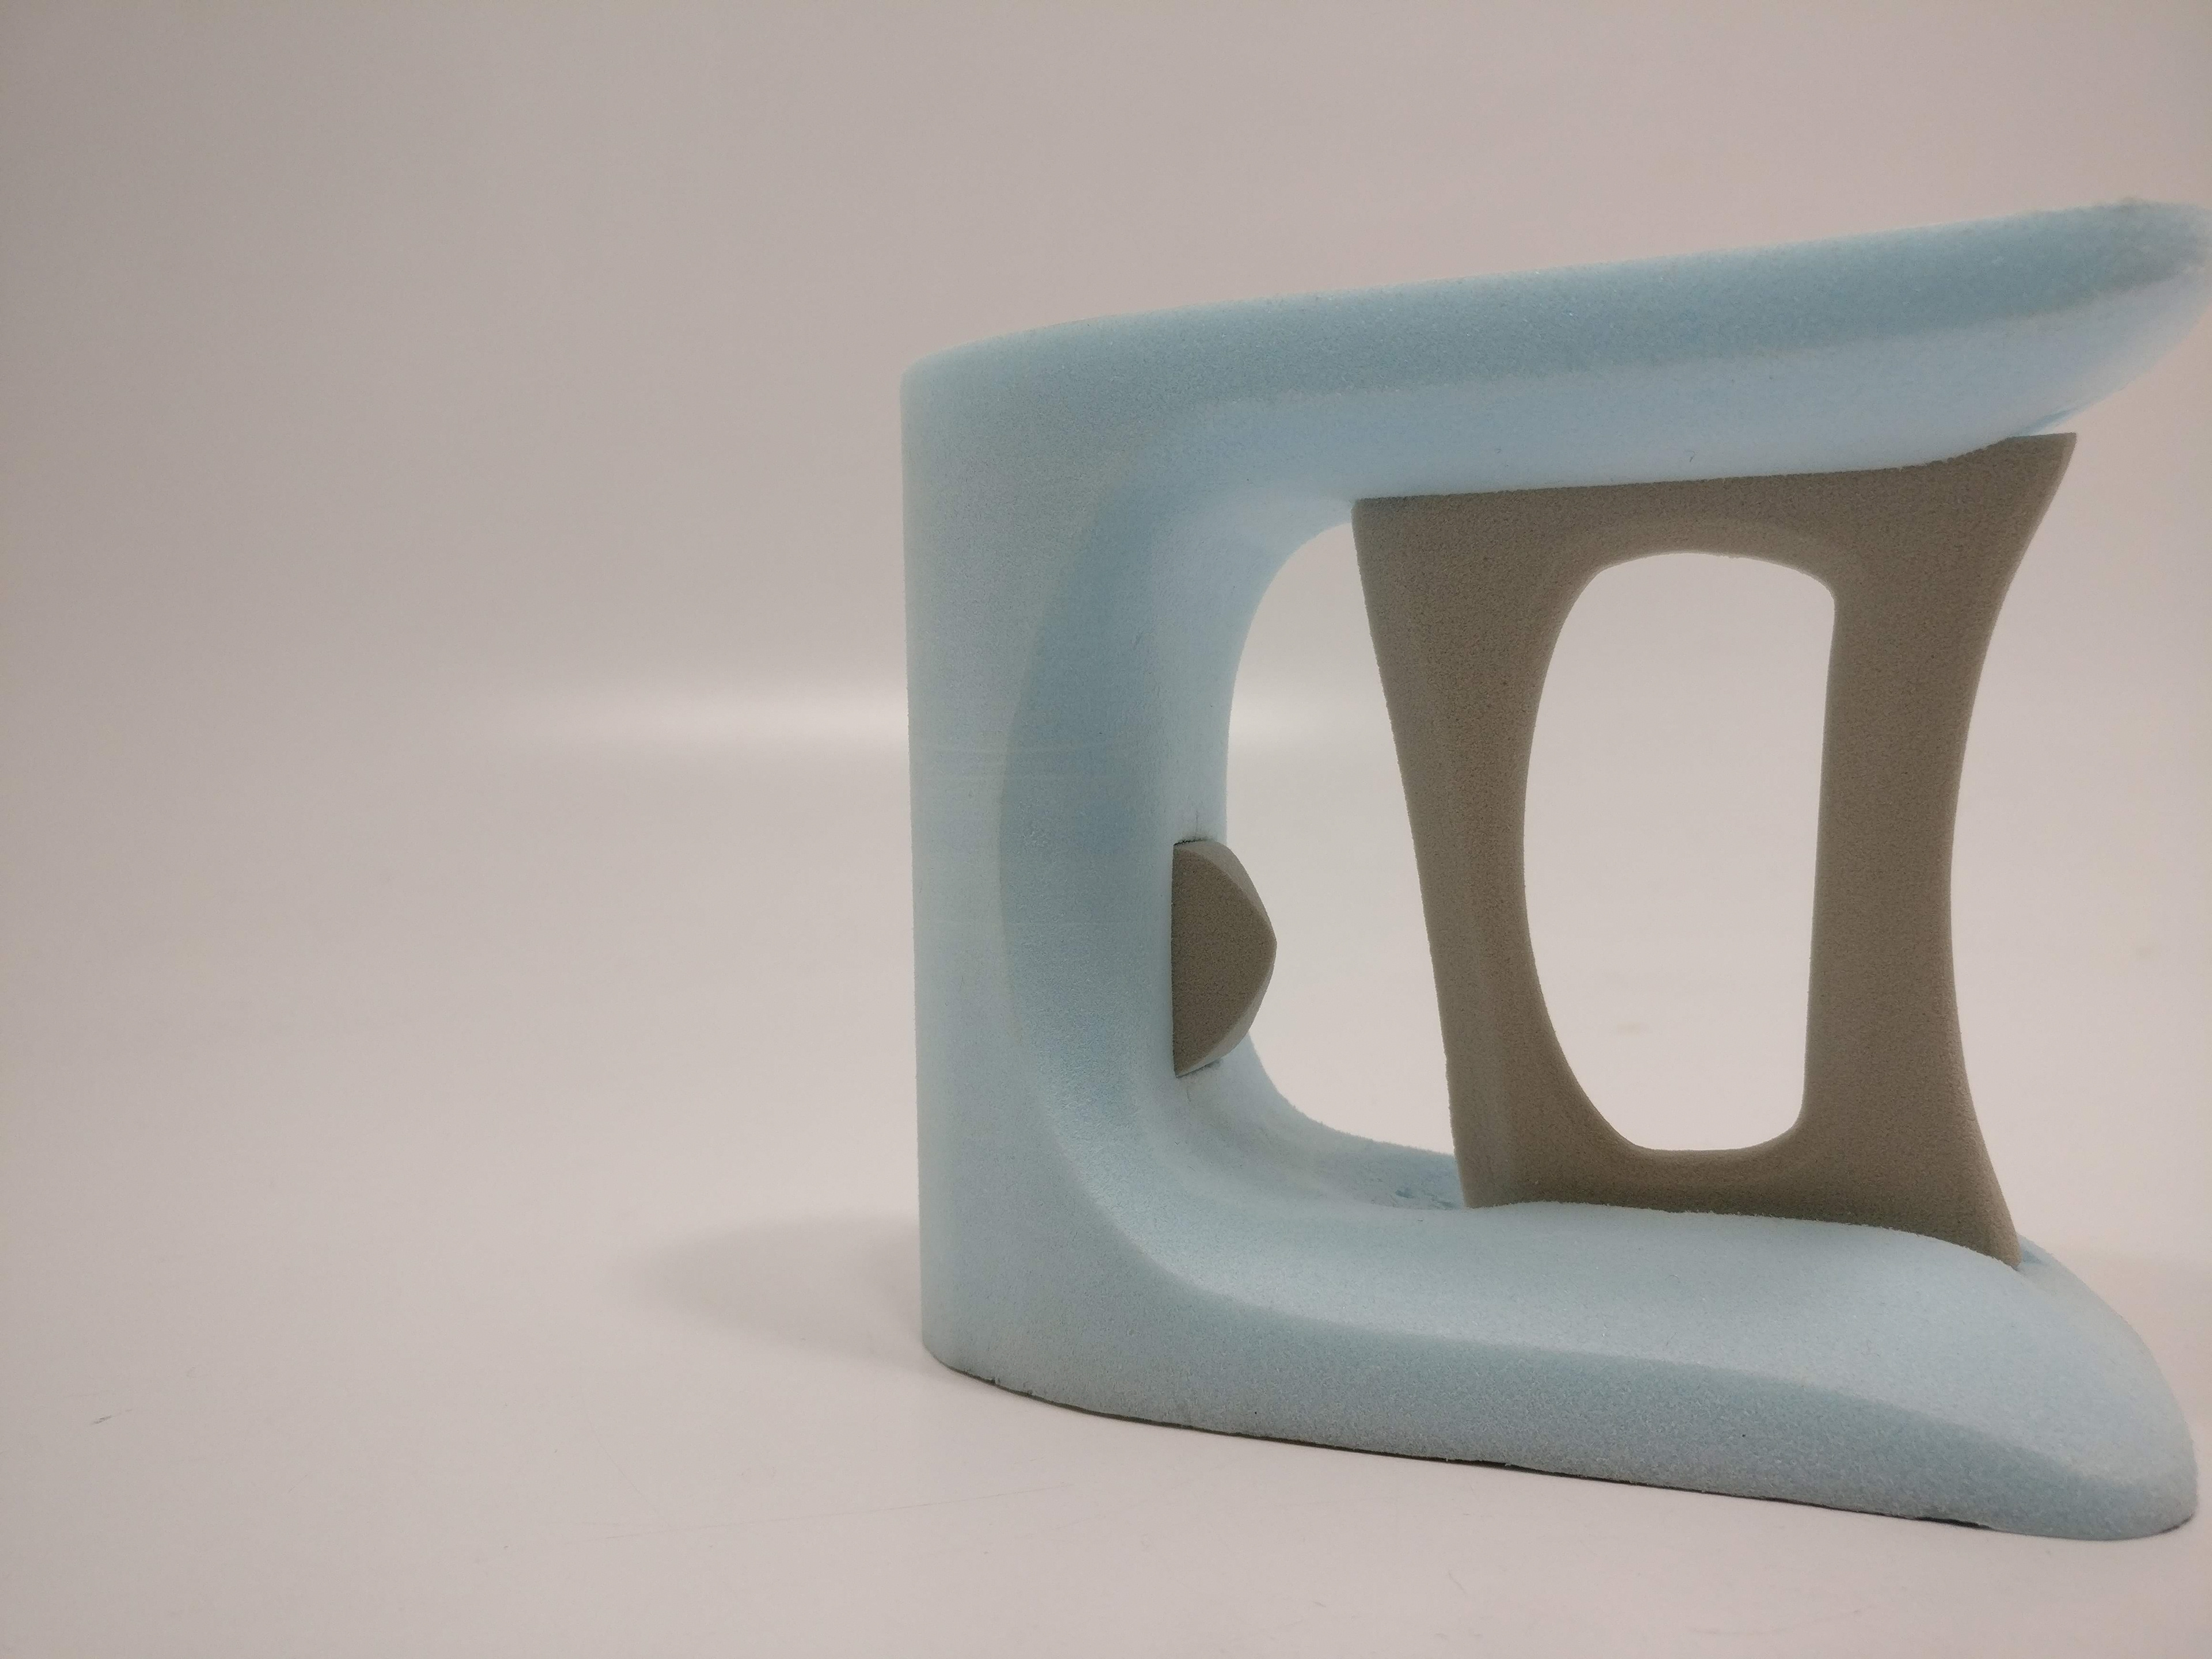
Appearance model process
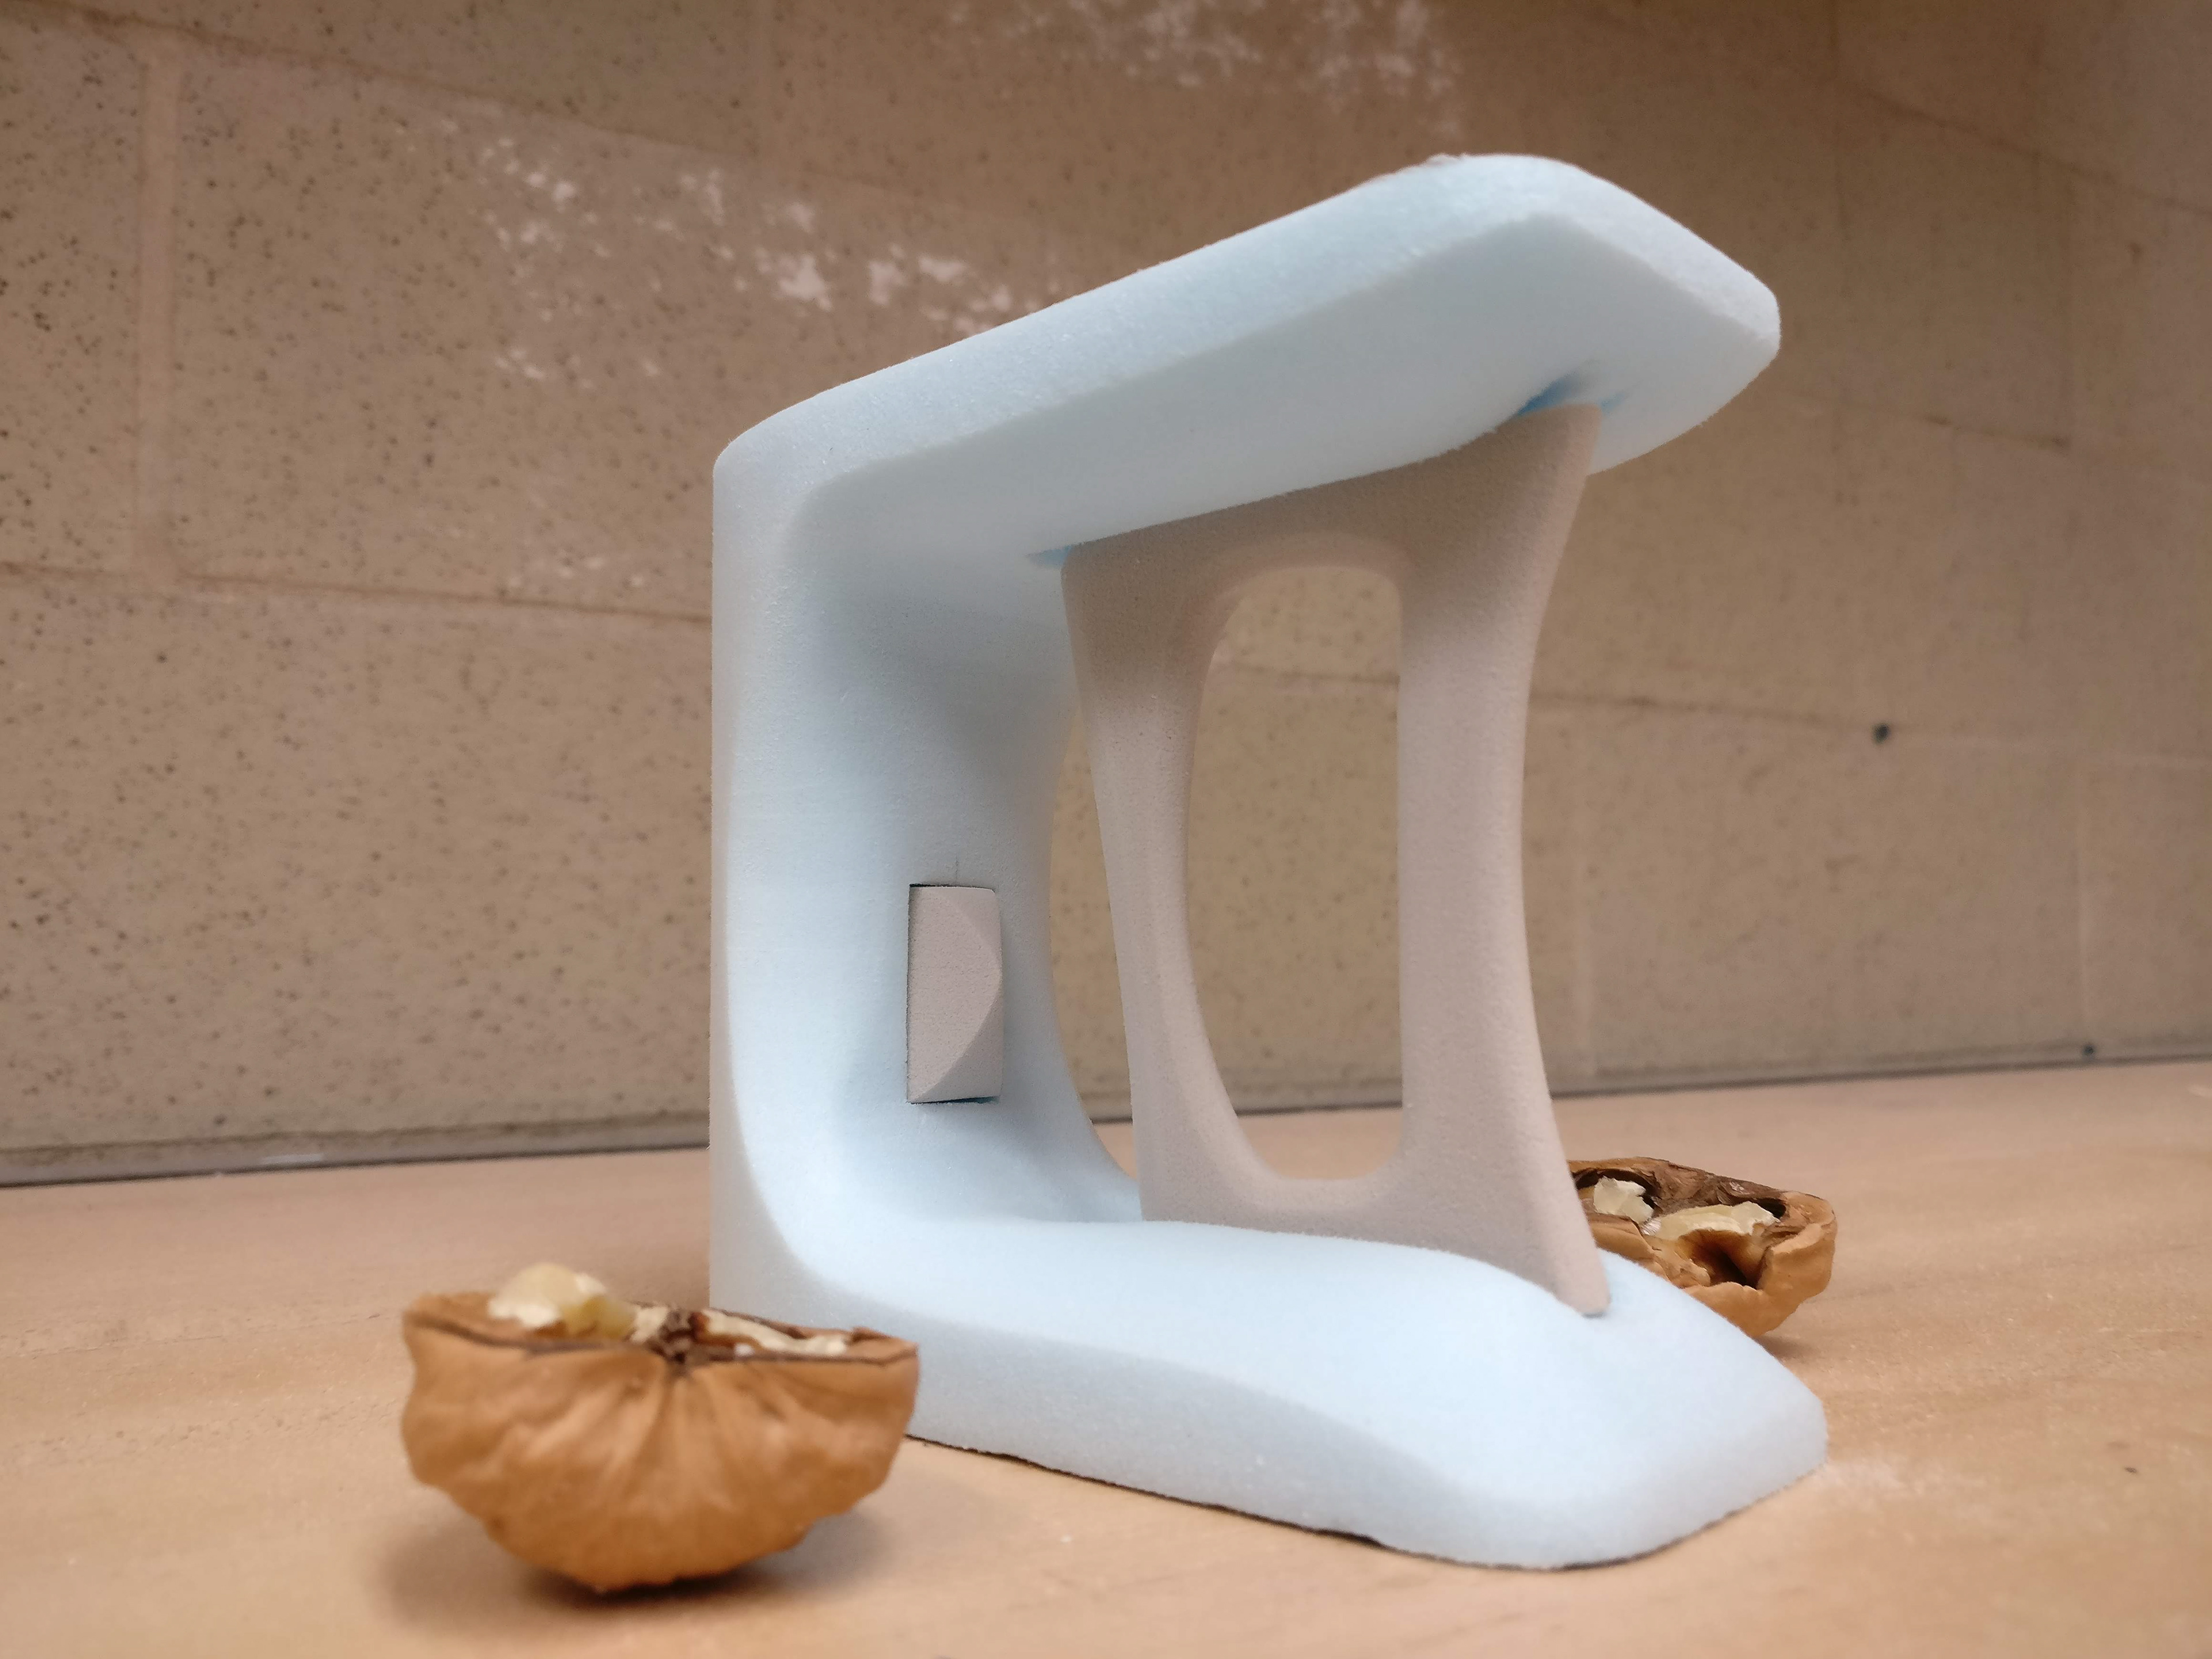
An appearance model was made to figure out the ergonomics of the tool, and further bring the idea to reality.
Ideas of the form were first finalized in sketches, then a rough blue foam model was made to more accurately figure out the most comfortable handle size.
The final model was then made from blue foam and grey polyurethane foam.
A band saw was used to get the general form of the body and the final form was produced through sanding by hand and with files.
A similar process was performed on the grey foam parts.

Summary of the process through sketches
Testing for the form revealed that smaller hand sizes would prefer to operate with both hands.

Summary of the modelling process
Final looks-like Model
The body was carved and sanded into shape out of blue foam which is a low cost material.
The points of contact with the nut were carved out of grey polyurethane foam.
The result is a sleek and elegant design that invites the hand to hold it.

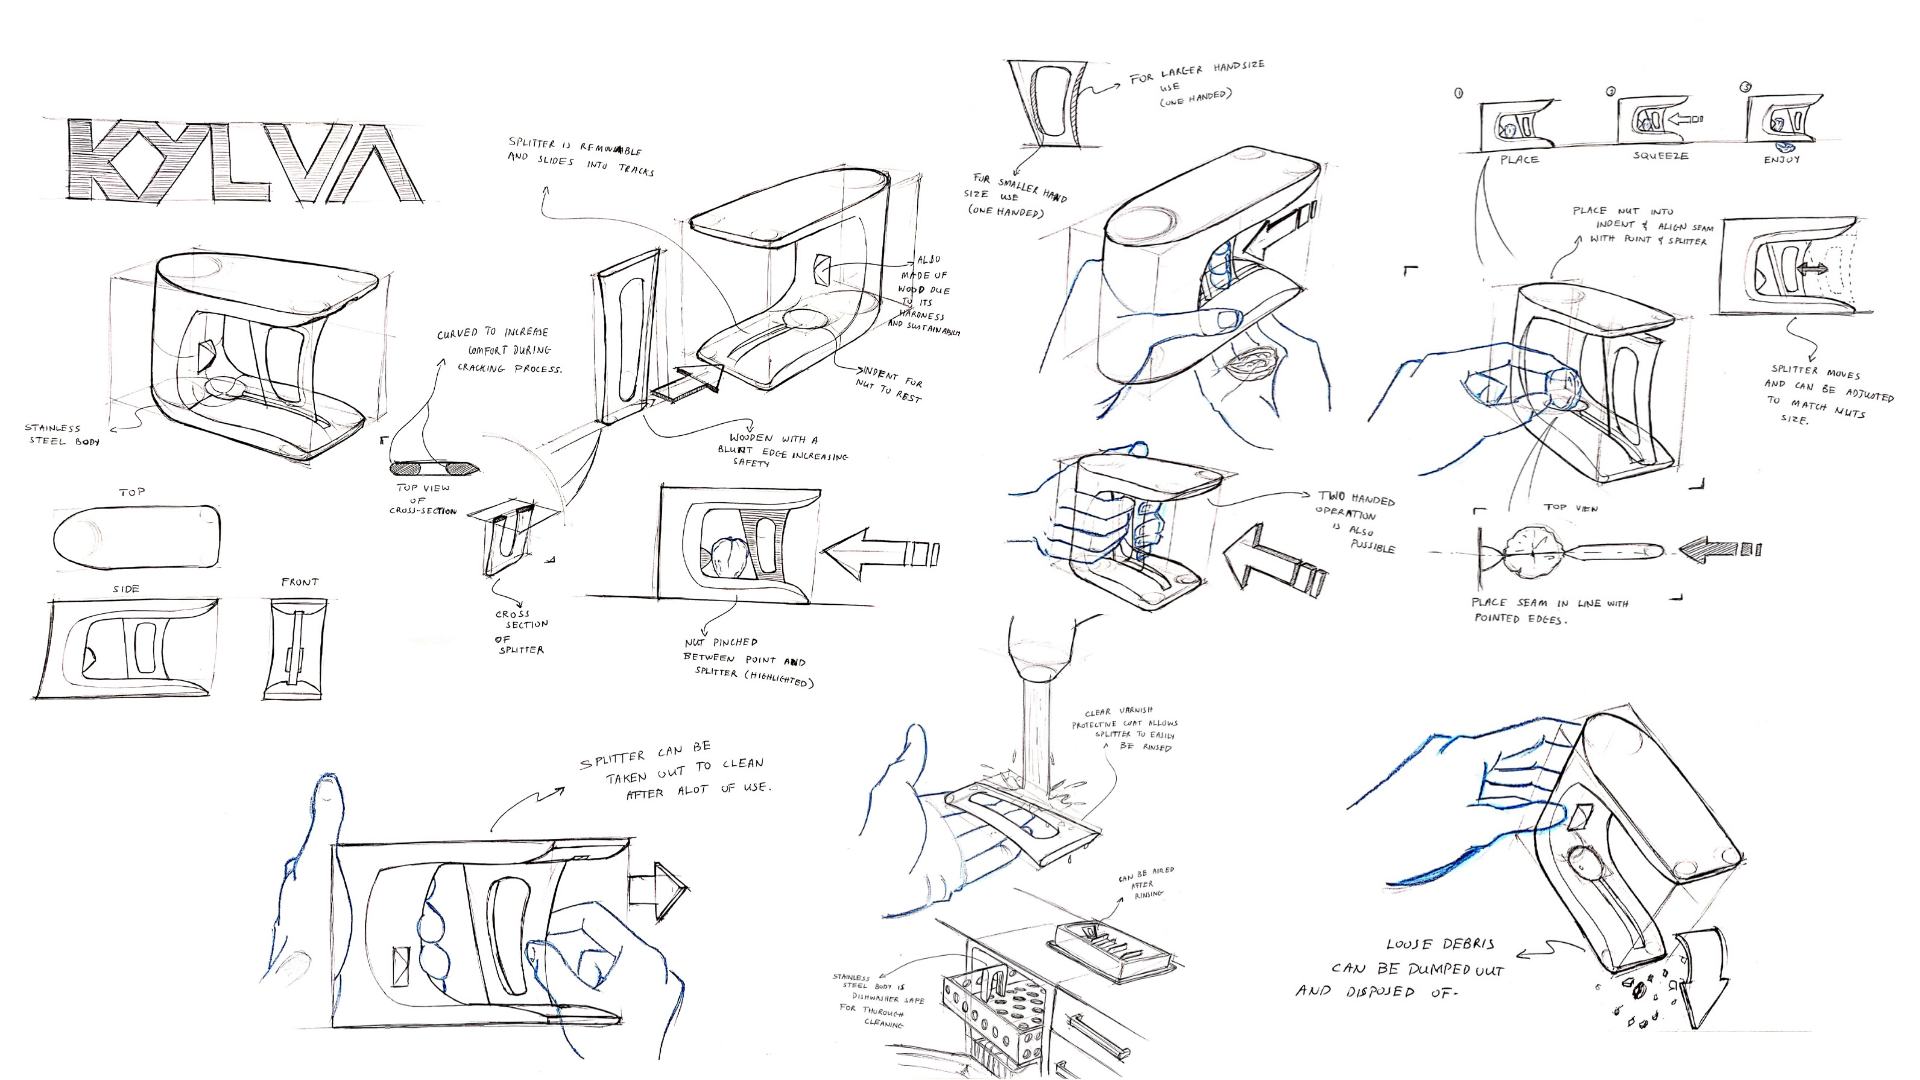
Final drawings
These Explanatory Sketches show the final design, its features and how its used.
3D RENDERS
After the final appearance model was made, the design was modeled in Solidworks and then taken to Keyshot to apply materials to it.
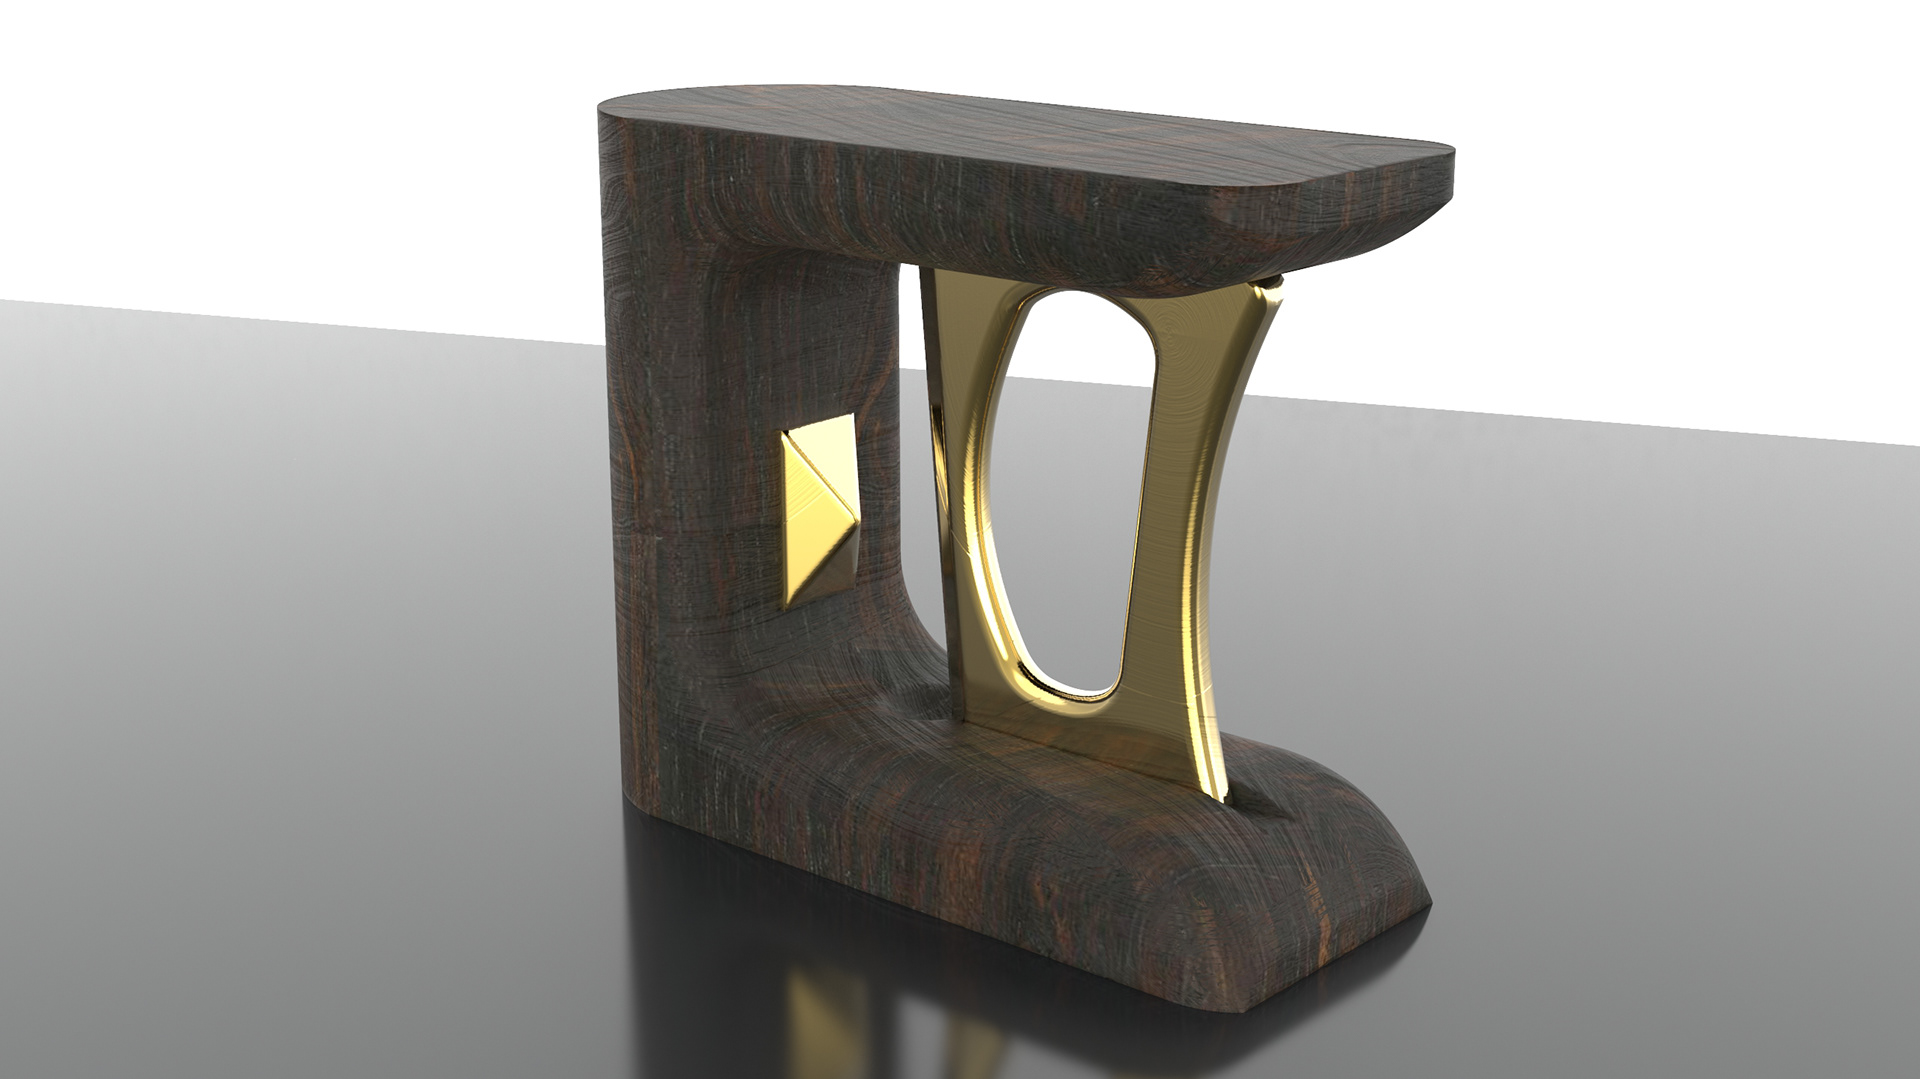
An African Black wood model with gold plated steel accents.
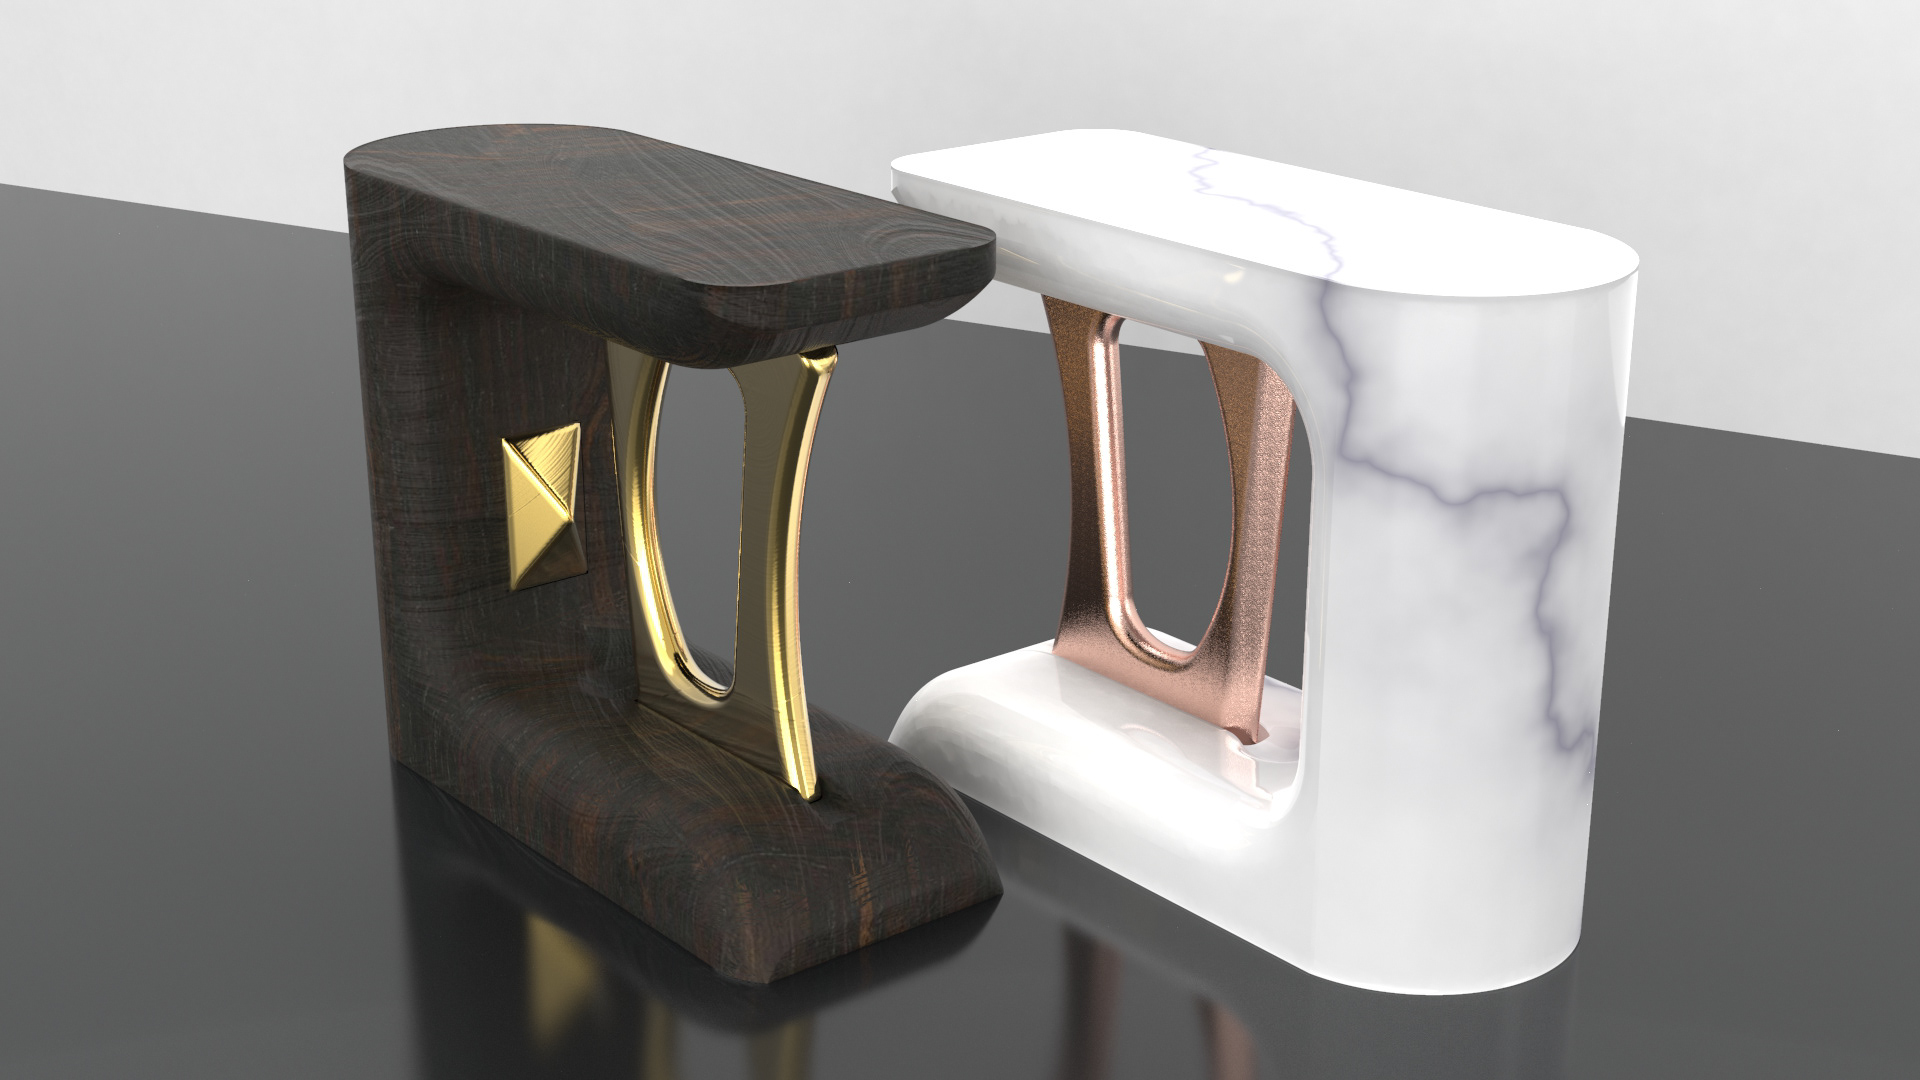
A marble finish version can be seen here with rose gold anodized aluminium accents.
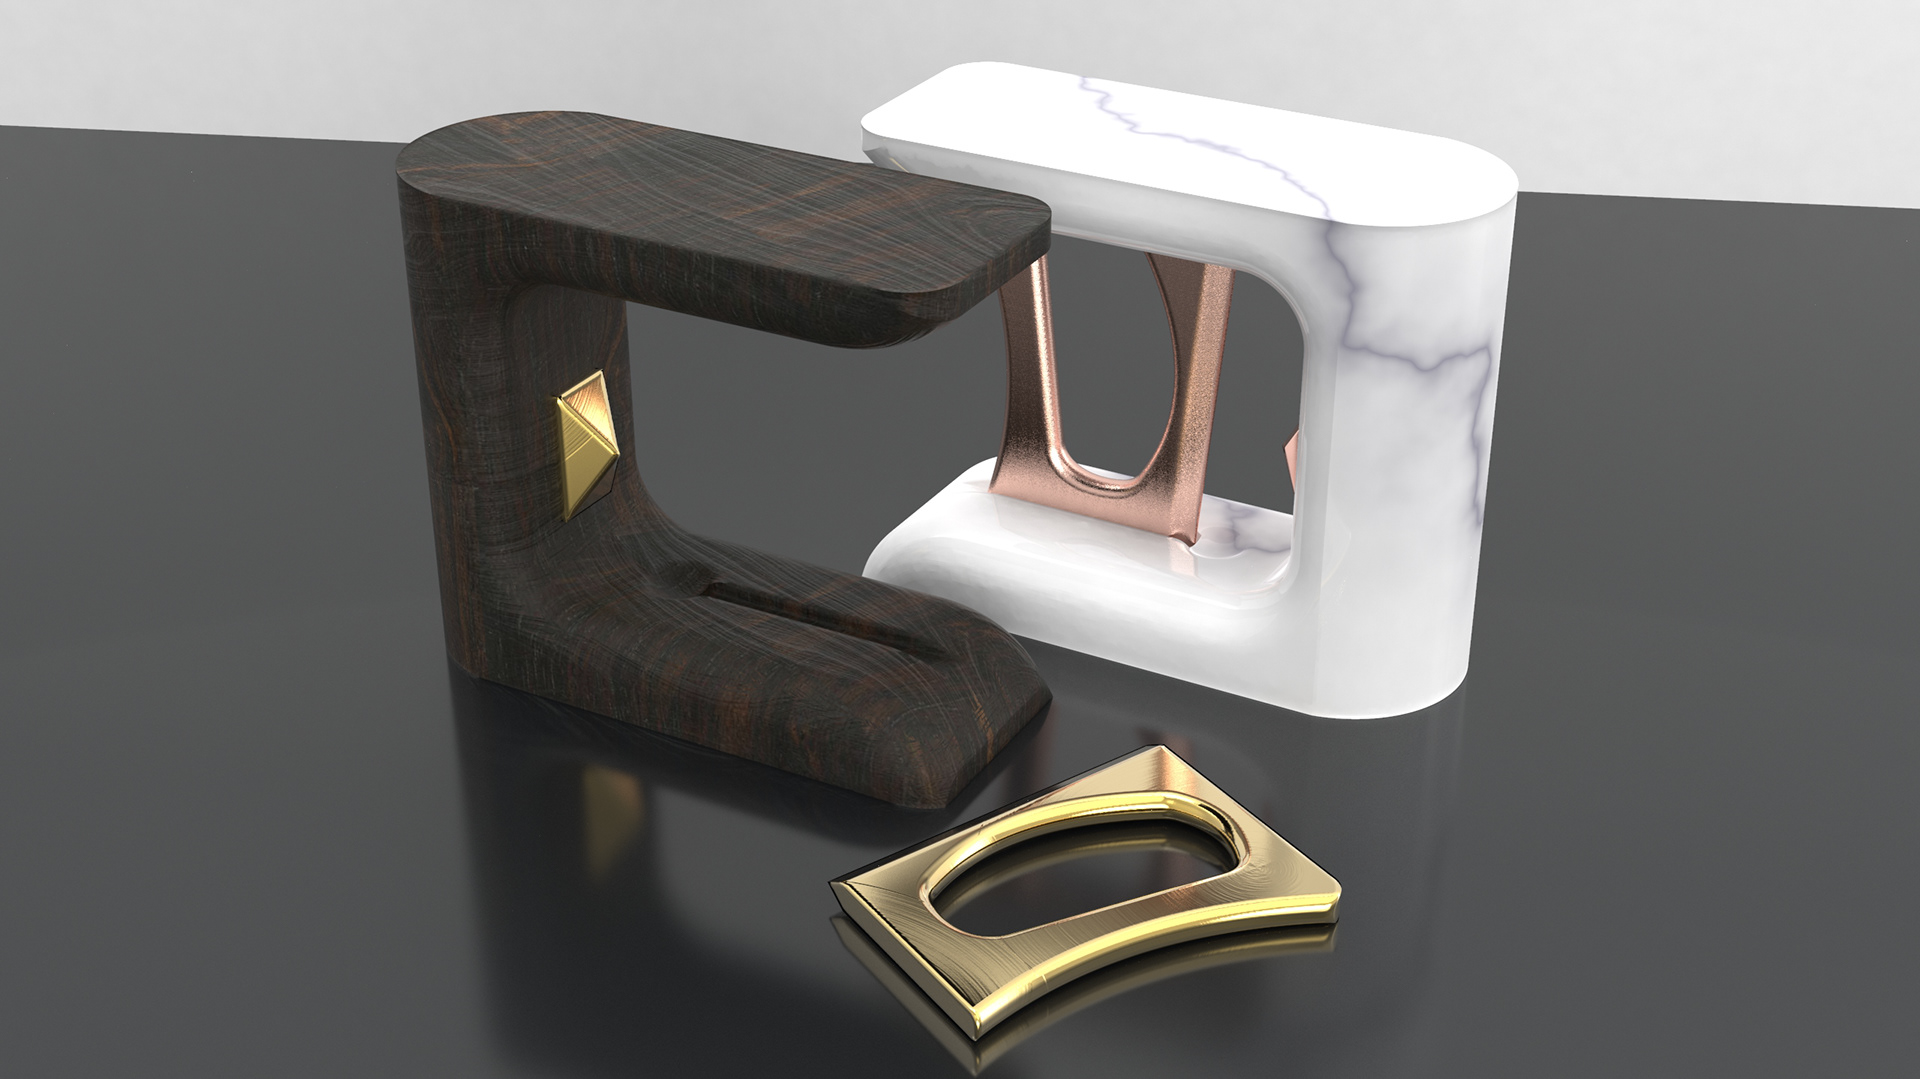
Render showing the removable blade
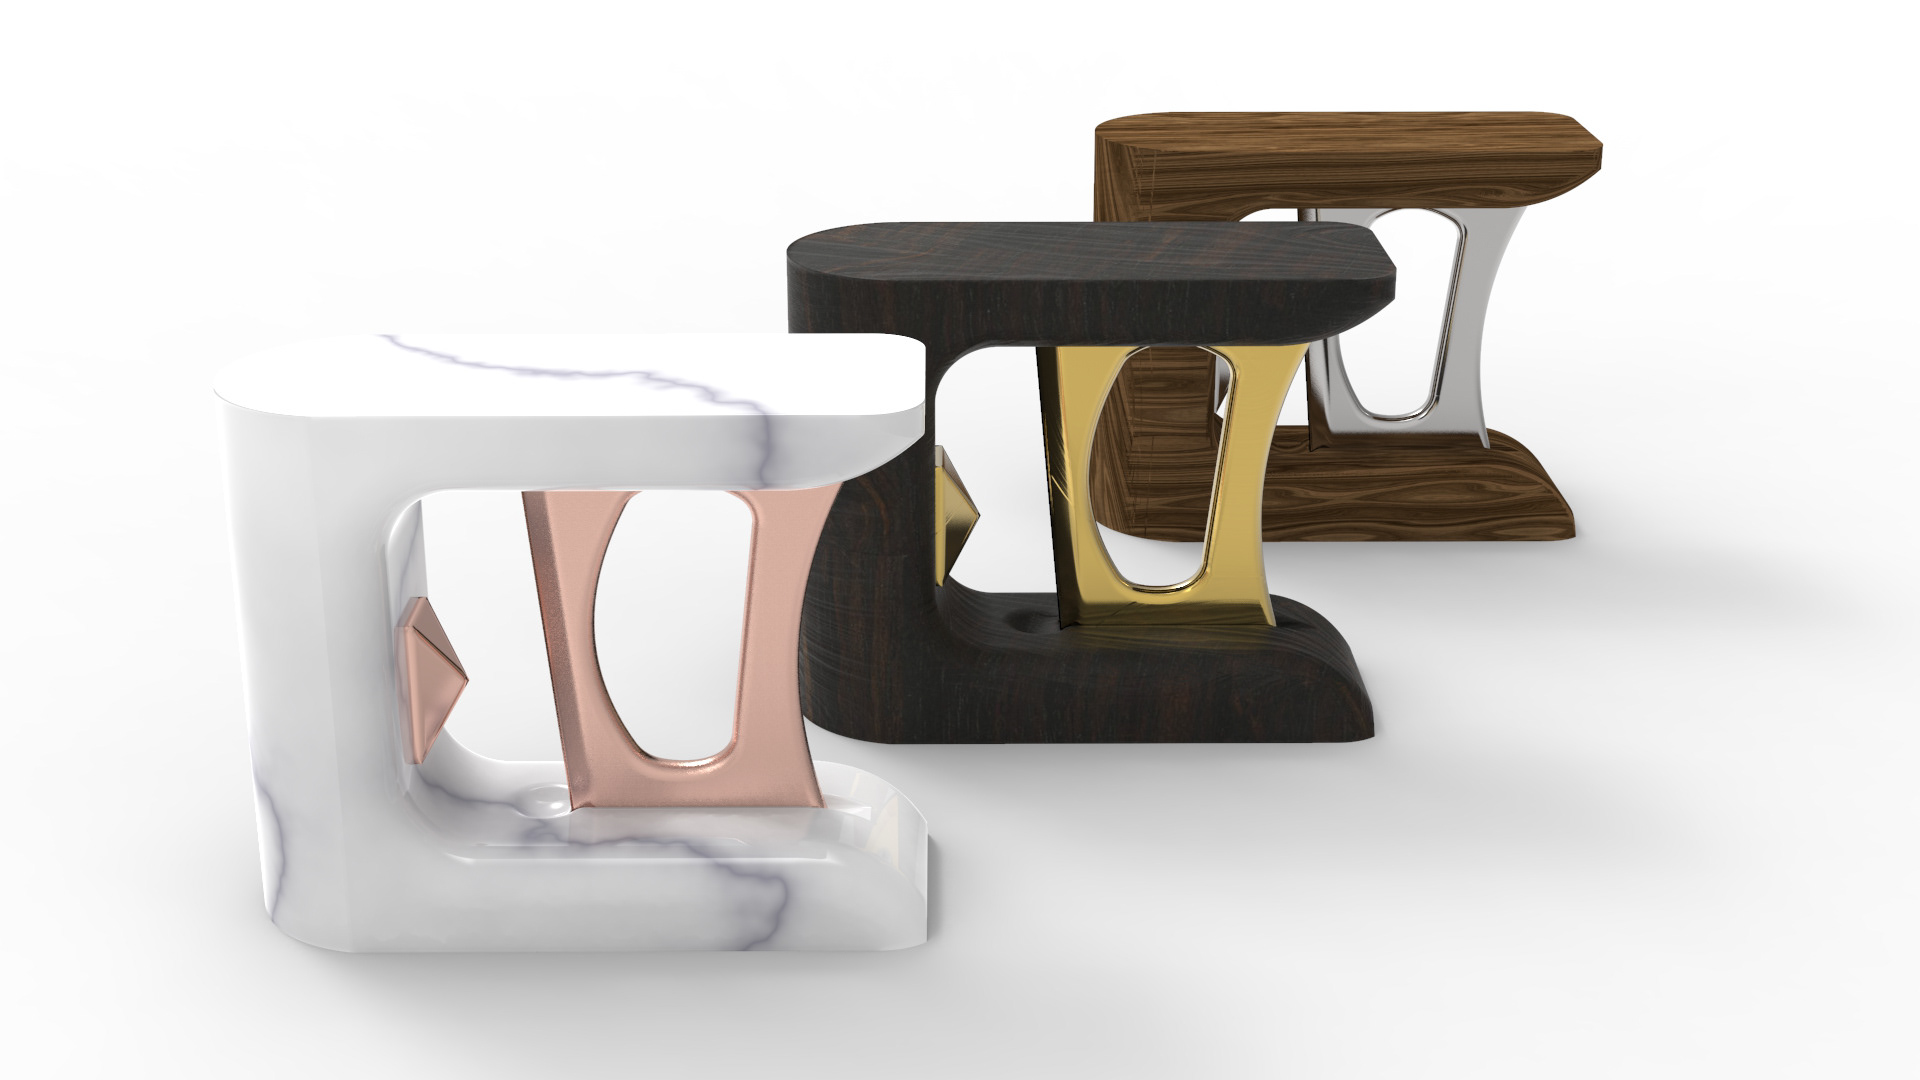
A lineup of possible designs and materials
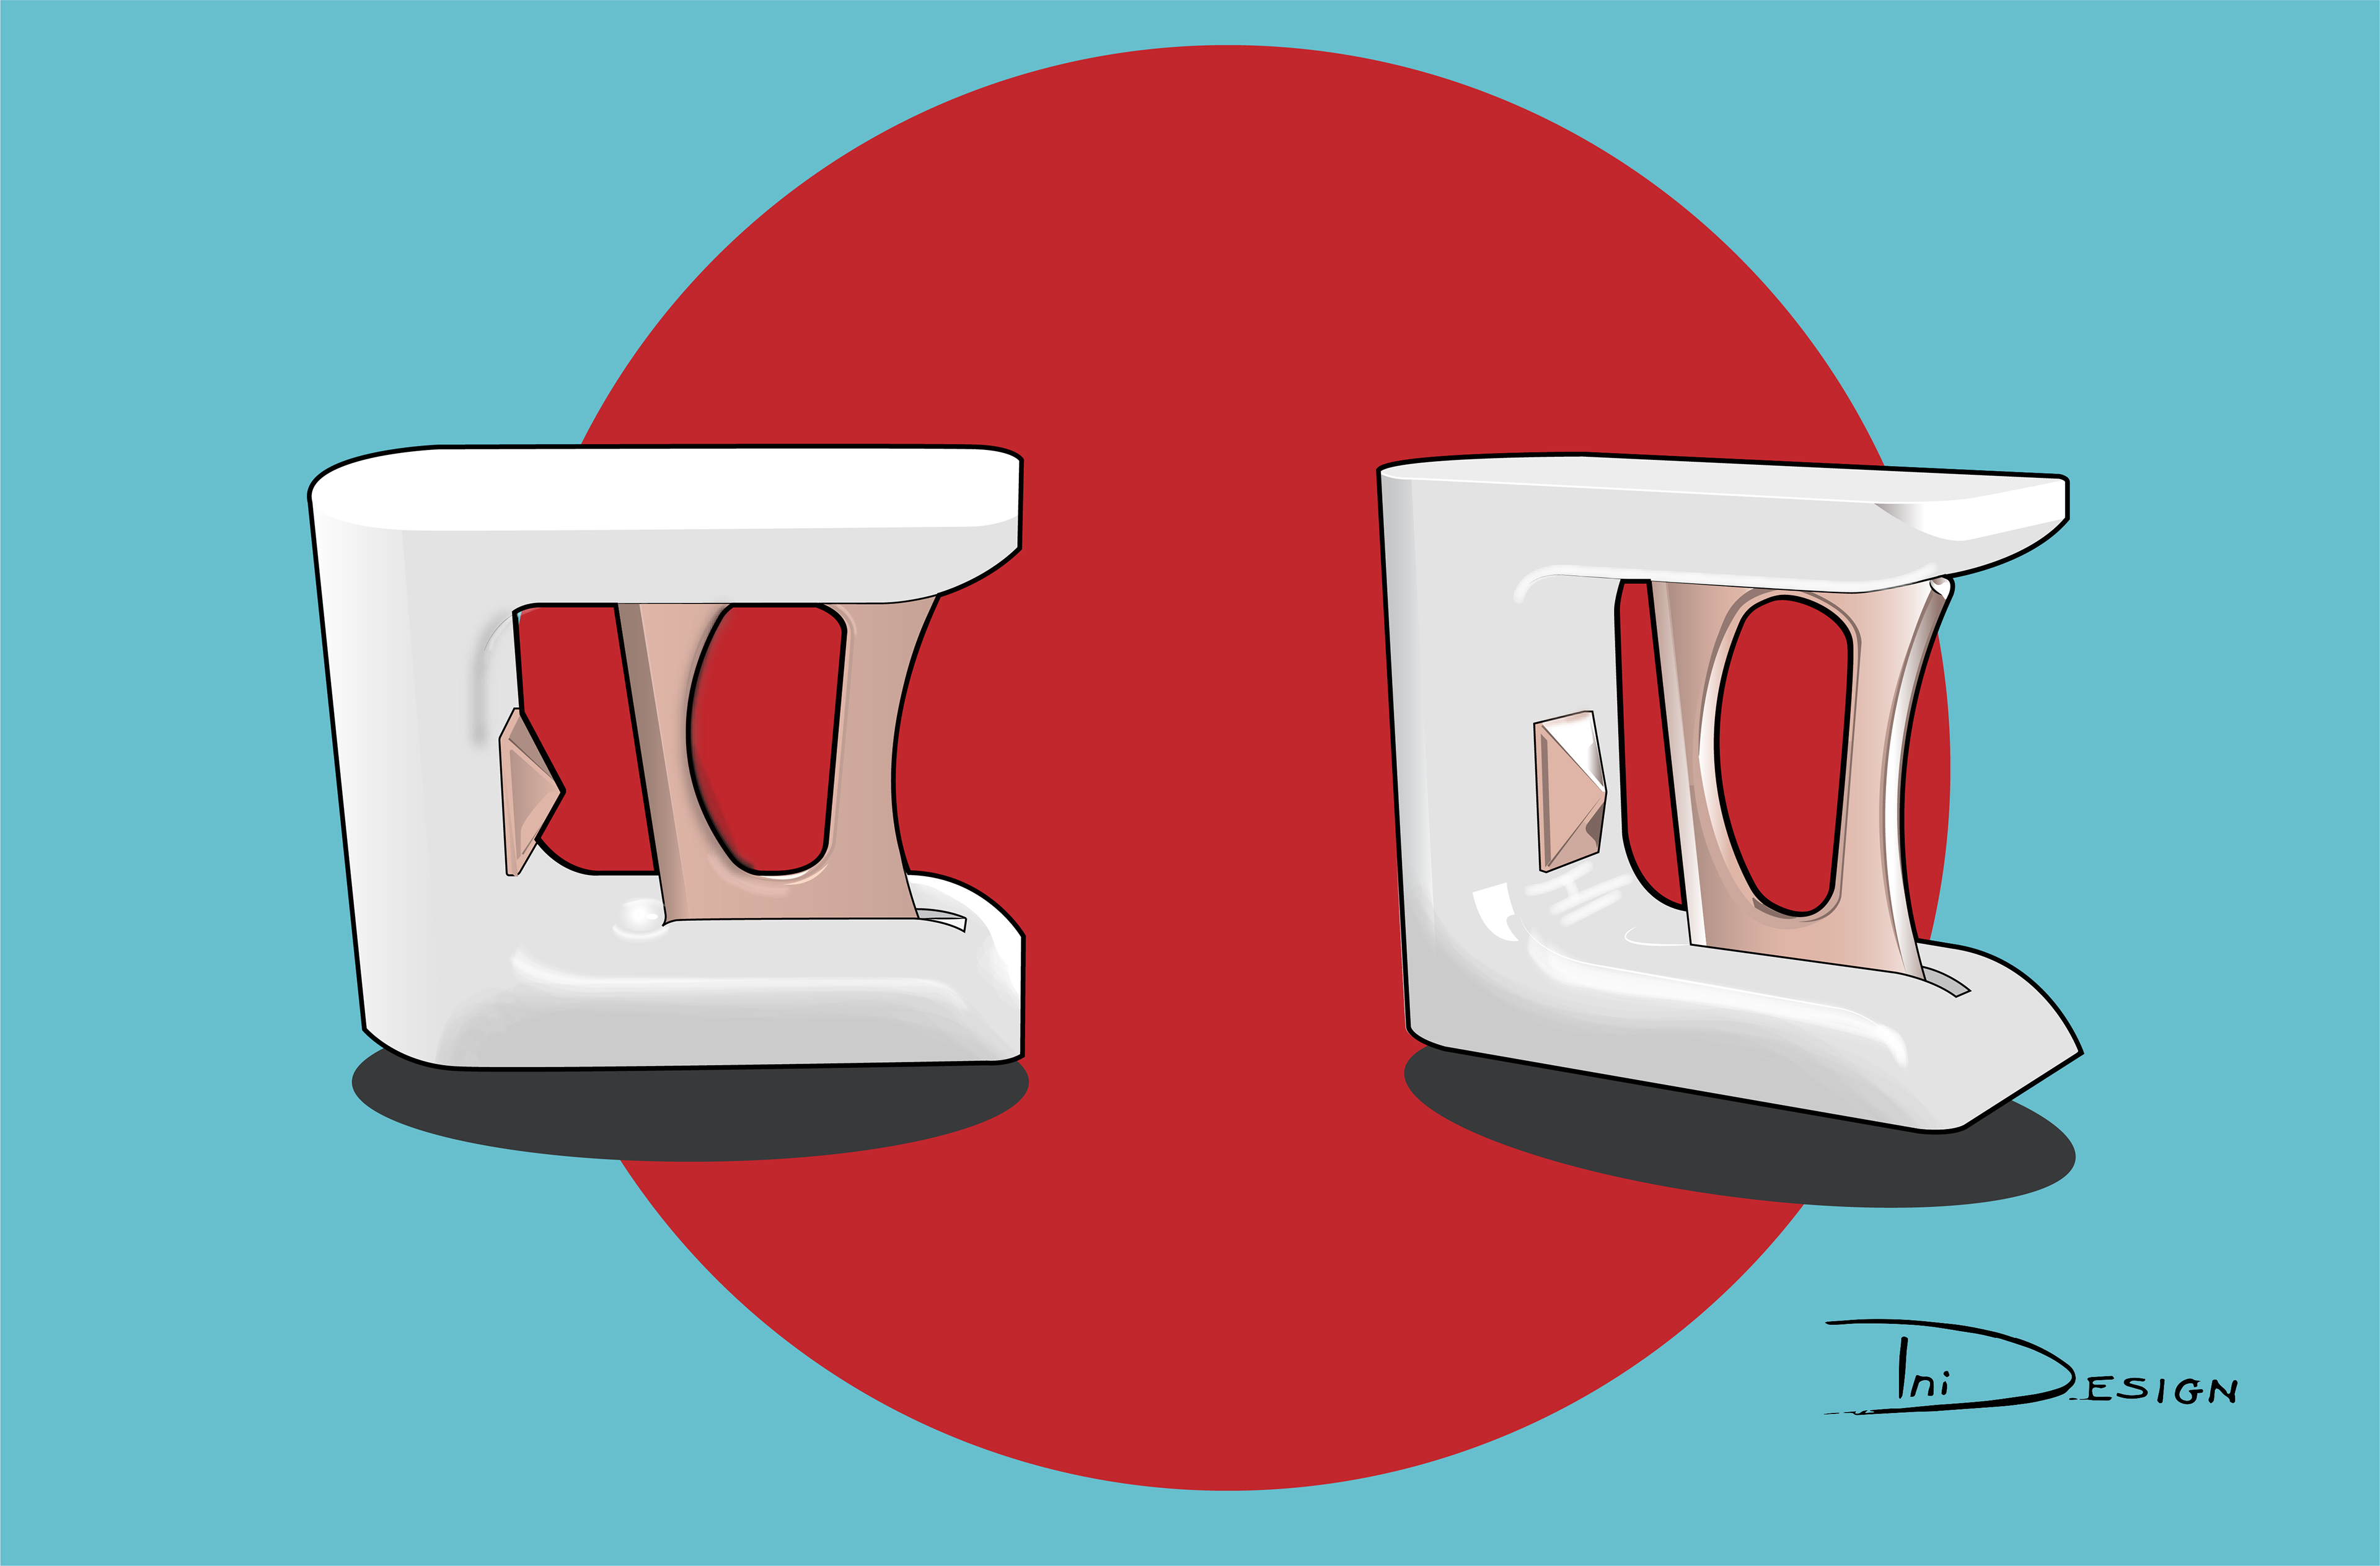
2D Digital render
This render was done with Adobe Illustrator using the live paint tool and some brushes
improvements
-When this design splits a walnut, the clean split can make removing the nut from the shell difficult. Better analysis of the use cycle of nutcrackers, would have allowed for the removal of the nut from the shell to be a useful design feature.
-Considering how the final design is held, it would have been beneficial to design a way for the halves of the nut to be caught, as opposed to holding it carefully over a surface to catch. This could have been discovered through more thorough testing with users.